Years ago when I worked for Starbucks, one of my favorite parts of the night was once the doors were closed and could sit in the quiet back office, sipping a latte and nibbling on a biscotti while I crunched the books. Number crunching was never my favorite thing, but the crunchy, chocolate dipped biscotti somehow made it better. Some time ago, my teenager began asking if I could try making biscotti, and when I found a base recipe in Every Day Food I couldn't resist.
Biscotti are dairy free, which makes them a perfect cookie for anyone who is allergic or sensitive. They also lend themselves to whatever flavor combination comes to you. I happened to have a bag of pistachios and some delectable Camino raspberry chocolate. Camino has a whole range of chocolate I encourage you to try. Not only are they a Canadian company, but fair trade and organic, too!
Ingredients:
2 1/2 cups flour
1 cup sugar
2 tsp baking powder
1/4 tsp salt
3 large eggs, lightly beaten
1 tbsp vanilla extract
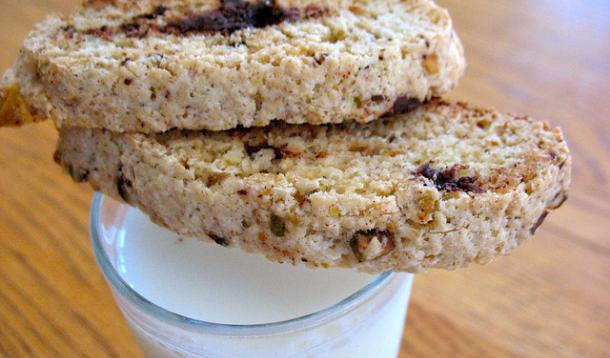
1 cup pistachios, chopped
1 bar of Camino raspberry dark chocolate, chopped finely
 Preheat your oven to 350 and line baking sheets with parchment paper. In the bowl of a mixer, combine the flour, sugar, baking powder, and salt. Get the motor going on low and add in the eggs and vanilla, and mix until combined. At first, this will appear crumbly and dry, but let the mixer keep going and eventually, a thicker, stickier dough will form. Add the nuts and chocolate, and turn the mixer on again briefly to get them all incorporated into the dough. Have faith! It will happen!
Turn the dough out onto your counter and divide it into two equal pieces. It will be pretty sticky at this point, and to keep it from adhering to your hands, you’ll want to get them a bit wet. Form each ball of dough into a 2 ½ inch wide and ¾ inch long log, as pictured. Make sure to do this on the baking sheet-if you attempt to do it on the counter, like I first did, they will stick to the counter and be hard to get onto the sheet without ruining.

Bake for about 20 minutes, rotating the sheet half way through, until they are set but you can press the top and it still has some give. Remove from the oven and let cool for about 20 minutes.
Slice each log on the diagonal into ¼ - ½ inch slices, depending on how thick you prefer your biscotti. Place them on the lined baking sheet, cut side down and put back in the oven for about 15 minutes, rotating the pan and turning over the cookies half way through. Remove to a wire rack and let cool completely.

Biscotti will keep in an airtight container for about 2-3 days, or you can freeze them up to 3 months.
Makes about 2-3 dozen, depending on how thick you slice them.


