
This recipe dates back to the 1950s or 60s, and it’s one which my Mom makes quite often to this day. It’s a great meal to make with kids who will have fun shaping the meatballs and will probably love the look of the puffed-up rice sticking out of the cooked meatballs (hence the porcupine name). I’ve replaced the original recipe’s sodium-laced canned tomato soup with tomato sauce and broth and upped the seasonings a bit as well, to reflect today’s tastes. I really like to use a combination of pork and beef for flavourful, juicy meatballs. Don’t be alarmed by the inclusion of baking soda – it neutralizes the tomatoes’ acidity and makes for a much more flavourful sauce. And if you don’t have a slow cooker, you can easily cook the meatballs in a casserole dish in the oven. Cook up a double batch and freeze half for a super speedy supper the next time you need one.
Ingredients
Directions
 Put the ground meat(s) into a large bowl. Measure out 1/2 cup of the rice and put it in with the meat. Add the onion, garlic powder, mustard powder, salt and pepper and mix it all together with clean hands.
Form the mixture into about 20 meatballs (each slightly smaller than a golf ball) and place these on a baking sheet.

Brown the meatballs in the canola oil in a frying pan over medium heat or, if your slow cooker has a stovetop-safe insert, perform this step on the stove in the slow cooker. You may need to do this in two batches so you have room to flip the meatballs as they are browning.
Drain off the fat then transfer the meatballs to the slow cooker (or an oven-safe casserole dish with a tight lid).
Combine tomato sauce, broth (or water) oregano, basil, hot sauce, Worcestershire sauce and baking soda and pour over meatballs. You want them to be completely covered so top up with a little bit of water if needed.
Cover and let cook in the slow cooker on low for 5 hours, or on high for 3 hours. If cooking in the oven, cook for 90 minutes at 350F.
20 minutes before meatballs are ready to serve, put the remaining 1 cup rice with 2 cups water and 1/2 tsp. salt in a medium saucepan. Bring to a boil then cover pan and immediately reduce heat to minimum. Fluff with a fork when cooked. Serve meatballs and sauce on top of rice.
Serves 4

![]() RELATED: What to Do With Leftover Tomato Sauce
RELATED: What to Do With Leftover Tomato Sauce

If there’s a gene responsible for devouring anything that’s been breaded and deep fried, I’m pretty sure the menfolk in my life both have it. I recently watched them mindlessly stuffing something brown and crispy in their mouths while watching sports and it occurred to me that I could probably wrap breadcrumbs around just about anything and they’d eat it. To test this theory, I made these crispy zucchini sticks. I didn’t bother to tell them they were oven-baked, rather than deep-fried, and they ate them up so quickly that I honestly don’t think they noticed. You can serve them with whatever dip your family likes; I’ve included the recipe below for one of our favourites. Bonus tip: If you want an all-in-one meal, cut a chicken breast into strips, double the panko mixture and beat in an extra egg and you can coat the chicken the same way, place it on a lightly-greased rack and in the same amount of time you'll be serving up delicious homemade chicken fingers to go with your awesome zucchini sticks.
Ingredients
For the zucchini sticks:
For the dip:
Directions
Preheat oven to 425 degrees F. Drizzle 1 teaspoon of canola oil on a piece of paper towel and use it to wipe the surface of a cooling rack. Place the rack on a baking sheet and set aside.
In a broad dish (a pie plate or round cake pan works well), combine Panko, Parmesan, oregano, basil, salt and pepper. Set aside.
In a second broad dish, beat the eggs with a fork until well blended.
Put the zucchini sticks in a plastic bag and sprinkle flour over top. Twist the top of the bag shut and gently shake the bag to coat the zucchini sticks.
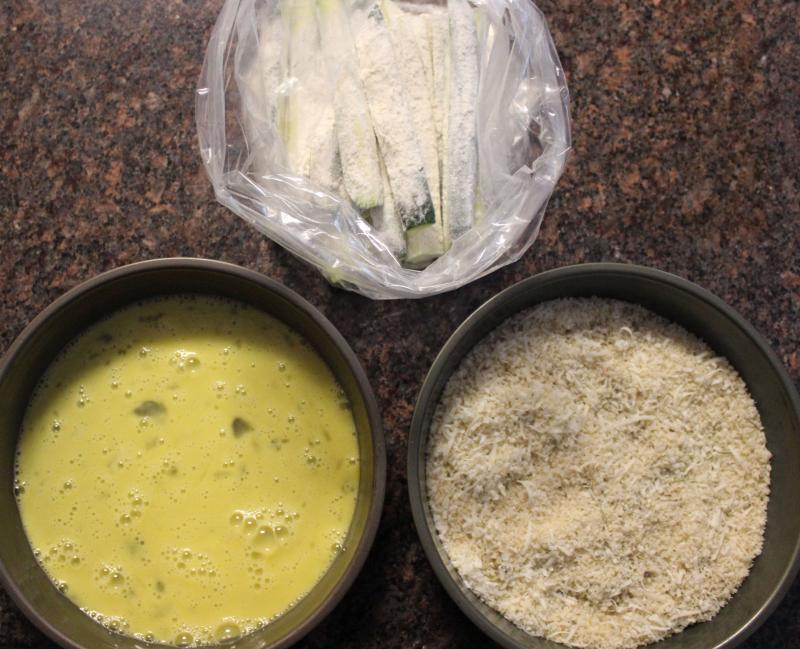
Remove the zucchini sticks from the bag one a time. Tap one end against your work surface to remove excess flour then dip the stick in the eggs. Place the flour and egg-coated zucchini in the Panko mixture and press gently to coat, flipping the stick to coat all sides.
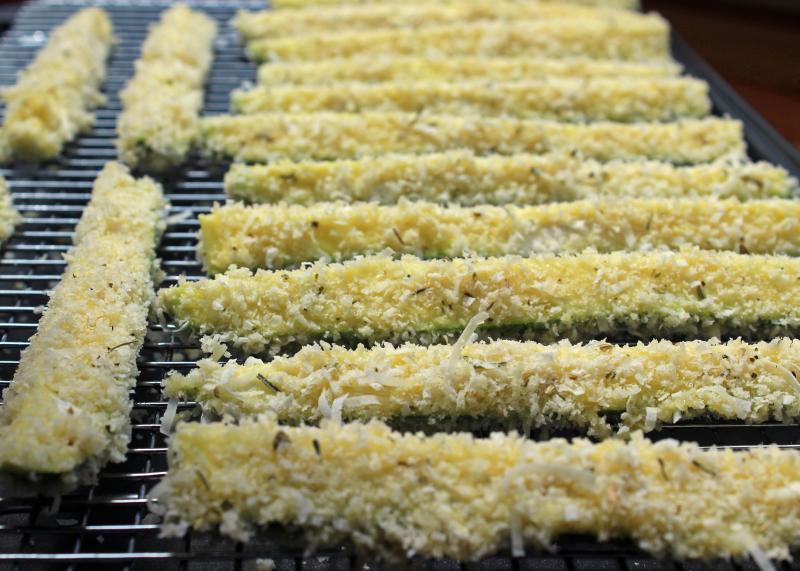
Place zucchini onto prepared cooling rack; when all are coated, put the tray in the oven.
While zucchini sticks cook, combine dip ingredients in a small bowl and stir to blend well.
Bake for 18 to 22 minutes, or until golden brown and crispy.
Serve immediately.
Makes 16 sticks, enough for 2 – 3 servings.

You know that feeling when you’re lying in bed and you can smell fresh baking wafting up from the kitchen? Yeah, me neither. In my house, I’m the one whipping up delicious things first thing in the morning for my family members (and the occasional lucky houseguest) to enjoy. At least I get to taste the treats too, so that’s some small consolation. I have a bit of a weakness for breakfast pastries, fuelled in part by memories of daily trips to Parisian bakeries last time I was there. I love fruit-filled goodies like Danishes, but often find the store-bought ones way too sweet for my liking. This version is more fruit-forward and despite the length of the recipe, is quite easy to make thanks to packaged puff pastry. Best of all, you can assemble it the night before so when you get up, you simply move it from fridge to oven, have a peaceful cup of coffee or tea as it bakes, then get ready to accept your hero award from your adoring fans.
Ingredients
Strawberry Filling
Cream Cheese Filling
Glaze
Directions
In medium saucepan, combine strawberries and sugar; cook over medium heat stirring frequently until sugar is dissolved. Mash with a potato masher or the back of a fork until berries are broken down. Reduce heat and simmer 3 minutes, stirring occasionally.
While berries are simmering, combine cornstarch and cold water in a small bowl, stirring until smooth. Whisk into strawberry mixture and bring to boil. Reduce heat and simmer until thickened, about 1 minute. Stir in vanilla. Transfer to a bowl and refrigerate until completely cooled, about 30 minutes.
Make cream cheese filling by combining cream cheese, sugar, egg white, vanilla and flour in a small bowl. Whisk until smooth. Set aside.
If baking the Danish immediately, preheat oven to 425F.
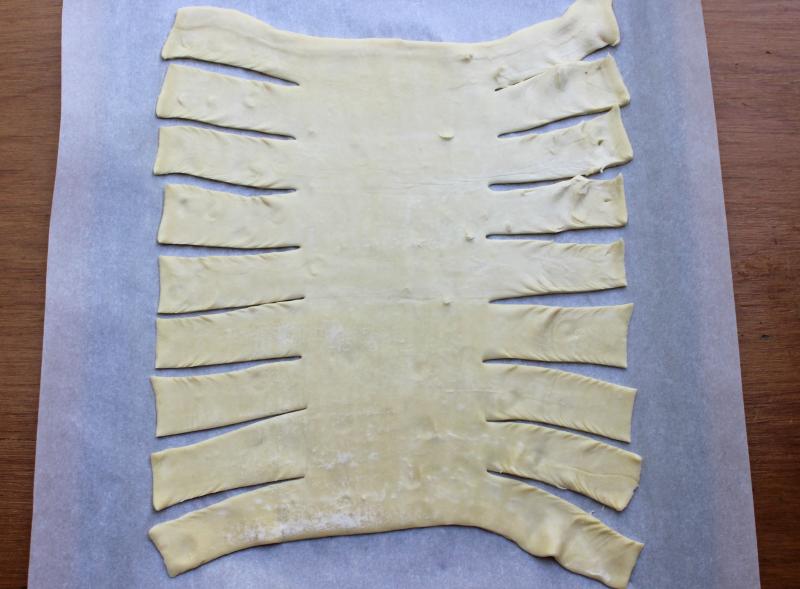
Prepare pastry by rolling out dough between two sheets of parchment paper to form a rectangle slightly larger than 8 x 10 inches. Place pastry, still resting on bottom sheet of parchment, on a baking tray, with the short (8 inch) side closest to you.
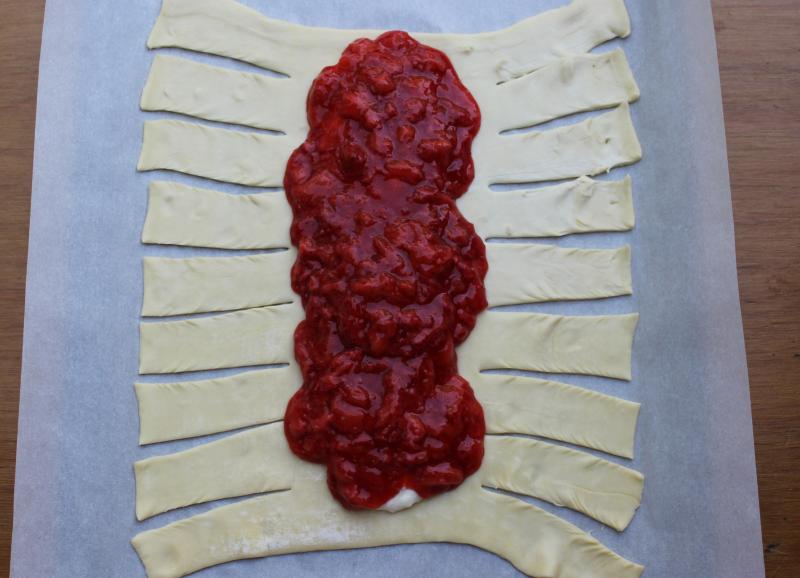
Starting at bottom right corner of pastry, using a sharp knife, cut 3-inch lines from the outside edges towards the centre of the pastry, about 1 inch apart. If strawberry filling is not yet cooled, refrigerate pastry until ready to assemble the Danish.
To assemble, spoon cream cheese filling down the centre of the pastry, in a line no more than 2 inches wide. Spoon strawberry filling over top of the cream cheese (it will spread a little wider but try to keep it on the uncut portion down the middle of the pastry.
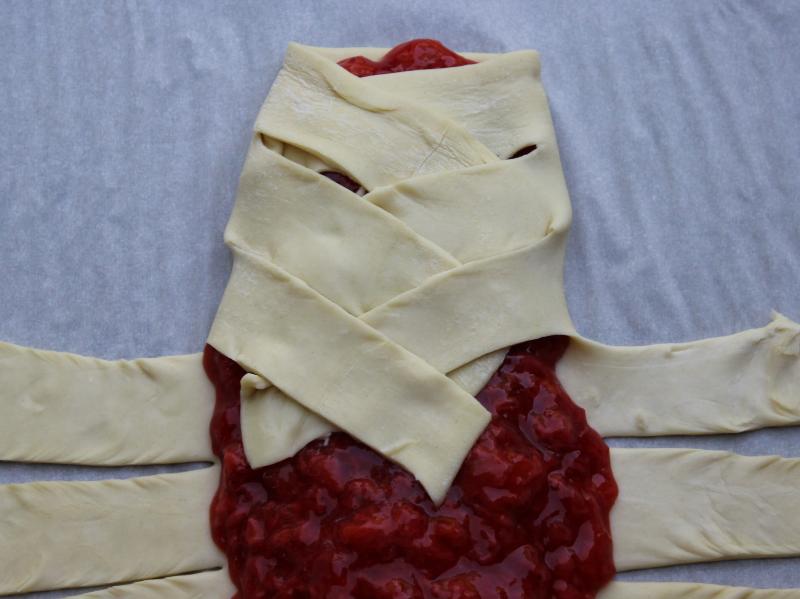
Cover the berries by folding the strips of pastry over top, alternating left and right and overlapping slightly. The berry filling may peek out a bit, and that’s ok. At this point, you can cover the unbaked Danish with plastic wrap and refrigerate for up to 12 hours.
When ready to bake, brush the top of the Danish with the egg yolk and water mixture. Put in oven (which you’ve preheated to 425F) and immediately reduce heat to 400F. Bake for 20 to 25 minutes or until pastry is a deep golden brown colour.
While pastry is baking, prepare glaze by whisking together icing sugar, milk and vanilla in a small bowl. Add a tiny bit more milk if glaze is too thick to drizzle.
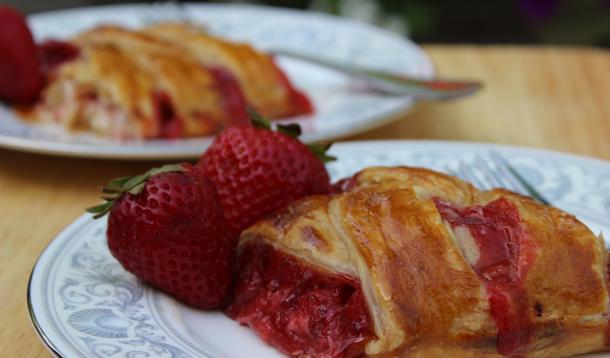
After removing pastry from oven, let it cool for 15 minutes, then drizzle glaze over top. Cut into 4 – 6 portions and serve, then take your well-deserved bow.
In the unlikely event that you have leftovers, they can be refrigerated in an airtight container for up to 48 hours.