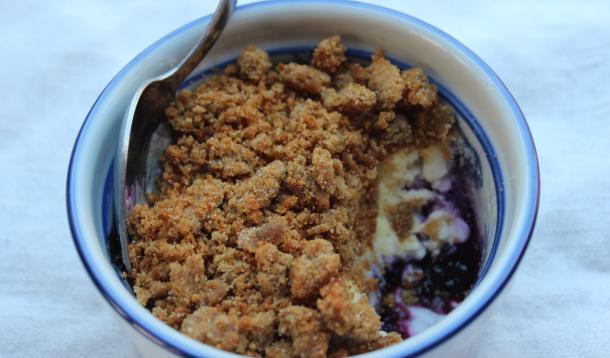
When it comes to cheesecake, I am a big fan of the crust. Crunchy, sweet, and packed with flavour ... why, it just makes sense to put it on top instead of hiding it at the bottom! These single serving mini cheesecakes are speedy to prepare and even easier to serve – no more worrying about whether that delicious crust will hold together from pan to plate. Best of all, you can make them with many different kinds of fruit (and you even can cheat successfully by using jam!) PLUS they can be baked up a day or two before serving. Use your favourite homemade ginger cookie recipe or make it even easier with tasty store-bought ones.
![]() RELATED: It's Brownies and Cheesecake All-In-One: You Know You Want It
RELATED: It's Brownies and Cheesecake All-In-One: You Know You Want It
Ingredients
Directions
 Preheat oven to 350 F.
 Combine blueberries, sugar, and cornstarch and water in a small saucepan. Cook mixture over medium heat, stirring often, until thickened (about 3 minutes).
 Combine cream cheese, egg, sugar, lemon juice and lemon rind in a small bowl. Whip together with an electric mixer until fairly smooth (about 90 seconds).
 Divide the blueberry mixture among four 4 ounce (1/2 cup) ramekins placed on a baking sheet.
 Pour the cream cheese mixture over top, dividing evenly.
 Bake for 15 minutes.
 When cooled, top with cookie crumbs. Store at room temperature for up to 6 hours or refrigerate for up to 48 hours.
Makes 4 mini cheesecakes


I sometimes think kids will eat just about anything if it doesn’t involve cutlery. Think about it – pizza, sandwiches, sushi, hotdogs, burgers…and my personal favourite, tacos! I have to confess, though, that while I love what goes into tacos, I struggle with the packaging. Hard tortilla shells are impractical as they break so darn easily – when my kids were little, I knew at least one of them would be in tears when their taco fell apart.
Soft tortillas are better, but I find them too filling and feel they sometimes overwhelm the flavours of the filling. Enter the lettuce leaf. Boston lettuce is my favourite, but any leaf lettuce will do just fine, and it will make the gluten-intolerant people in your life pretty happy too. You can make the shredded chicken filling ahead of time, including in a slow cooker; it freezes beautifully as well. The coleslaw comes together in mere moments, leaving you with plenty of time to enjoy this happy, healthy, tear-free tacolicious meal.
Ingredients
Shredded Chicken
Crunchy coleslaw
To assemble
Directions
 Heat 2 tablespoons of the oil on medium heat, in a medium sized, heavy duty pot.
 Season the chicken with salt and pepper and brown, a few pieces of time in the hot oil. Remove the chicken when it is browned on both sides and set on a clean plate.
 Reduce heat to medium low and add the remaining tablespoon of oil and the onions to the pan; cook for 2 minutes.
 Add the garlic, chipotle peppers, oregano and cumin. Cook, stirring, for 2 minutes.
 Add the tomatoes and beer; stir to combine and turn heat up so that the mixture comes to a boil.
 Return the chicken and any juice that has accumulated on the plate to the pot, making sure the chicken is all snuggled into the tomato mixture. Reduce heat so it is just simmering and put a lid on the pot.
 Cook over low heat for about 35 – 40 minutes, or until chicken is tender and falling apart.
 While chicken is cooking, combine the sour cream with the lime zest, lime juice, salt and pepper to make the dressing for the coleslaw.
 Put the cabbage, red peppers and carrots in a bowl, drizzle dressing over and combine well. Refrigerate until serving time.
 With a slotted spoon, transfer the chicken pieces to a cutting board.
 Turn up the heat and remove the lid so the tomato mixture will reduce slightly.
 Shred the chicken using two forks and then return the meat to the pot.
 To serve, place washed and dried lettuce leaves on individual serving plates.
 With a slotted spoon, top with the chicken mixture, then add a heaping spoonful of coleslaw.
 Garnish with a few cilantro leaves and serve with lime wedge.
Serves 4

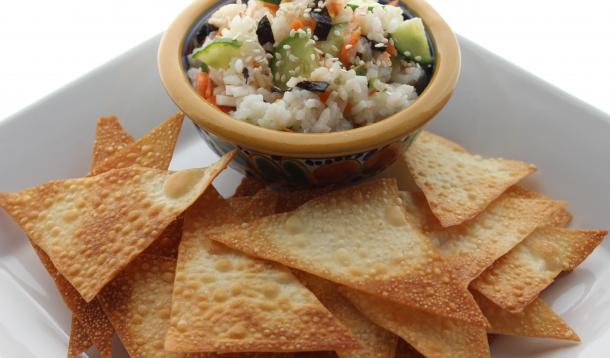
I am a little bit surprised how many kids like sushi - I'm not sure mini-me would have been a fan. I see tots packing it in their school lunches, grabbing the house made packages at the grocery store and hitting up the all-you-can-eat Sushi spots. It's fun to make sushi at home, but California Rolls, especially the inside-out kind (my daughter's favourite) can be a little finicky and time consuming. Enter the sushi salad – think of it as a big bowlful of deconstructed California Rolls. It’s easy to prepare and really delicious, especially when you swap the chopsticks for crispy baked wonton scooper-uppers.
![]() RELATED: Pregnancy Cravings You Should NOT Indulge In
RELATED: Pregnancy Cravings You Should NOT Indulge In
Ingredients
Wonton Crisps
1 package of wonton or egg roll wrappers (in the produce section at most grocery stores)
canola oil
Rice
2/3 cup Calrose rice
3 tbsp rice vinegar
1 tbsp white sugar
Dressing
1 tsp wasabi powder
2 tsp hot water
1 tbsp cold water
1 tbsp soy sauce
1 tsp ginger juice (from jar of pickled ginger)
Toppings
2 sheets nori (toasted seaweed) cut into ½” by 1” strips
2 tsp finely chopped pickled ginger
1 green onion, diced
1/4 cup finely shredded carrot
1/2 large seedless cucumber, quartered lengthwise and sliced
½ ripe avocado, peeled, pitted and diced
2 sticks surimi (mock crab meat), thinly sliced (optional)
1 tsp sesame seeds, toasted
Directions
 Make wonton crisps up to a week ahead. Start by preheating oven to 375F.
 Cut 3 inch wonton wrappers into halves on the diagonal (creating two triangles out of each square wrapper). If using the larger 6 inch egg roll wrappers, cut them into eighths on the diagonal.
 Brush two baking sheets lightly with oil then lay out triangles of dough in a single layer.
 Flip the wonton triangles over so both sides get a light coating of oil.
 Bake for 5 – 7 minutes until golden and crispy. Watch them closely during the last few minutes of baking so they don’t overcook.
 Remove from oven and place crisps on a wire rack to cool, then store in an airtight container.
 Rinse rice and place in saucepan with 1 1/3 cups water.
 Cover; bring to boil; simmer on lowest heat for 20 minutes.
 While rice is cooking, put rice vinegar, sugar and salt in a glass measure or bowl and bring to a boil in the microwave, stirring occasionally until sugar is dissolved.
 Transfer cooked rice to a shallow, large serving bowl and stir in vinegar mixture; stir often while cooling.
 While rice is cooling, prepare all the toppings.
 For dressing, in a small jar with a tight lid, mix wasabi powder into hot water, then add cold water, soy sauce, and ginger juice. Cover and shake to blend well.
 When rice is at room temperature, add all the prepared salad toppings except the sesame seeds and toss to combine well.
 If not serving immediately, refrigerate the salad.
 When ready to serve, drizzle the dressing over the salad, using enough to add flavour but not too much so the salad doesn’t get soggy. Toss gently.
 Sprinkle with sesame seeds and serve with wonton crisps.
Serves 6 – 8