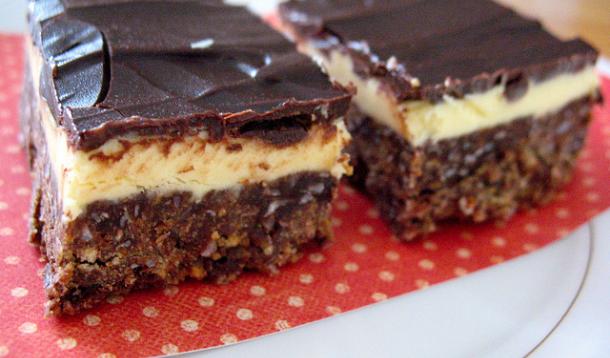
Nanaimo bars, with their chocolatey bottom full of coconut and nuts and sweet butter cream filling, are quintessentially Canadian. It is believed that the original recipe came from a woman from Cowichan Bay and was submitted to a cookbook. The bars, which need no baking, became very popular! Their sweet chocolatey flavor makes them one of my teen’s most favorite dessert recipes, and are fitting on a Canada Day celebration from kitchen which overlooks...you guessed it, the Strait of Georgia and in the distance, Nanaimo!
Ingredients:
Base Layer:
1/2 cup butter
1/4 cup sugar
1/3 cup unsweetened cocoa
1 large egg, lightly beaten
1 tsp vanilla
2 cups graham cracker crumbs
1 cup shredded coconut (sweetened or unsweetened)
1/2 cup chopped walnuts or pecans
Middle Layer:
1/4 cup butter, room temperature
2-3 tbsp milk or cream
1/2 tsp vanilla extract
1 tbsp vanilla custard powder (Birds Brand) or vanilla pudding powder
2 cups icing (confectioner’s) sugar
Topping:
4 oz semi-sweet chocolate, chopped
1 tbsp unsalted butter
Line a 9x9 inch square pan with parchment paper.
Base:
 In a medium sized saucepan, melt the butter until smooth and then remove from the heat. Stir in the sugar and cocoa until smooth, then gradually whisk in the egg. Put the pot back on the element and continue to cook with the residual heat, stirring until thickened (about 1-2 minutes). Stir in graham cracker crumbs, nuts, and coconut. Press the mixture evenly into the pan and set into the fridge to chill for about 30 minutes.
Filling:
While the bottom layer chills, beat the butter for the middle layer until creamy. Add the rest of the middle layer ingredients, beating at first on low and then medium until creamy. Spread over the bottom layer and then put in the fridge to chill for about 30 minutes.
Topping:
Melt the chocolate and butter together in a saucepan over low heat until smooth. Let cool slightly, then spread over the filling. Chill for about 10 minutes until set.
The bars are a little hard to cut without cracking the chocolate. Let the pan sit on the counter for about 15 to 20 minutes first, then run the knife under hot water and wipe it dry before slicing through them.
Makes about 12 bars
Adapted from Joy of Baking


