If one of your New Year's resolutions is to be more creative, then there's no better time than New Year's Eve to get started.
You could head to the store to pick up ready-made blowers, noisemakers and hats. Or, you could spend some quality time with your kids as you - and they - ring in the new year with these nifty DIY creations.
![]() A Craft For Every Age: How To Make Art When You Don't Know How To Make Art
A Craft For Every Age: How To Make Art When You Don't Know How To Make Art
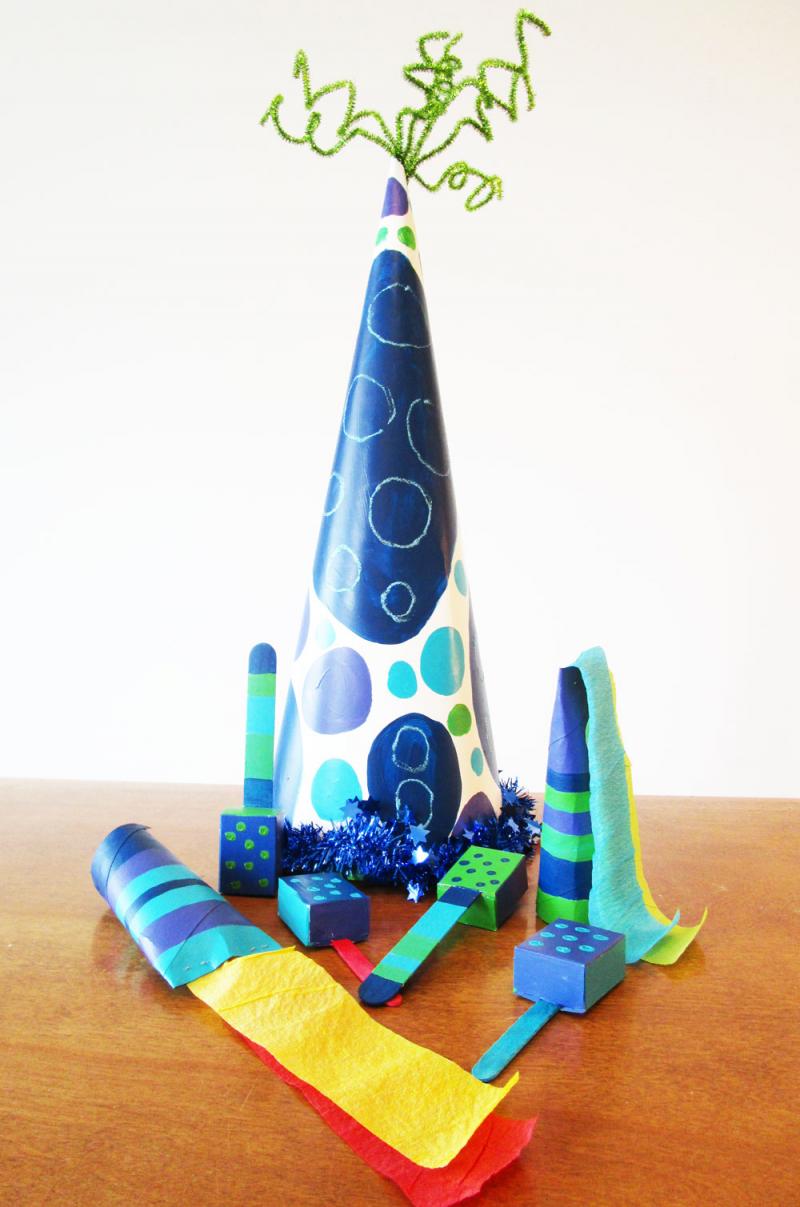
BREEZY PARTY BLOWERS
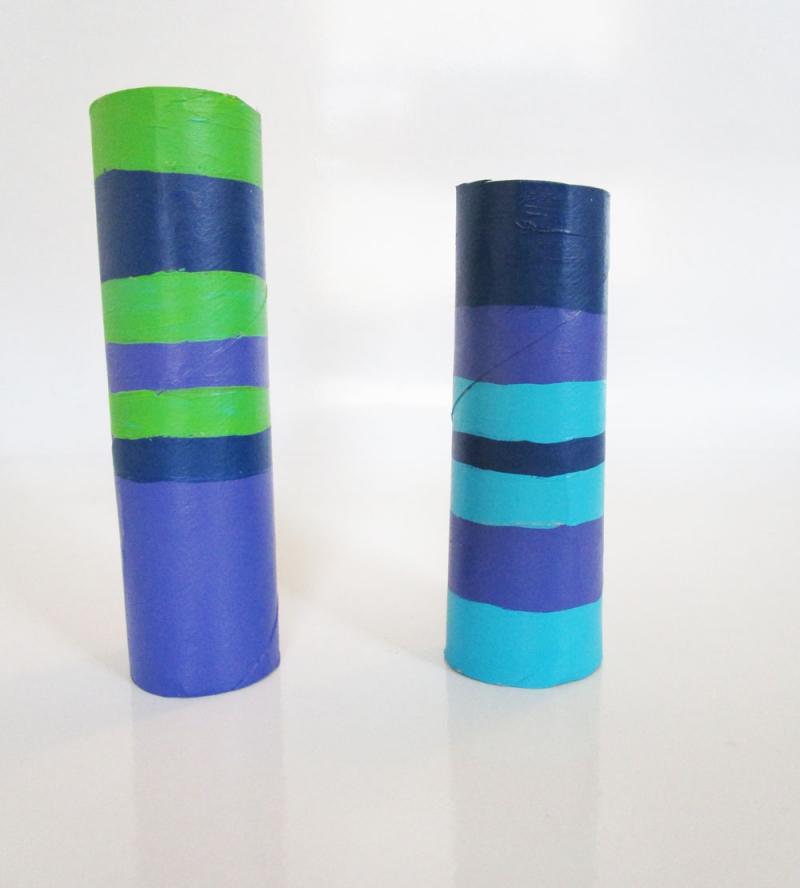
To make your own party blowers, you need cardboard tubes, crepe paper streamers, paint, a pair of scissors, and a stapler.
Now, since you and your kids will be blowing into these, I would recommend using paper towel or wrapping paper tubes - rather than toilet paper tubes - for obvious reasons. Also, I happened to have party streamers kicking around since my daughter celebrated her birthday just a few weeks ago. But, you can use tissue paper instead. Just cut it into strips, about 5cm (2") wide and 20cm (8") long.

First, cut the tubes into 15cm (6") lengths. Then, paint them.
If paint is not an option, you might use colourful tape instead. Or you could wrap and glue construction paper or tissue paper around the roll.
Once dry, pinch the roll flat at one end and lay two to three strips of crepe paper or tissue paper inside. Then add two staples to hold the paper in place, leaving space in the middle for air to travel through.
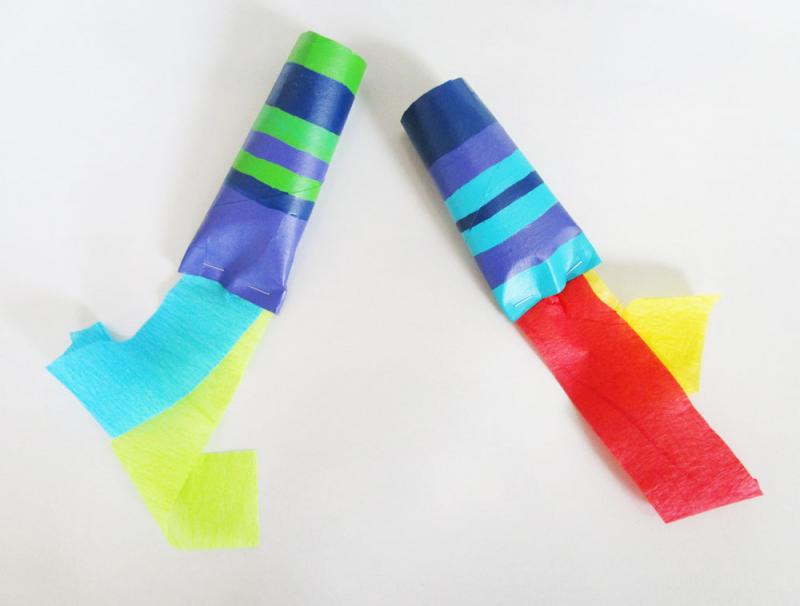
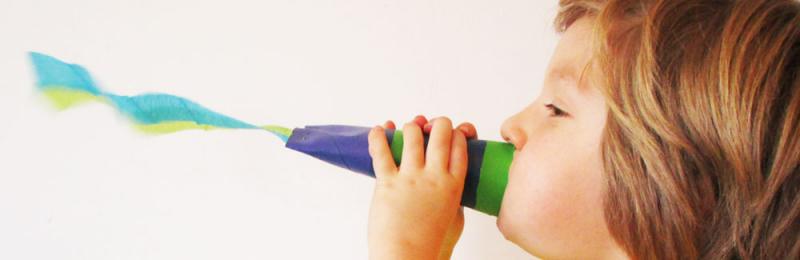
And... blow! As an added bonus, these babies also make noise. Whee!
If your blowers don't blow, it probably means that you don't have enough space for the air to travel through. Simply open the area (but only a wee little bit) between the staples to fix the problem.
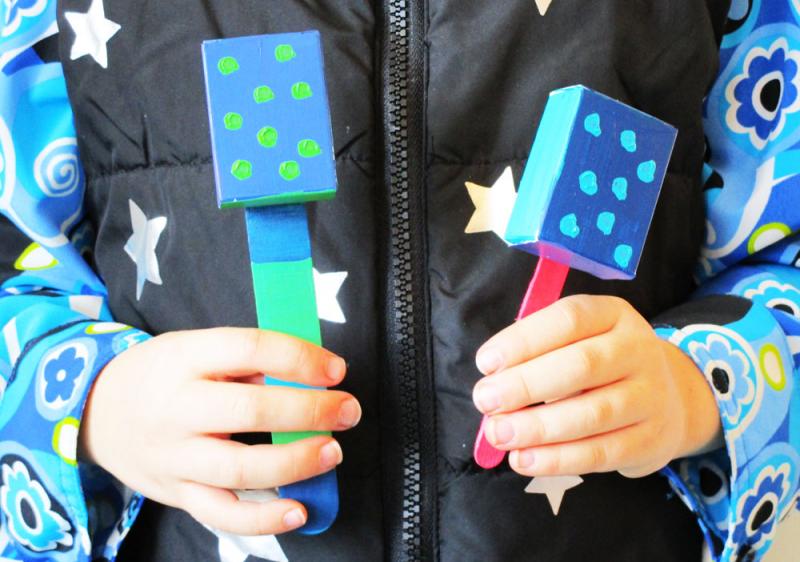
SHAKY SHAKY NOISEMAKERS
There are a billion ways to make noise. But for these noisemakers, you will need raisin boxes and wooden craft sticks.
To begin with, put a few beads (or rice, or lentils) into each box. Then, glue the boxes shut, but not before shoving a stick inside.
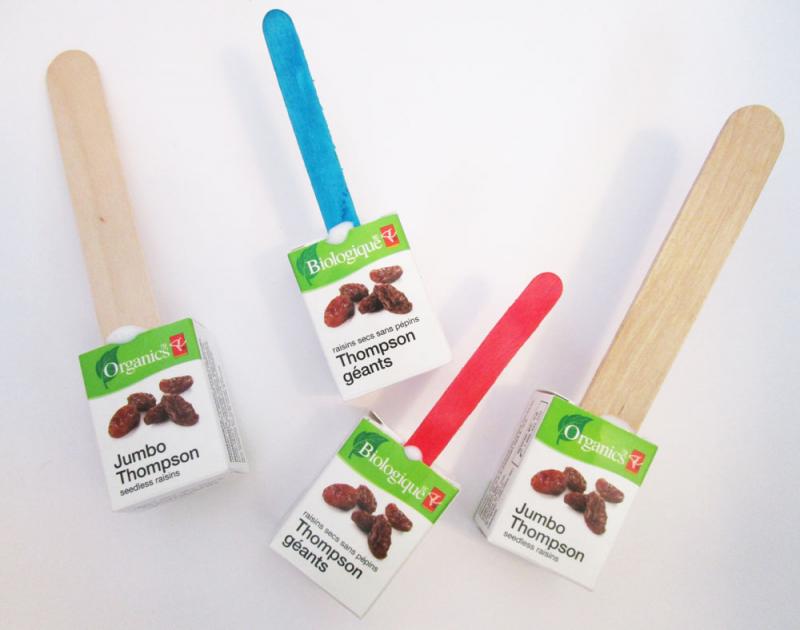
Once the glue is dry, paint the boxes and unfinished sticks. (I used cotton swabs to make the dots).

I love raisin box noisemakers because they are just the right size for little hands.
However, you could use lots of other items from around the house instead. Cracker or cereal boxes, paper cups (taped together) or paper plates folded in half (and stapled) would work beautifully. Really the idea is to use what you have on hand.
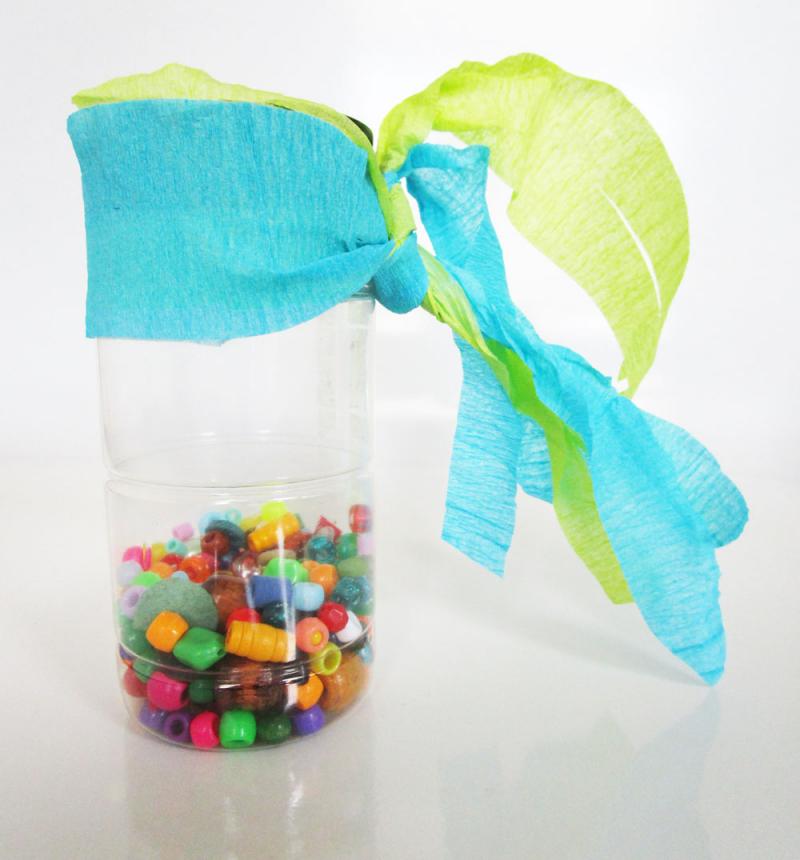
For example, an empty water bottle or parmesan cheese container with beads inside and some ribbon tied around the top makes an excellent (and instant) New Year's Eve noisemaker.
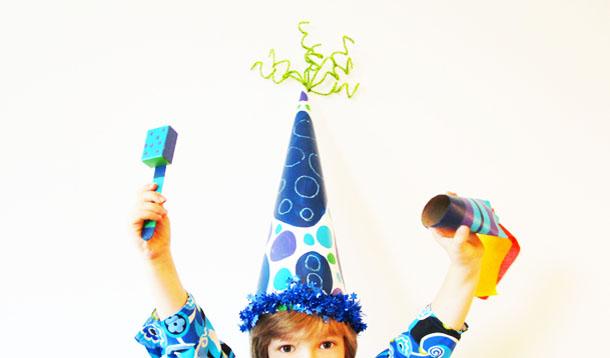
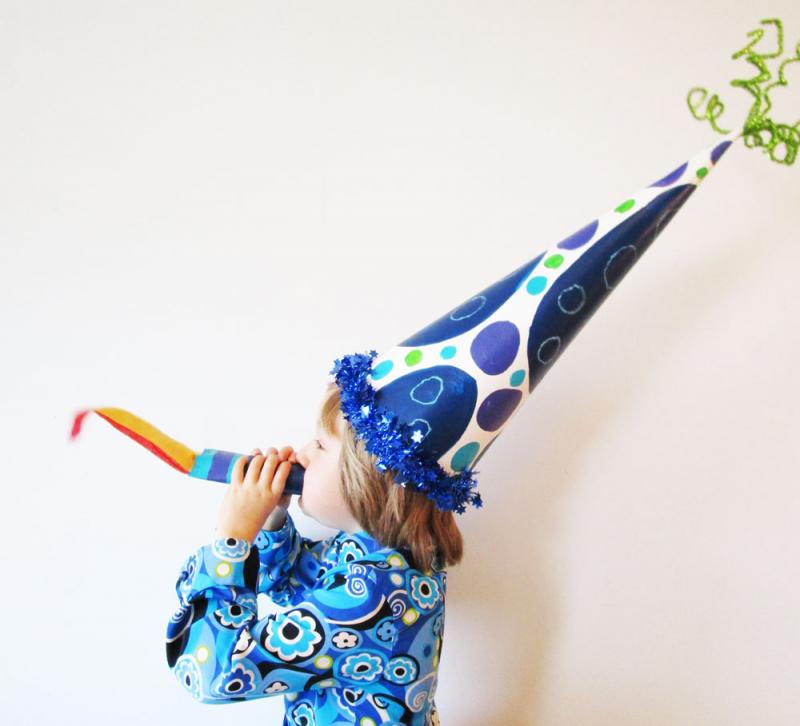
GO-BIG-OR-GO-HOME PARTY HAT
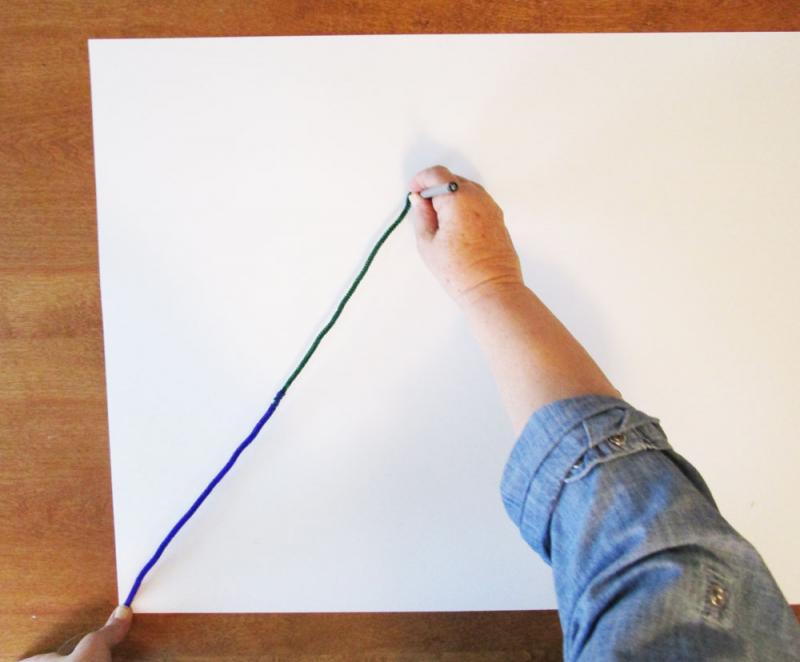
For this type of hat, you will need some heavy paper (poster board from the dollar store is perfect), one or two pipe cleaners, a pencil, a pair of scissors and some decorating items like paint (or markers) and glitter glue.
If you want a really tall hat, twist two pipe cleaners together. If you want a shorter hat, just use one pipe cleaner. Either way, you will want to securely attach one the pipe cleaners to the end of your pencil.
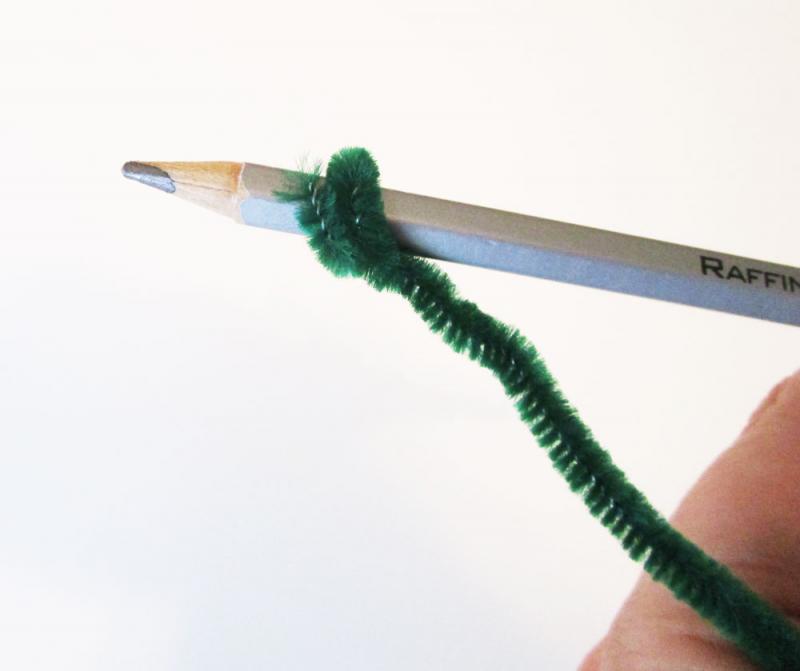
Then, standing over the paper, hold one end of the pipe cleaner(s) at the corner and pull tightly on the pencil as you draw an arc on your paper. Special thanks to my mummy for demonstrating this technique.
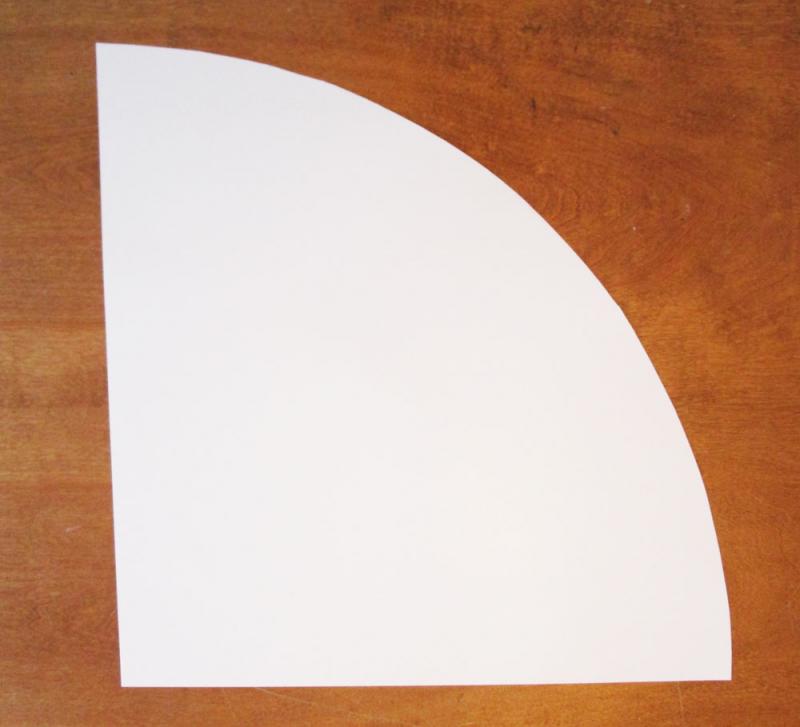
When you cut out the shape, it should look like this.
Next, measure how big your hat needs to be by placing it on the party-goer's head. You will need to twist the paper a bit to get the right size.
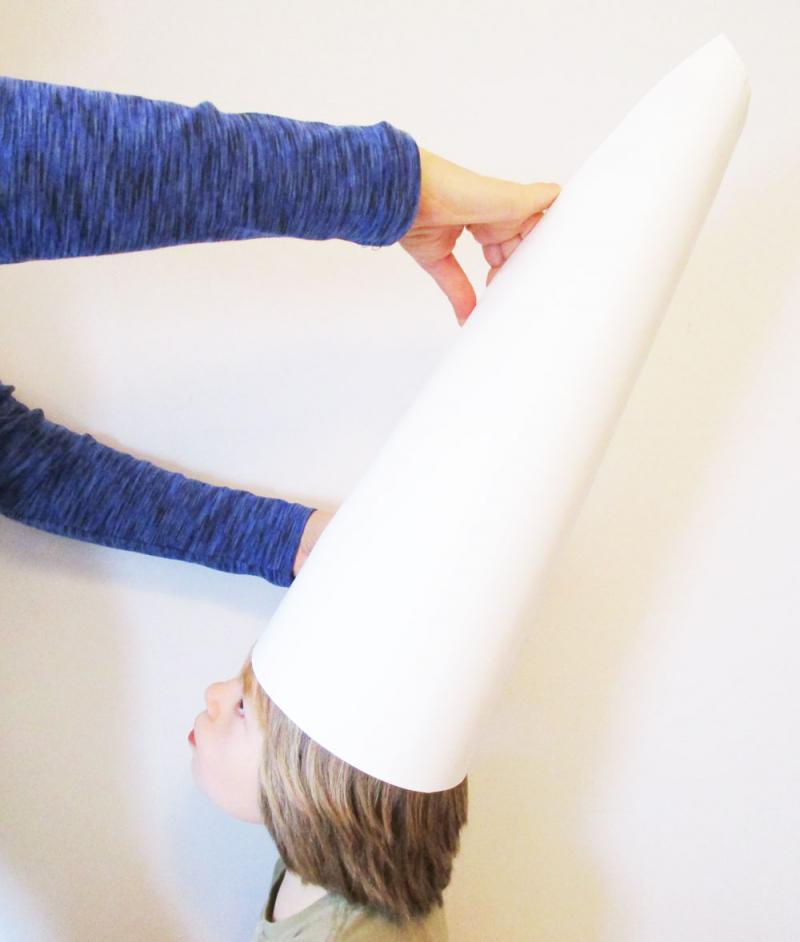
Once you have the right size, throw a staple in the end to keep things together.
After that you will need to secure the edges of the hat together. You can do this with tape or a really big stapler, but I used craft glue (which was held together by rolling elastics onto the cone).
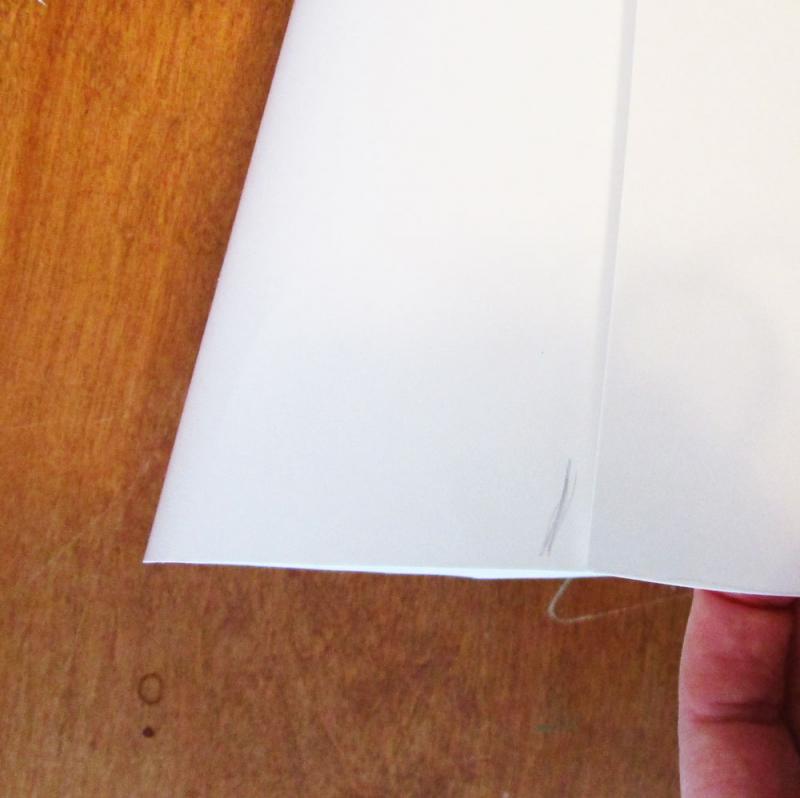
Oh and don't panic if the top of your cone has a little opening. Since you will be adding decorations up there, there's no need to stress out.

Once the glue has dried, it's time to decorate using whatever you have at your disposal.
For my hat, I began by painting blobs of colour all over the cone. Then, I grabbed my daughter's glitter glue and made circles where it looked like it needed them. To finish off, I stuck a bunch of pipe cleaners into the top of the cone and stapled a piece of glitzy garland (which I snatched from our Christmas tree) around the bottom edge.
Note that it's a good idea to tape over any staples on the inside of the hat so they don't get caught on your hair. Also, you may need to staple two pieces of yarn to the bottom of the hat so you can tie it under the chin.

Yes, it is GIANT, but a big celebration calls for a big hat, don't you think?
Happy New Year everyone! Now go ahead and get creative!

If you're celebrating the holidays, chances are you're baking. And if you're baking, chances are you've got a few egg cartons kicking around the house.
Well, I'm here to let you know how you can use those egg cartons to your advantage. Specifically, how to keep your kids occupied while you're rushing to pull the cookies out of the oven before they burn, or madly cleaning each and every ceiling fan blade because you don’t want a repeat of last year’s mystery-fluffs-on-the-turkey incident.
![]() Santa's Helper Project: Reindeer Ornament Craft for Kids
Santa's Helper Project: Reindeer Ornament Craft for Kids
Either way, this creative recycling craft - courtesy of my folk artist mother - makes use of readily available materials that you probably already have at your fingertips.
Here's what you need:
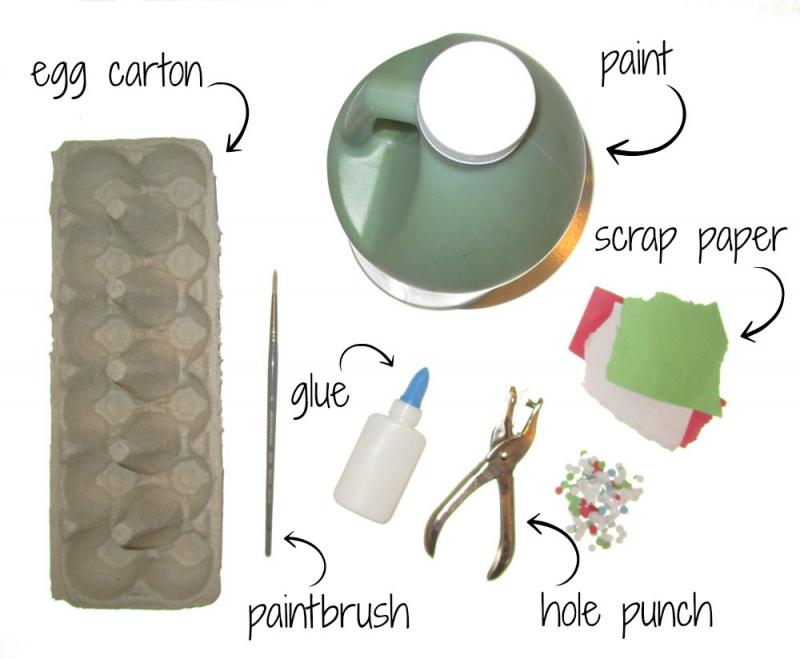
In addition to an egg carton, paint (washable tempera or acrylic), scrap paper, hole punch, glue and paintbrush, you'll also need a decent pair of scissors and maybe a pipe cleaner or two.
Now, did you know that there are different kinds of egg cartons? It's true. See for yourself the next time you are in the egg aisle. People around you will think you're checking to make sure the eggs aren't broken but really you'll be unleashing your inner craft goddess.
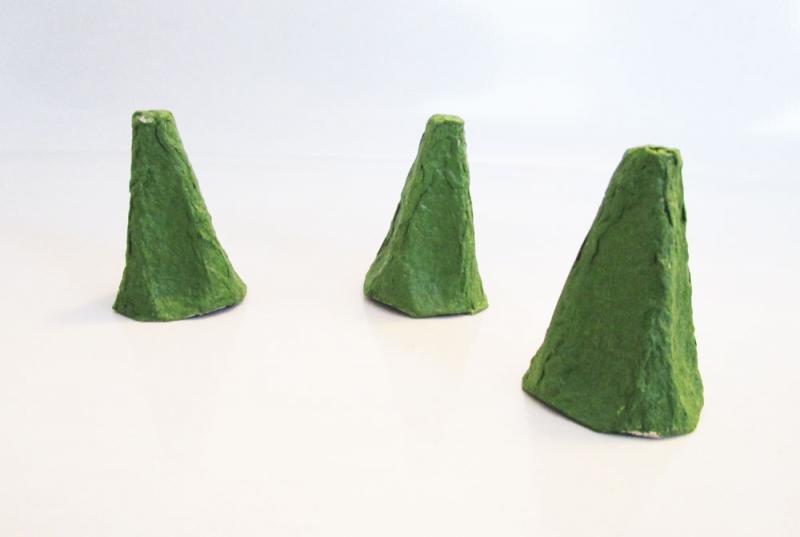
For this project, it's best to use the ones where the dividers are tall and cone shaped, rather than short and square. But, if you don't have cone shaped cartons, don't panic. Just peek at step 3 below.
Also, my photo shows a gigantic container of paint. Rest assured you only need a small squirt, it's just that I have a habit of buying in bulk.
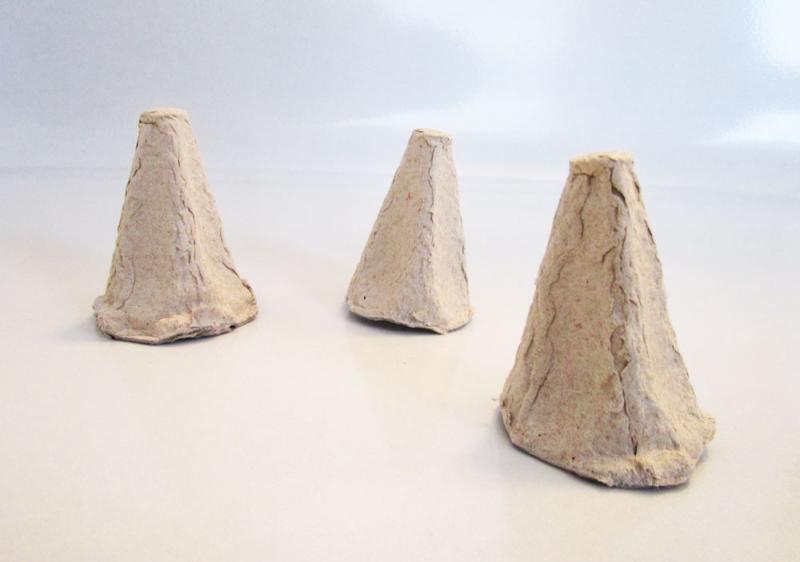
Step 1
To get started, cut the cones from your egg carton. Depending on the ages of your kids, this is a step that you might wish to do ahead of time. Maybe while you're watching The Mindy Project at midnight. Or, that might just be me.
Step 2
Once the cartons are cut, set out the supplies and let your kids get creative.
After they've painted the cones (and are waiting for them to dry), they can punch holes in scrap paper to make tiny little circles (which will become ornaments for the trees).
By the way, I chose green for my trees but honestly, pink, purple, or blue would be just as fantastic. Also, the nice thing about these recycled paper cartons is that the paint soaks in and dries pretty quickly, making this a relatively mess-free activity. However, if you are worried about using gooey paint, then magic markers or paint pens would work fine as an alternative (especially for little hands).
Step 3
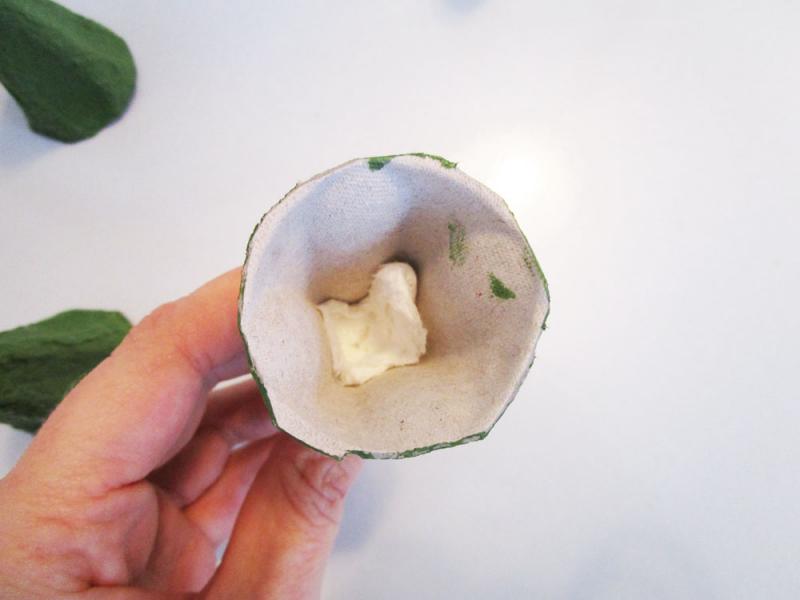
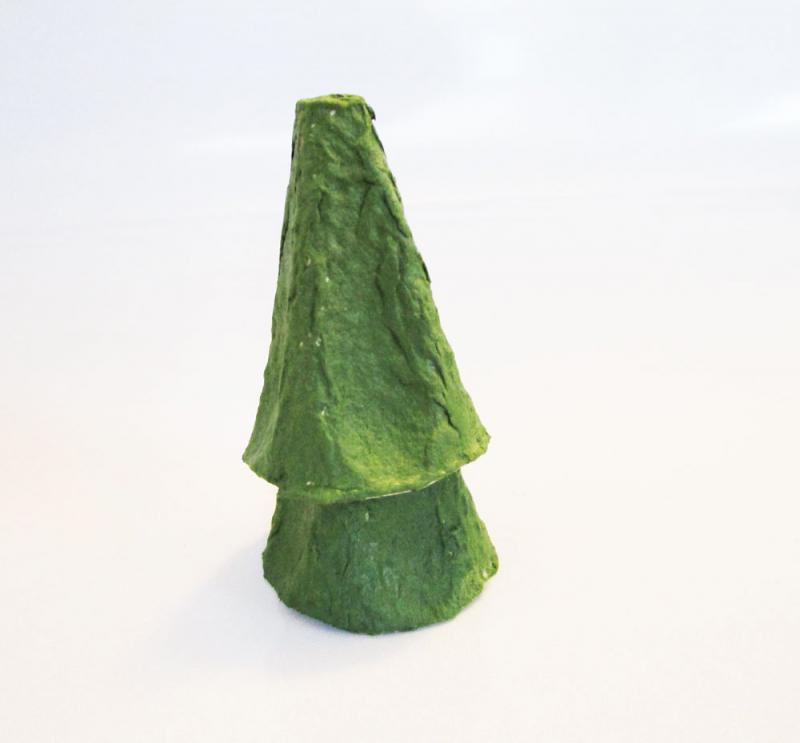
If you want your trees to be taller, stuff a bit of paper towel into the end of one cone and stack it on another, like so.
Step 4
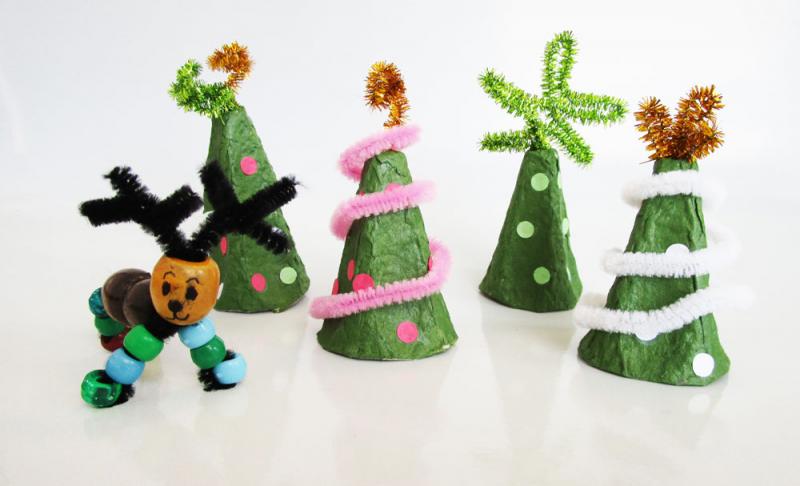
Once the paint is dry, it's time to decorate. I used colourful dots (from the hole punch) which I glued on with regular white school glue but if you have younger kids, you might wish to use glue sticks instead. I also used some pipe cleaners to make tree toppers and garlands.

Cute, right?
And if your kids make enough of these little Christmas trees, you could use them as place card holders on your dinner table.
Now that's what I call multitasking.
Happy Holidays!
Why not make a reindeer to hang out in your Christmas tree forest?
There's no easy way to say what I have to say, so I'll just go ahead and say it:
You, your kids, and your kitchen are probably going to get messy when you try out these cool holiday painting ideas. But here's the thing: Sometimes making art means getting dirty and in fact, the best projects are often the ones that leave a trail.
![]() Couple Shells Out $50K for Fingerpainting
Couple Shells Out $50K for Fingerpainting
And, because these are fingerprint pictures, they will become instant keepsakes for you to look back on and smile as you remember that time when your daughter was so excited at the sight of her Christmas tree craft that she grabbed onto your shirt with a little hand that couldn't possibly be covered with more paint.
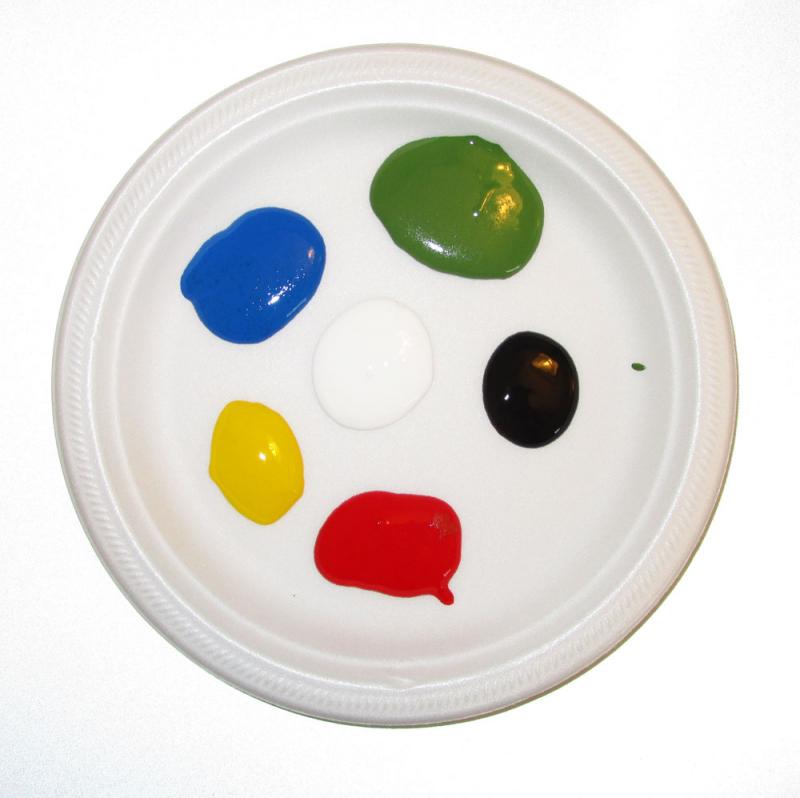
You really only need a few supplies to make this happen...
You will also want to make sure that EVERYONE involved is wearing painting smocks or is dressed in old clothes.
Ready? Great, let's get started...
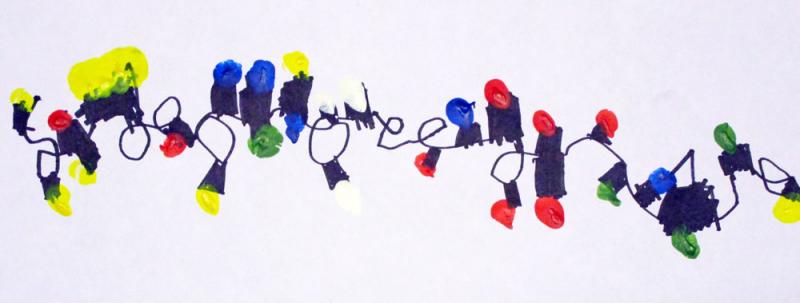
CHRISTMAS LIGHTS
My friend Kelly showed my daughter (and 29 other kids) how to make these lights and not one piece of clothing got dirty. Kelly is superhuman.
First, draw a squiggly line across the paper using a Sharpie marker.

Add some square shapes along the line - top and bottom.

Dip into the paint and start adding fingerprints at each of the square shapes.

When finished, you will have a string of colourful Christmas lights! Wouldn't this be great with all family members adding their own fingerprints to the painting?
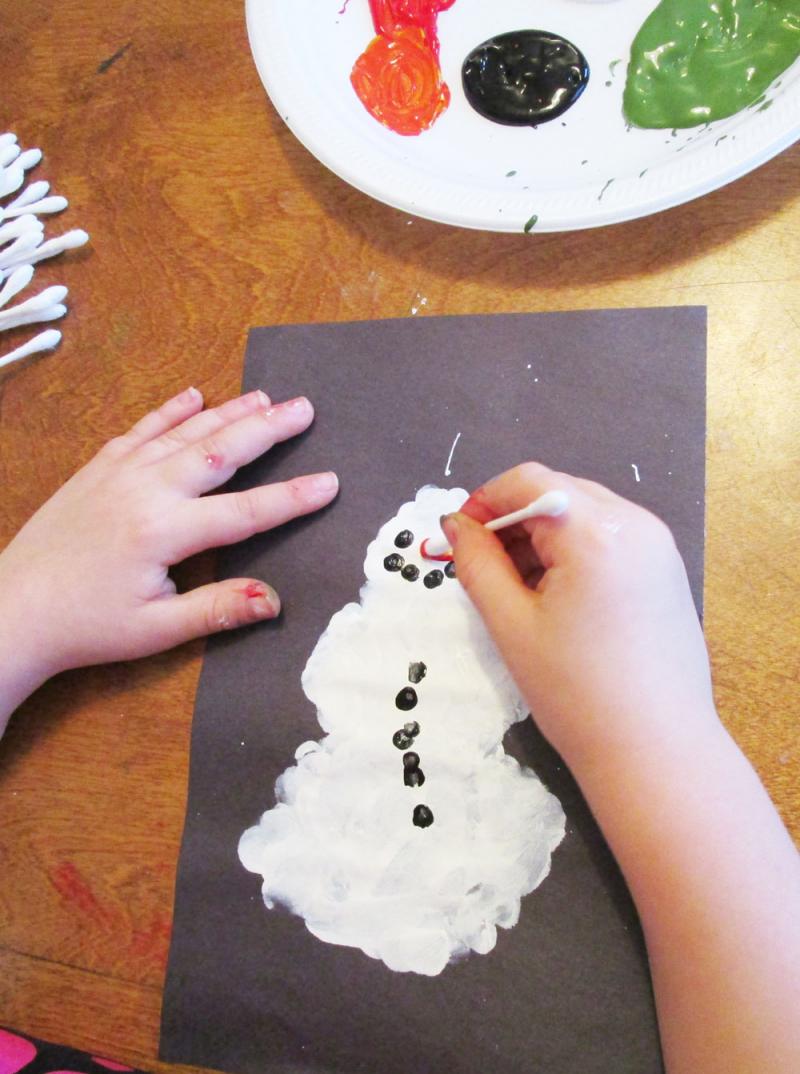
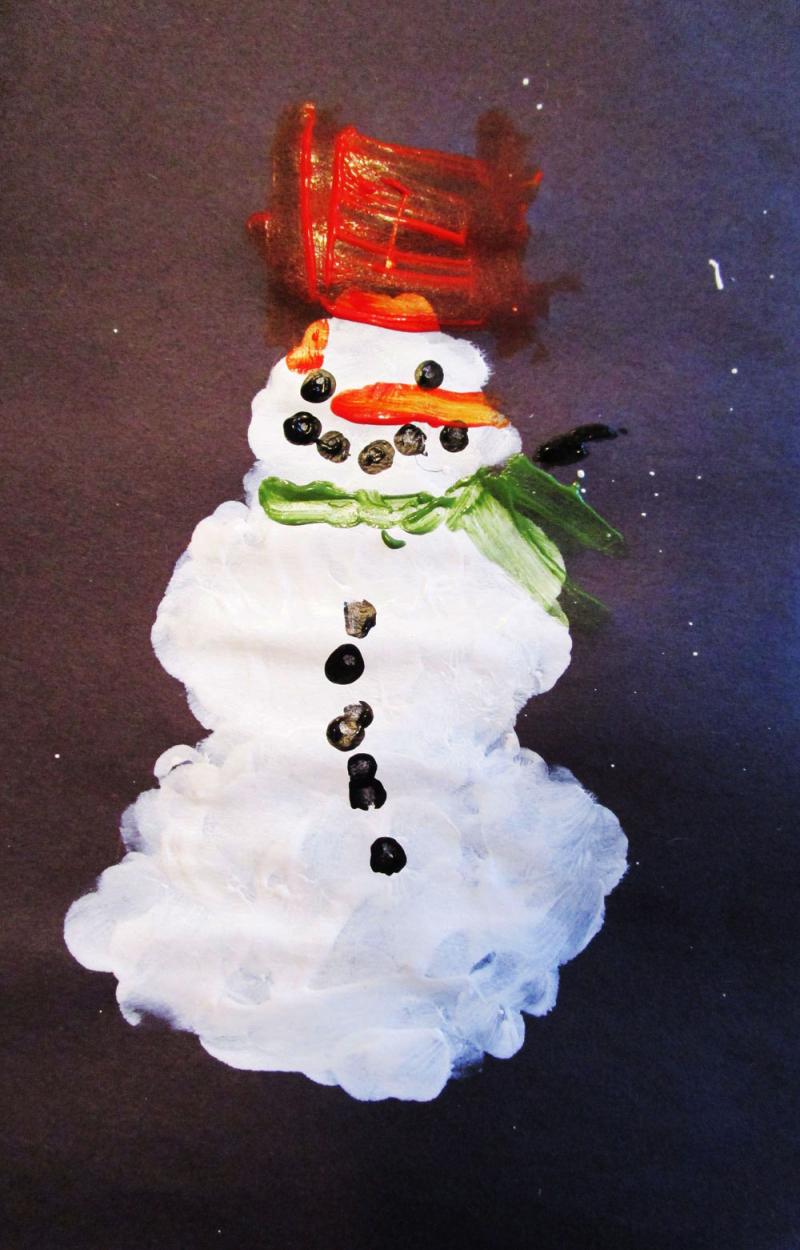
FROSTY
Using a dark sheet of paper, simply fill in a snowman shape with your fingertips dipped into white paint. (I drew three circles as guidelines but this is certainly not necessary.)
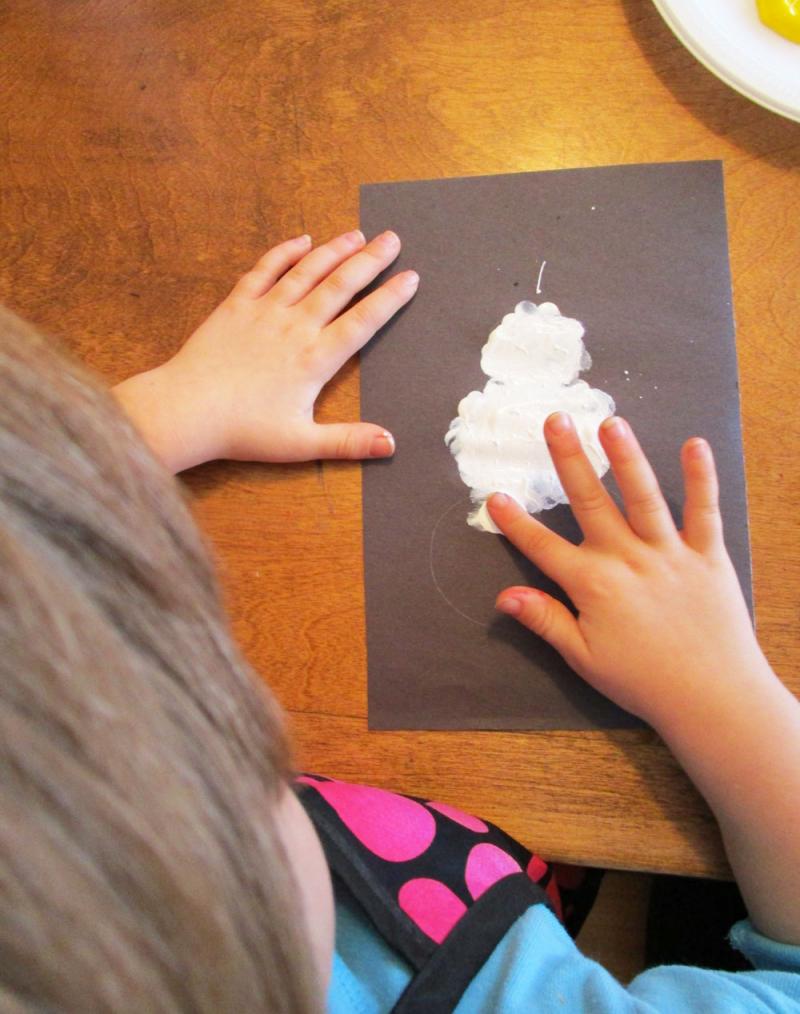
Once the snowman is completely dry, you can start to add details. We used cotton swabs for this step.
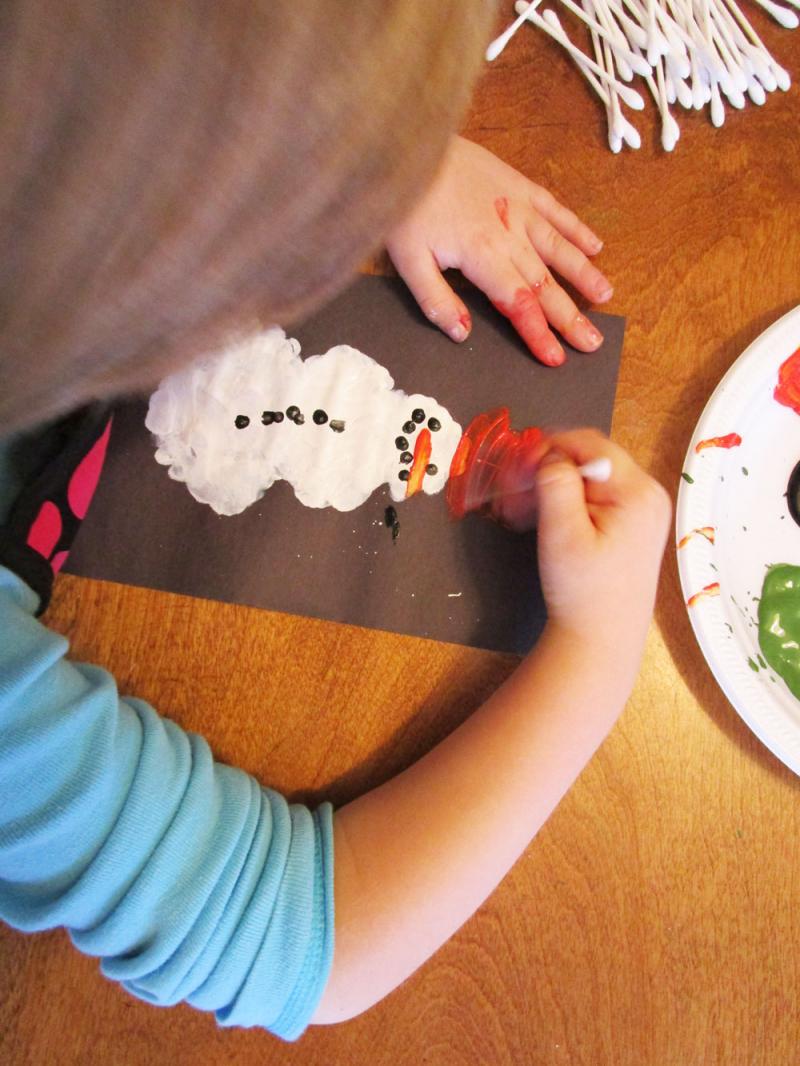
Voila! Your very own Frosty.
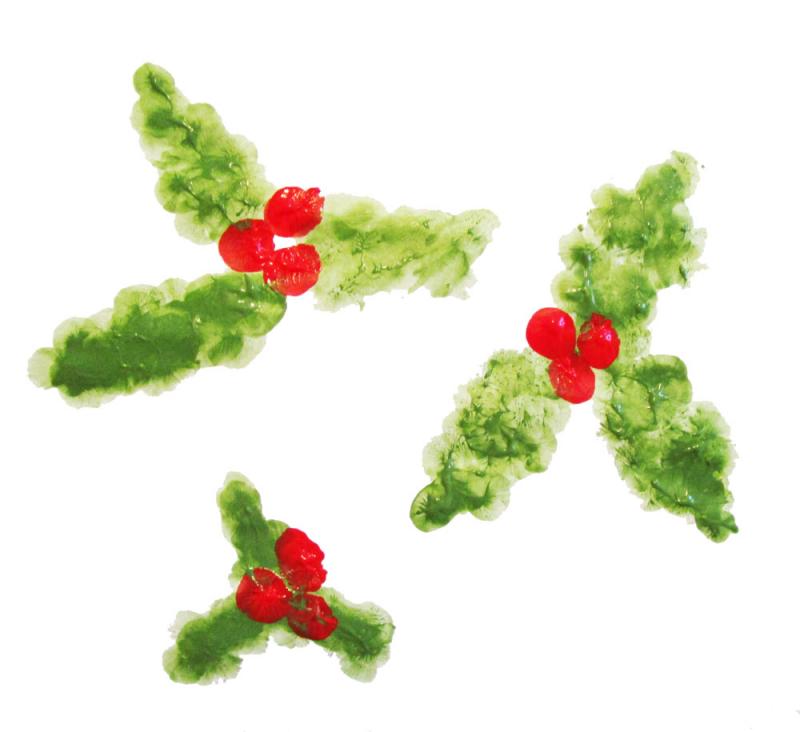
JOLLY HOLLY
Create three holly leaves using your fingertips dipped in green paint.
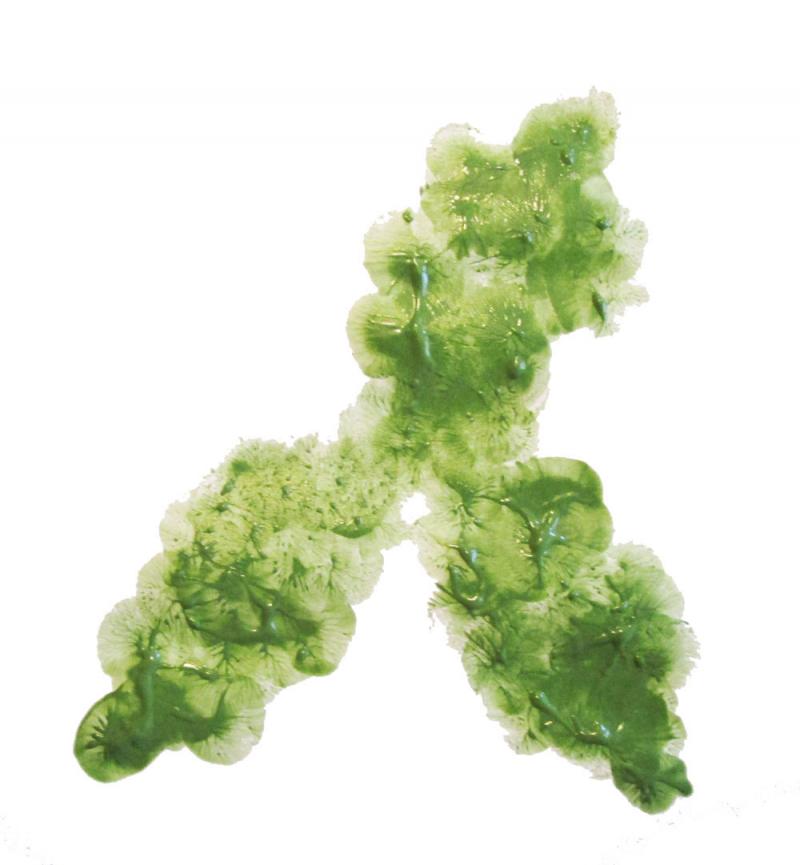
Then, add the red berries. It's just that easy. These would look lovely as decorations on holiday cards.
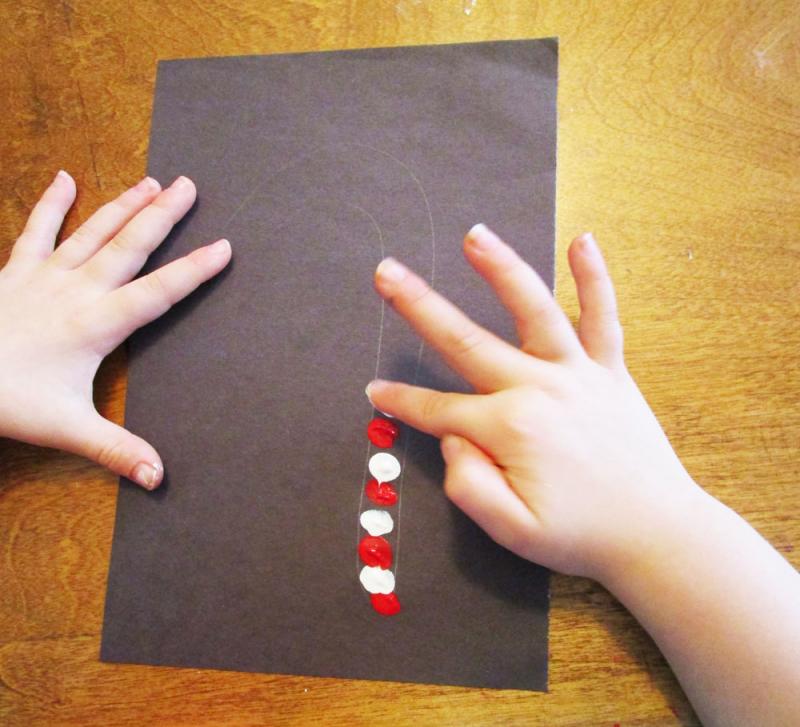
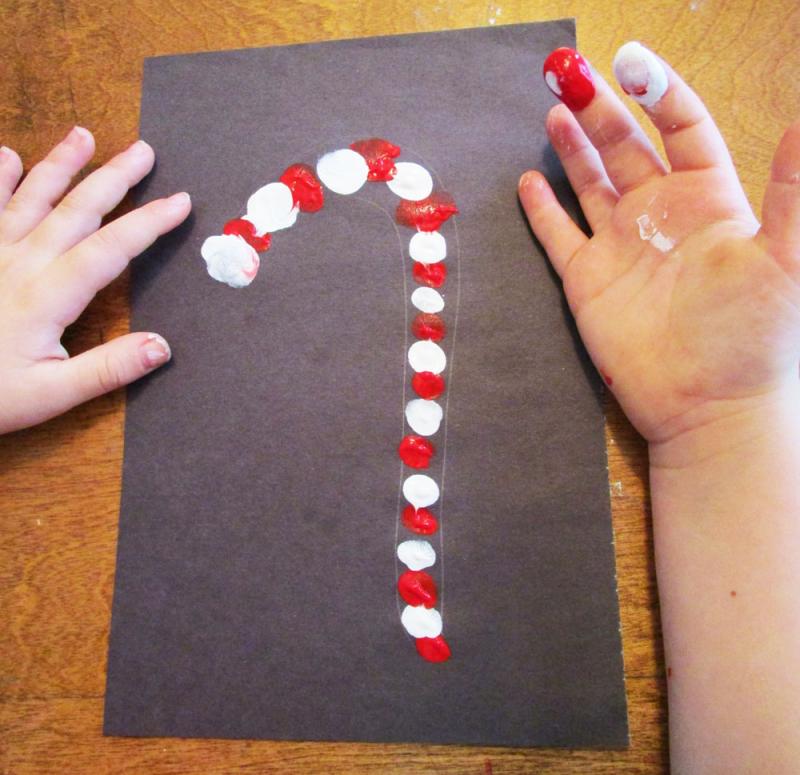
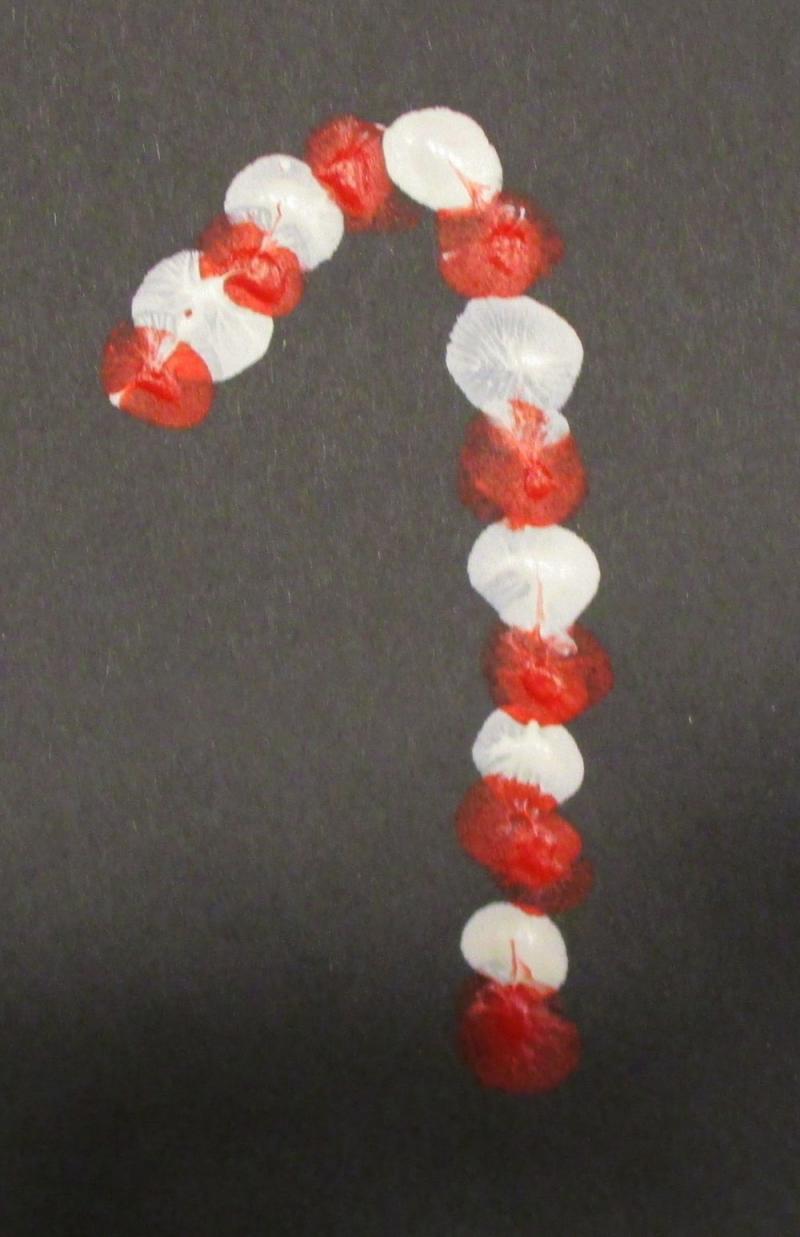
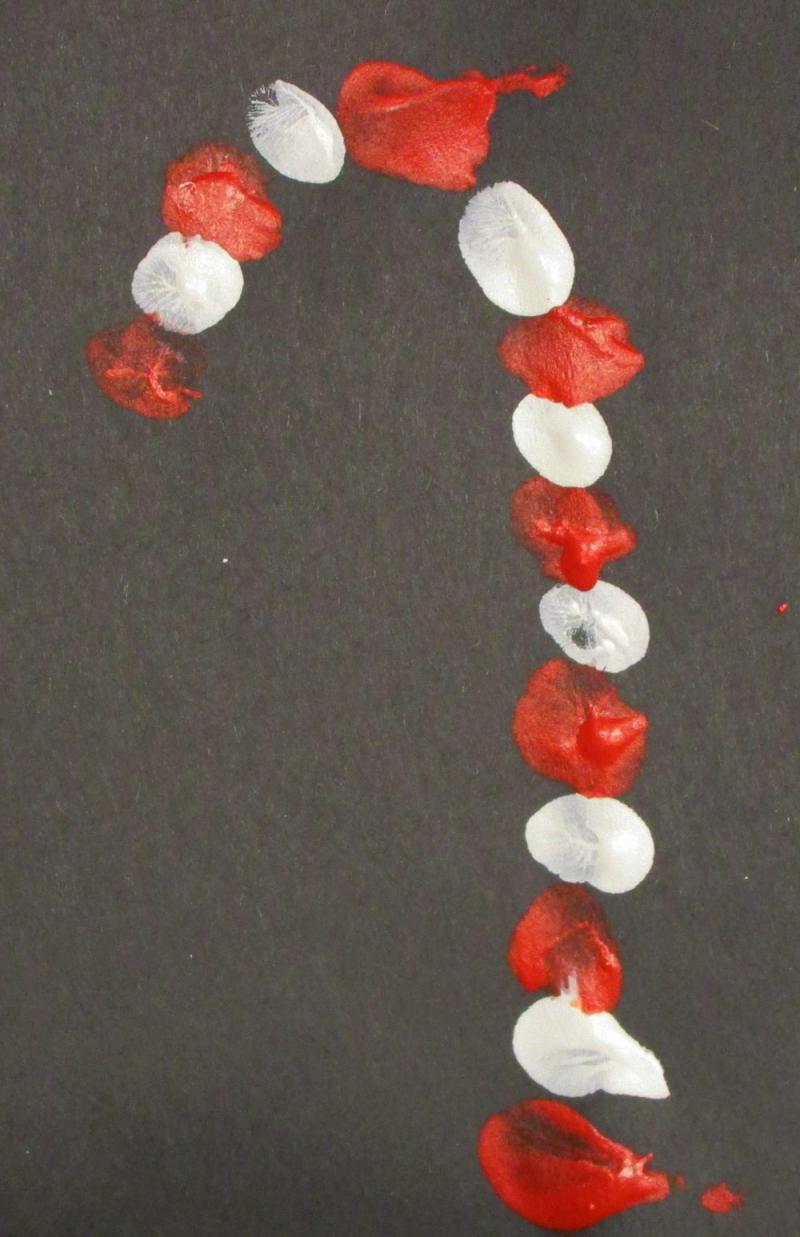
CANDY CANE
The technique here is simple. Dip two fingers into red and white paint and alternate the colours on a dark sheet of paper.
Here's one where I drew a cane shaped outline...
And here are two that were made freehand.
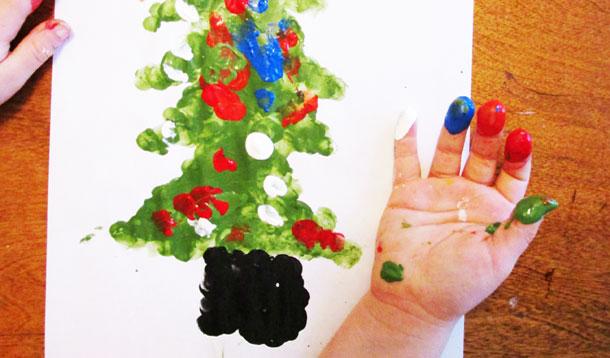
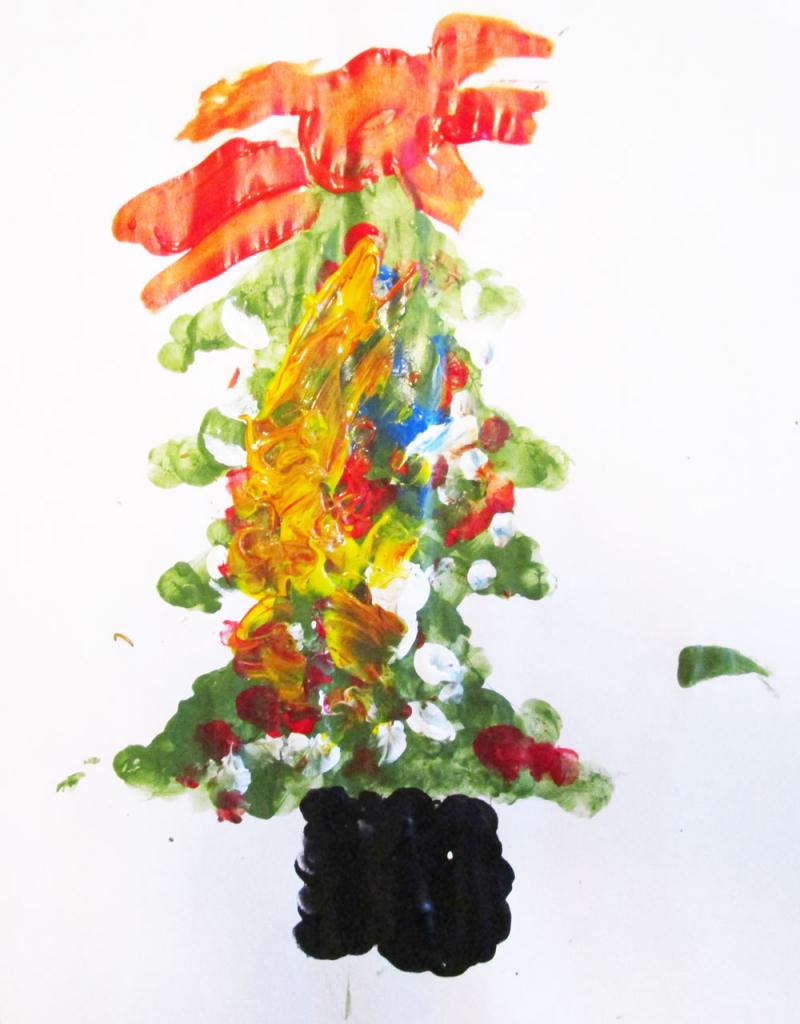
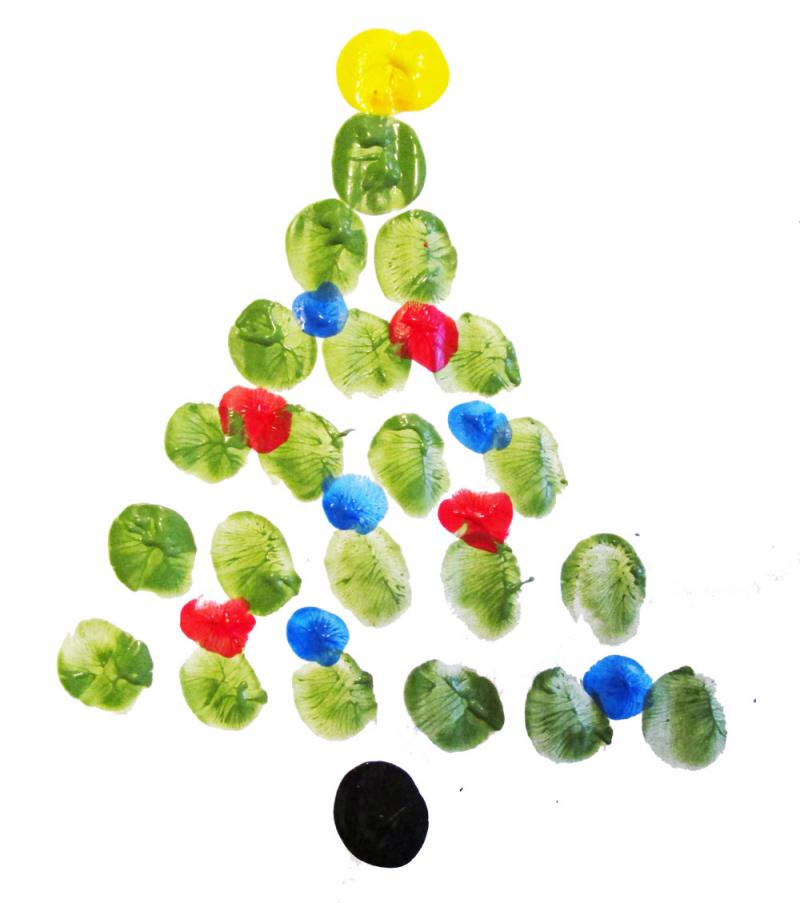
OH CHRISTMAS TREE
For the Christmas tree, I drew a quick outline of a tree on paper and let my daughter fill in the space.

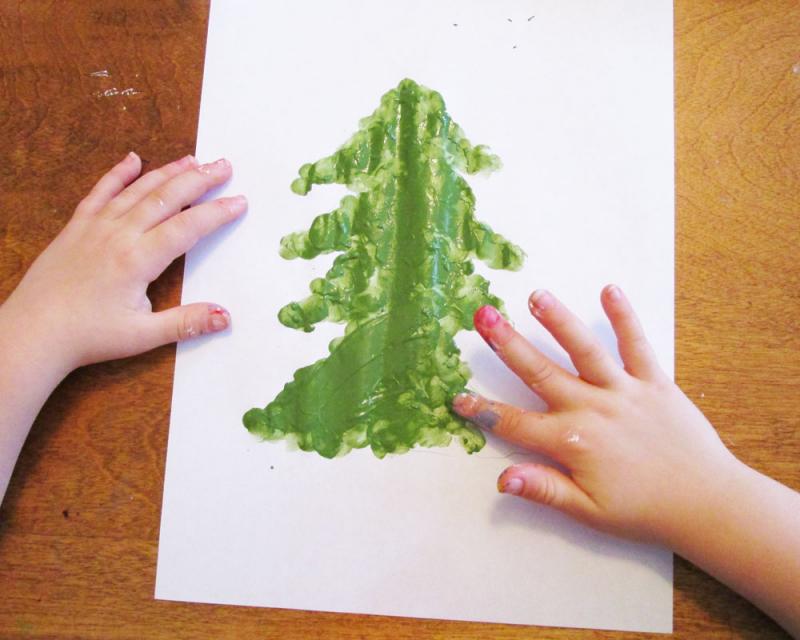
Once the paint was completely dry, she added ornaments by dipping her fingers into paint and dabbing them onto the tree.
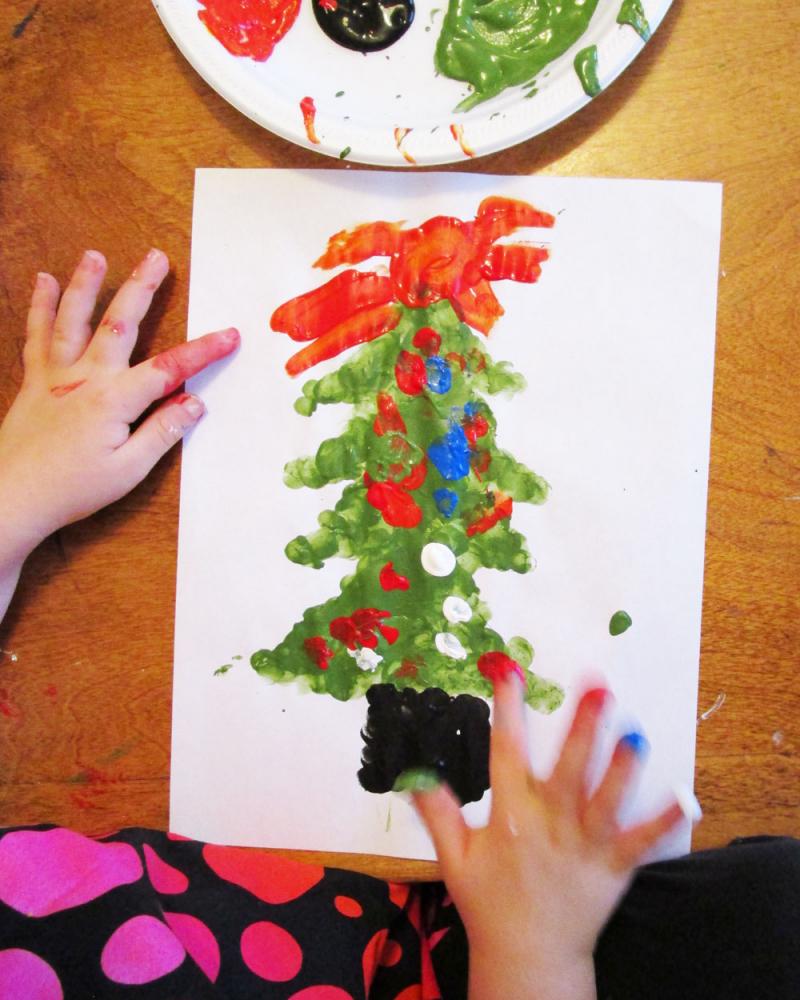
As you can see, things got a little "out of hand" but hey, it's still a tree, and a cute one at that!
You can also create a tree by making one fingerprint, followed by two, followed by three and so on.
Now go wash your hands!
If you're a bit too squeamish to give these fingerprint paintings a try, check out these paint-free Christmas crafts instead!


