
I love decorating for Christmas, so when IKEA asked me to participate in their 'Help Spread Jul' event, it was a very fast yes! Jul is Swedish for Christmas, by the way {It's one of the few Swedish words I recall from living in Stockholm}. It is no secret that I love IKEA and I look there every year for holiday decor. I have to say though, that this year the selection is spectacular.
I created several DIY projects with a red, pink, and white theme so I thought I would decorate my living room in this fresh colour combination. IKEA has a lot of pretty red and white decorations to add to what I already made, so it was easy to find everything I needed. But I did have one problem. The bookcase I wanted to style looks like this:
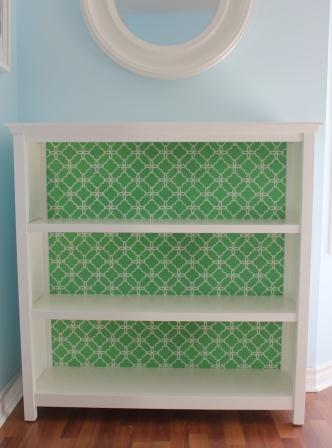
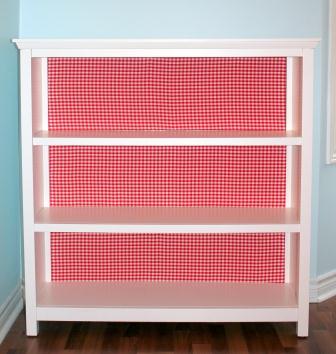
Not great for a red, white, and pink colour scheme is it? So I headed outside the Christmas decor section at IKEA to see if I could find something to make the green go away {at least for now}. I found a few options but finally settled on a fabric shower curtain. I then had boards cut to size, wrapped them in the fabric and popped them into the back of the bookcase. I know, it sounds crazy, but it looks festive, don't you think?
Next came the fun part: putting the whole look together!
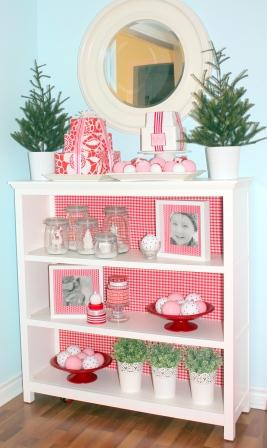


Want to create your own IKEA Christmas vignette? Here is how you can get the look:

1. JUMLS bowl $6.99
2. SKURAR plant pot $3.99
3. FEJKA Christmas tree $14.99
4. RIBBA frame $9.99
5. JULMYS ornaments $4.99 / pack of 4
6. FEJKA artificial plant $6.99
7. SLOM jars $1.99 - 3.99
8. MARGARETA shower curtain $16.99
Several other bloggers are participating the in the IKEA Spread the Jul event. You can find links to their posts on Pinterest or by searching the hashtag #IKEAdesign on twitter.
*IKEA provided me with a gift card for holiday decor shopping.
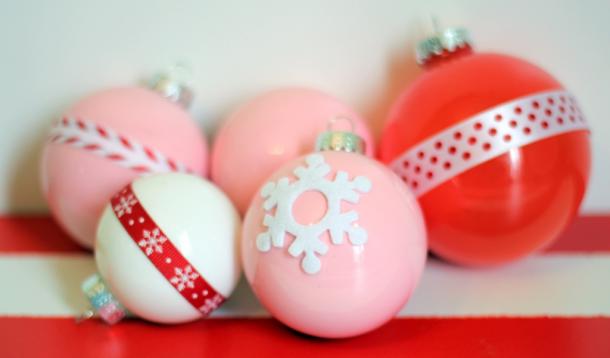
Have you been looking for Christmas ornaments in a certain colour or shade but can't find them anywhere? I had the same problem when searching for red and pink ornaments recently. Instead of giving up, I decided to paint my own. You won't believe how easy it is, or how great they will look!
 Magazine Makeover - Turn A Magazine Into A Christmas Tree In Just Minutes

All you need are:
clear glass or plastic ornaments from Michaels
paint {I used Benjamin Moore paint, but craft paint will work too}
ribbon and stickers {optional}
egg cartons for drying
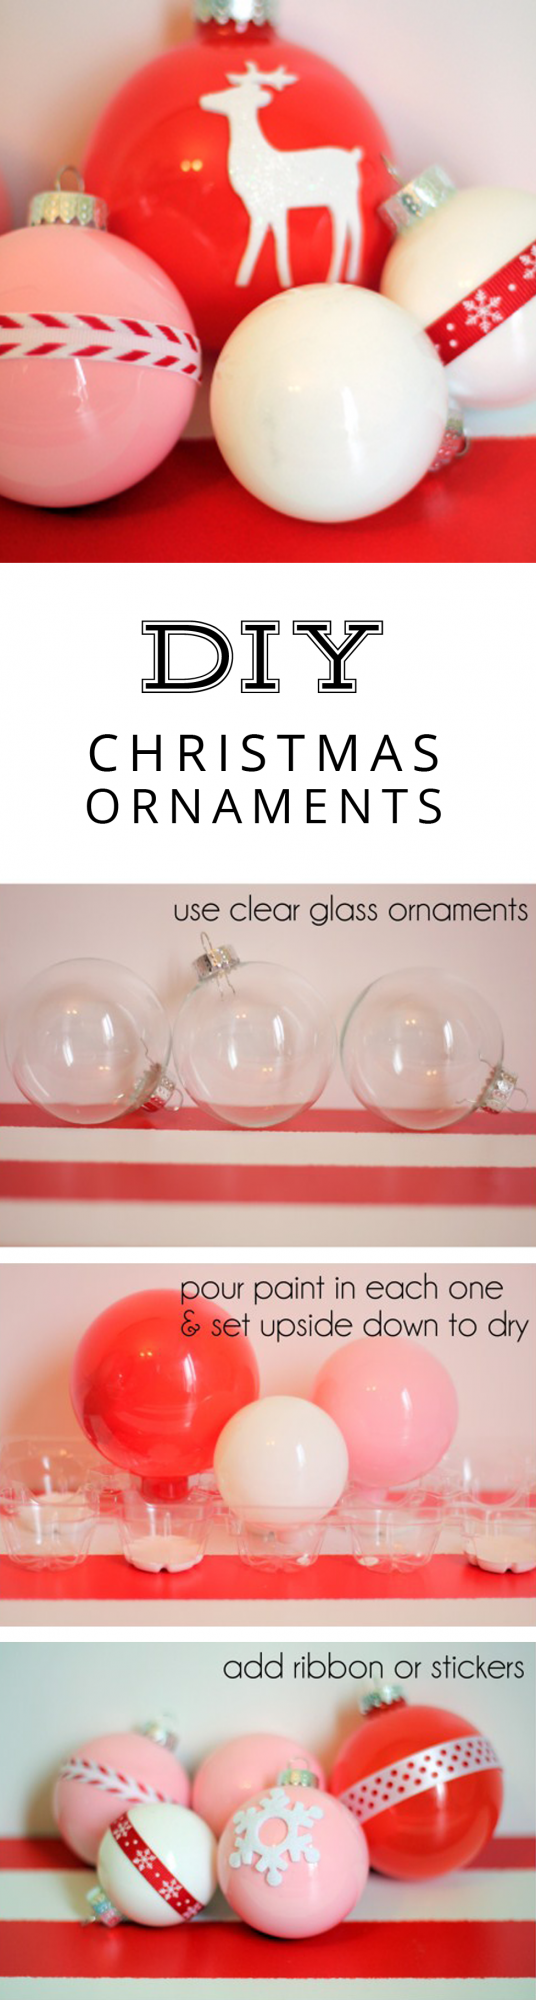
Make sure you completely coat the inside of each ornament with paint before setting upside down to dry. Allow them to dry overnight. If there are any spots that the paint missed, simply pour more paint. Once dry, feel free to add ribbon or stickers for a little fun detail.
Amazing Christmas Tree Alternatives


I love this red, white, and pink combination. What are the colours you use to decorate for the holidays?
I created these ornaments for a holiday themed segment for Cityline. I shared tips on how to modernize traditional Christmas colour schemes and tons of holiday DIY decor ideas.
I linked this up to Centsational Girl's Holiday Craft Link Party!
I love Christmas. It is by far my favourite holiday. I love decorating my home, shopping for presents and celebrating with family.
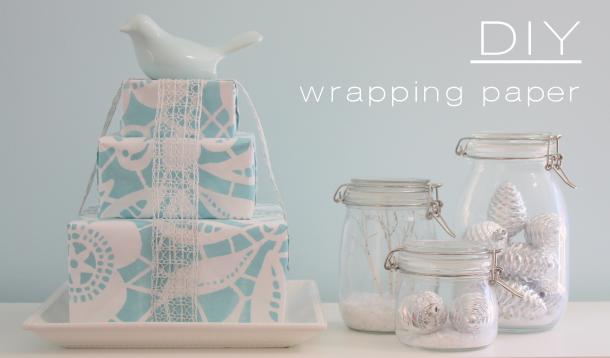
One of my absolute favourite things about Christmas is wrapping presents. I have a basement full of holiday wrapping paper but I have had a really hard time finding pretty 'grown up' paper, so I thought I would create my own. Last year, I got crafty with brown paper packages so this season, I wanted to try something a bit different.
As you may know, I have developed an addiction to Royal Design Studio's stencils. I have stenciled everything from a bookcase to a rug. I thought it would be fun to take the gorgeous Skylar's Lace stencil and create some pretty wrapping paper.
This is what I came up with:

What you need:
 stencil craft paint foam roller & paint tray white craft paper painter's tape
How To:
1. Roll out the paper onto a flat surface and tape the stencil in place over the paper. Test the tape first to make sure it will not tear the paper. If it does, simply tape it to the floor to the side of the paper. Seriously, how gorgeous is this stencil?!

2. Simply roll the paint over the stencil.

3. Let it dry...and don't panic! It will look a bit bumpy at first, but when it dries, it will be smooth:

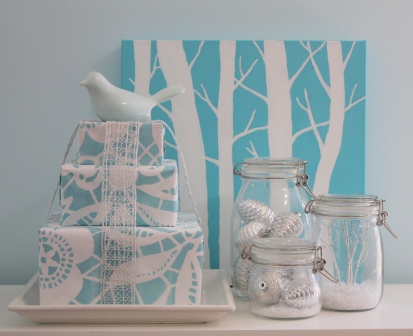
I wrapped three presents and stacked them to create a centrepiece. I love that it looks like a tiered wedding cake. I added the bird topper for a bit of whimsy and wrapped them all together in the textured silver ribbon.

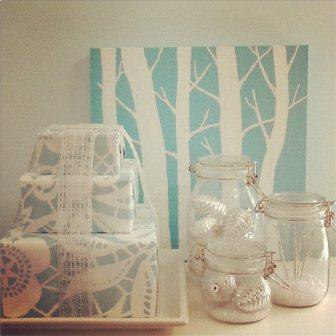
I created the faux snow globes last year for this YMC DIY video. They could not be easier: fill the bottom of each one with fake snow and add ornaments or small trees. They can be on display all winter.


How are you decorating for the holidays this year? I'd love your tips!
I linked this up to Centsational Girl's Holiday Craft Link Party!

