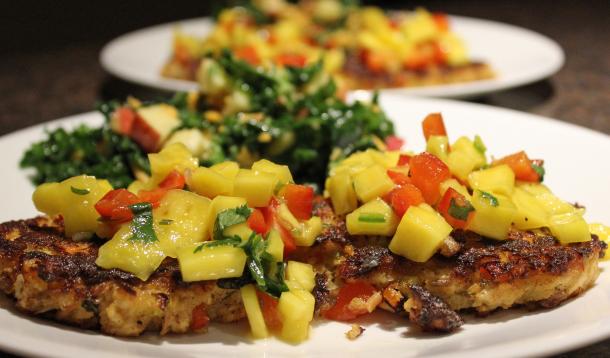
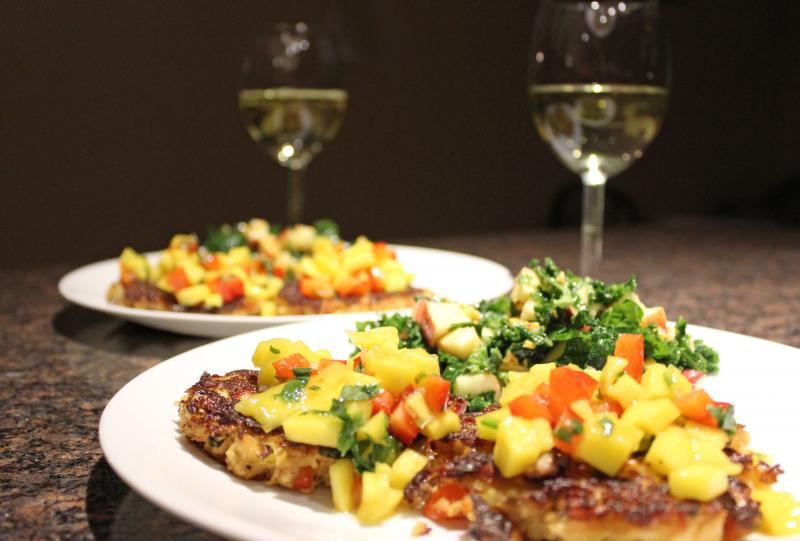
For years, I struggled to get my kids to enjoy fish. A proud Maritimer, I love cooking, serving and eating fish and seafood as often as possible, but it was a hard sell on the little ones. Adding bacon as part of a crispy topping in this fish dish worked wonders, but I knew there had to be other ways to train their young palates to appreciate all the delicious nutrition that fish offers. As it turns out, a tasty condiment – mango salsa – was the winning formula. It’s so nice to prepare and eat a meal that the whole family loves, particularly when I know it’s super healthy too.
Ingredients
For the salsa:
1 mango, pitted and diced
1/2 large sweet red pepper, seeded and diced
2 tbsp freshly squeezed lime juice
1/4 cup minced chives or green onions
1/2 jalapeno, seeded and minced
2 tbsp rice wine vinegar
3 tbsp olive oil
salt and pepper to taste
1/2 tsp Sriracha (or more, per your taste)
For the salmon cakes:
2 cans (approximately 125g each) tinned salmon (drained of any liquid) OR 1 pound cooked salmon, bones removed
2 tbsp red onion, chopped fine
1/4 cup red pepper, minced
1 egg, beaten
2 tbsp mayonnaise
2 tbsp freshly squeezed lime juice
1 tbsp olive oil
1/4 cup chopped cilantro
1/4 tsp Sriracha (or to taste)
Salt and pepper to taste
For breading:
2/3 cup Panko or other dry bread crumbs
1/2 cup flour
1/4 cup milk
1 egg, beaten
Directions
For the salsa:
 In a medium mixing bowl combine the diced fruit and lime juice with the remaining salsa ingredients, and season with salt, pepper and chili sauce to taste – you may not need much if the jalapeno offers enough heat for you.
Salsa can be made up to 3 days ahead, covered and refrigerated.
For the salmon cakes:
In a large mixing bowl combine all ingredients for the salmon cakes and mix well.
Shape salmon mixture into small patties (smaller than hamburgers to make them easier to flip) and place on a parchment-lined baking sheet.
Freeze for 30 minutes so they will be firm enough to coat and fry without falling apart.
For the breading:
In a small bowl, combine egg and milk and mix well.
Put flour in another small bowl, put Panko or bread crumbs in a third bowl.
To cook:
Heat 2 tablespoons of olive oil over medium-high heat in a large non-stick frying pan.
While pan heats, dredge the chilled salmon cakes in the flour, then dip into egg/milk mixture and finally dredge in breadcrumbs, patting gently to ensure the crumbs adhere.
Fry salmon cakes until well browned on both sides, turning once, very gently. Don’t overcrowd the pan – do in batches if necessary. If doing in batches, place in preheated 300F oven to keep warm while you finish cooking them.
Depending upon the size of your cakes it should take approximately 4 – 6 minutes per side.
Enjoy with salsa or other condiment of your choice.

Note: Once salmon cakes are fried, they can be placed on paper-towel lined plates and refrigerated until cool (if not serving immediately). Once cool, cover with plastic wrap to store in fridge for up to 24 hours. Reheat in a preheated 325F oven for about 10 minutes, until heated through.
Makes 8 large salmon cakes or 14 small ones.
![]() RELATED: Why You Should Teach Your Kids This Homemade Baguette Recipe
RELATED: Why You Should Teach Your Kids This Homemade Baguette Recipe

Most of us have many things we are grateful we learned from our mothers. My own list is long, but near the top is my love of food and cooking, which I definitely inherited from her. Growing up, we spent a lot of time in the kitchen together and one of her lessons that really stuck with me was what a joy it is to make bread. Until you’ve tried it, you might feel daunted by bread baking but fear not! It’s actually quite easy to turn out a delicious loaf with great texture and I’ve provided a very detailed step-by-step for you to follow.
This particular recipe is my favourite because it’s straightforward to make and the baguette-style loaf it produces is so tasty and versatile. Although bread baking requires patience because of the rising time, it’s a great kitchen project for little ones who will welcome the playtime while they wait between stages. You can shape it into freeform skinny loaves or fashion a tinfoil ‘trough’ to hold the dough into a traditional baguette shape for its final rise and baking.
Ingredients
3/4 cup warm water
1 tsp active dry yeast
pinch white sugar
1 tsp salt
1 ¾ cups all-purpose flour, plus extra for the counter
Directions
 Put the water in a large bowl and sprinkle the yeast and sugar over top. Let sit for four to five minutes until it’s foamy. Kids will enjoy watching the yeast activate and come to life; it’s up to you if you want to tell them that yeast is a fungus.
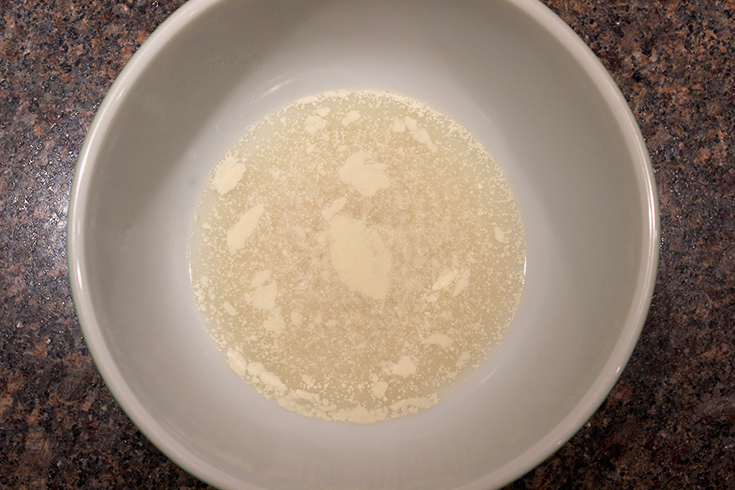
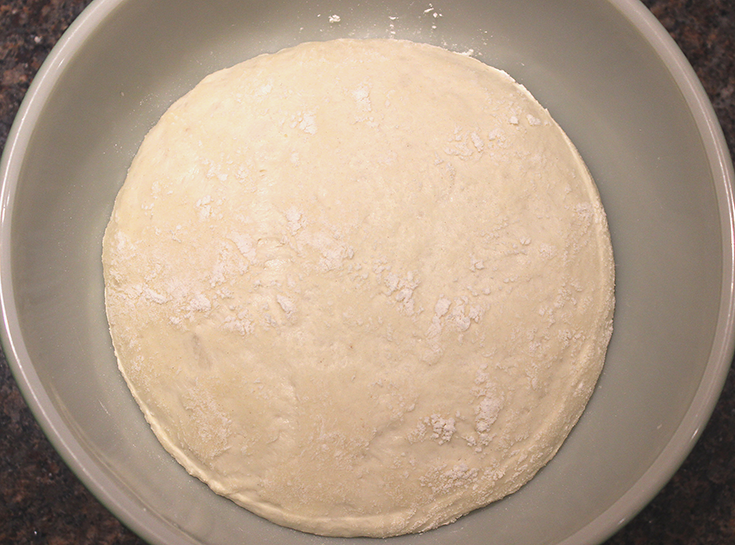
When yeast is foamy, add salt and flour then blend with wooden spoon until mixture comes together in a shaggy ball.
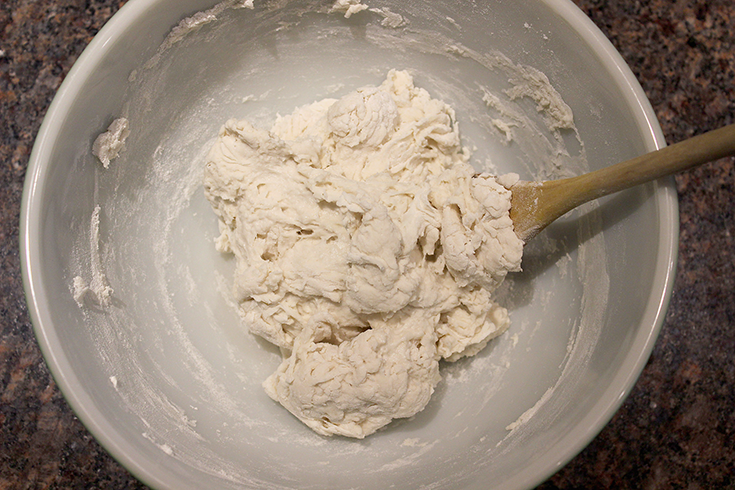
Transfer the sticky dough to a lightly-floured work surface.
Flip the dough over several times so the outside is coated with flour then knead for about three minutes. Never kneaded dough before? Here’s a description of the process: With your fingers, gently fold the dough in half toward you. Then, with the heel of your hand, push the dough down and away from you, firmly but lightly, in a rolling motion. Give the dough a quarter turn. Repeat folding, pushing, and turning steps, adding only enough flour every few turns to keep the dough from sticking to your hands and to the work surface. Continue kneading until the dough is smooth on the outside, springs back when pressed on with your fingers and is no longer really sticky.
Shape the kneaded dough into a ball and transfer to a clean bowl that has about 2 tsp of flour scattered inside. Sprinkle the dough ball with another teaspoon or two of flour and turn it to coat with the flour on all sides.

Cover the bowl with a clean towel and let the dough rise at room temperature for 2 hours, or until it has doubled in bulk. In a rush? Turn your oven on to 170F for three minutes, then turn oven off and put the covered bowl in the warm oven. The dough should double in about one hour.
Once the dough has doubled, shape your loaf by turning the dough out onto a lightly floured counter. Repeating the process that you used to knead the dough, work it gently for a few turns so that the floury surface gets incorporated into the middle of the ball, then gently roll the ball on the counter with your hands to form a long cylinder, about 12 – 14 inches long. The ends should be somewhat tapered.
The dough will spread out as it rises so if you want to preserve the long skinny shape, create a trough about 3 ½ inches wide out of a doubled sheet of aluminum foil and line it with parchment then place it on a baking sheet.
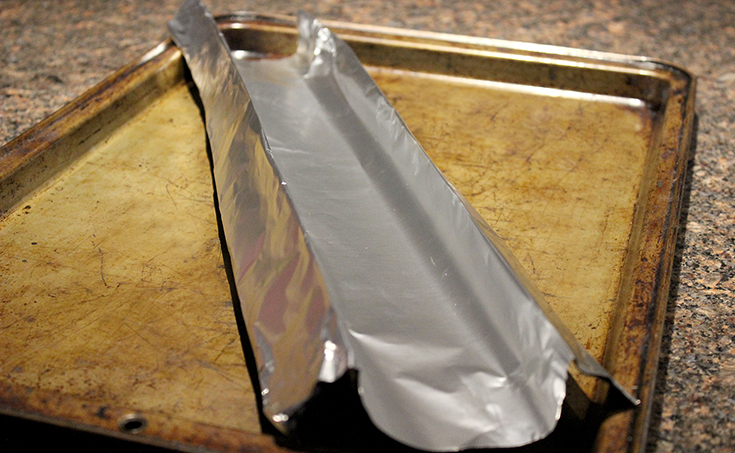
Place the dough in the parchment paper-lined trough. If you aren’t concerned about the finished shape, just place the cylinder of dough on a parchment-paper lined baking sheet.
Cover with a clean dish towel and set aside to rise at room temperature for 45 minutes; the cylinder should increase by half its size.
Preheat oven to 425F.
When the oven is up to temperature, slash the cylinder of dough diagonally at 3-inch intervals with a very sharp knife. These gashes will allow steam to escape during baking.
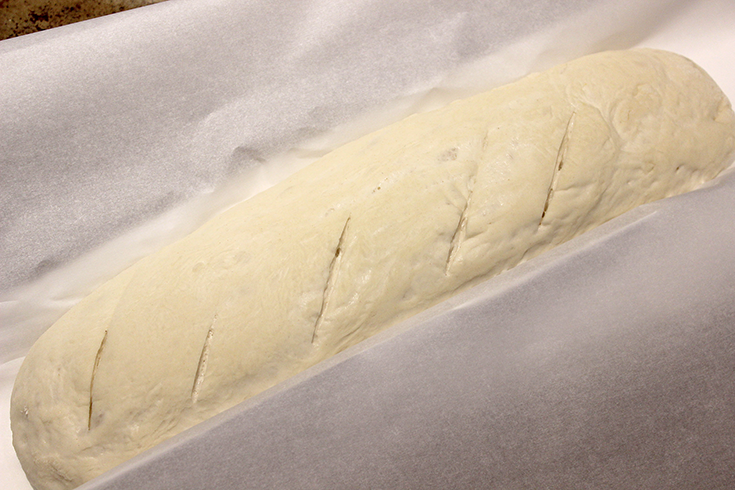
Using a pastry or silicone brush, lightly brush the top of the dough with lukewarm water. This will help it develop a golden crust.
Bake the bread for 25 minutes, or until it is golden brown and crisp. Remove from oven and cool the bread on a wire rack for at least 15 minutes before slicing and serving.
Makes one irresistible loaf.

Tacos and pizza have long been two go-to meals in our house. Everyone loves them, they’re delicious, and if you throw enough veggies on them, they can even be quite nutritious.
On their own, each is terrific, but put them together and it’s a match made in heaven. Use store-bought flatbreads (regular or gluten-free) as the base to speed things up plus they make it super easy for kids to take charge and add whatever tasty toppings they like to craft their own personalized taco pizzas.
They’re perfect for a birthday party, sleepover, or even a playdate that involves a meal. It’s easiest to set the toppings out buffet-style, but if you want to be sneaky, spread a thin layer of refried beans on first and top with cooked, seasoned meat. Picky eaters will never know the beans are there and they’ll help the meat stick to the flatbread. Of course, you can get creative and add whatever taco toppings your family likes – peppers, olives, pickled jalapenos and more!
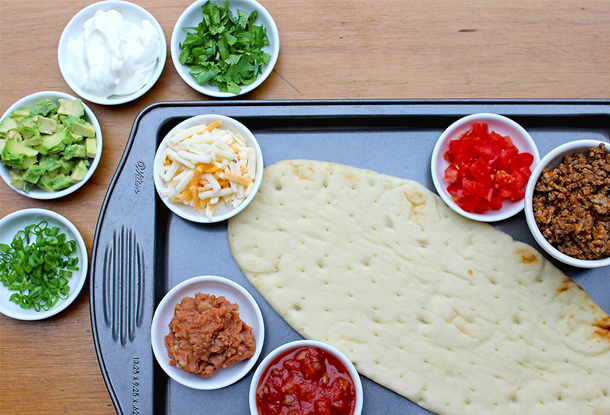
Ingredients
1 lb ground beef, chicken or turkey
1 envelope taco seasoning mix
Flatbreads (8 individual-sized or 3 – 4 larger ones, which can be cut prior to adding toppings)
1 can refried beans
1 cup diced tomatoes
1 1/2 cups shredded Tex-Mex, Cheddar or Mozzarella cheese
3 green onions, diced
1/2 cup chopped cilantro
1 avocado, peeled, pitted and diced
1 cup salsa
1/2 cup sour cream
Directions
Per taco seasoning package directions, cook the ground beef until no longer pink and add seasoning mix and water as directed. Bring to a boil and cook for 2 – 3 minutes. Beef can be prepared ahead of time and refrigerated up to 48 hours.
Preheat oven to 350F. If needed, cut the flatbreads into individual portions and place on baking sheets.
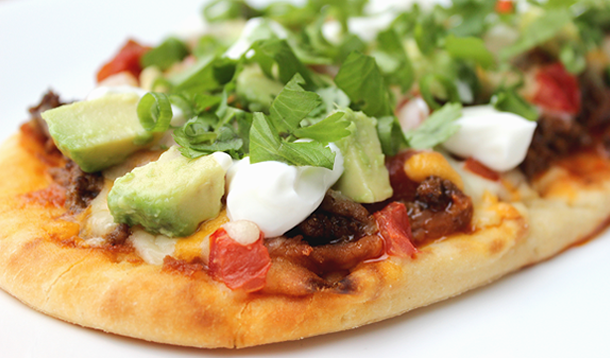
Spread a thin layer of refried beans on each flatbread and top with just enough ground beef to cover the beans.
Sprinkle tomatoes, salsa and cheese over beef.
Bake 10 minutes then remove from oven and add additional toppings as desired (diced avocado, sour cream, cilantro, green onions).
Serves 8 – 10; recipe can easily be halved or multiplied.

![]() RELATED: Homemade Taco and Dip Mix
RELATED: Homemade Taco and Dip Mix

