
Every year, I try to do something different and creative for each of my family member’s birthdays. Plastic worms crawling out of a dirt-coloured cake? Done that. Purple purse cake with blue licorice handles? Yup. Playmobil rock climbers using candy handholds on a cake resembling an upright slab of granite? Check.
I have to confess, I was starting to run out of ideas… until I turned to cupcakes. There are zillions of things you can do with cupcakes (caterpillars, flower bouquets, apples with pretzel stems and green candy leaves, just to name but three) so I am once again excited about birthday baking.
For my daughter’s special day, I whipped up a batch of her favourite vanilla cupcakes and then popped the baked cupcakes into old-fashioned paper sundae cups I found at my local large grocery store. I thinned out the buttercream frosting a little so it could be piped on to resemble whipped cream, topped ‘em with caramel sauce and a cherry and served them to the beaming birthday girl. I think she actually thought they were ice cream sundaes right up until she took her first big spoonful. You can use your own favourite cake batter and frosting recipes to make these beauties. Heck, you can even use a boxed mix, tub o’ frosting and jar of prepared caramel sauce – no judging! The birthday person will be so impressed by how gorgeous they look, they’ll never know if you cheated just a tiny bit.
Ingredients
Cupcakes
1 1/2 cups all-purpose flour
1 1/2 tsp baking powder
2 large eggs, at room temperature *
2/3 cup sugar
3/4 cup butter, melted
2 tsp pure vanilla extract
1/2 cup milk
* If you forgot to take the eggs out of the fridge a few hours before baking, don’t worry! Just put them in a bowl of lukewarm water for 15 minutes to quickly bring them up to room temperature.
Buttercream Icing
3 cups confectioners' (icing or powdered) sugar
1 cup butter, softened
1 tsp vanilla extract
2 to 3 tbsp whipping cream
Caramel Sauce
½ cup white sugar
3 tbsp butter
¼ cup heavy (whipping) cream
Directions
![]() Prepare cupcakes by preheating oven to 350F and lining one standard 12 compartment muffin tin with paper liners.
Prepare cupcakes by preheating oven to 350F and lining one standard 12 compartment muffin tin with paper liners.
![]() Combine flour and baking powder together and set aside.
Combine flour and baking powder together and set aside.
![]() In a large bowl (use a stand mixer if you have one), combine the eggs and sugar. Beat until light and frothy (2 – 3 minutes), then gradually add the melted butter and vanilla then beat for 2 minutes longer.
In a large bowl (use a stand mixer if you have one), combine the eggs and sugar. Beat until light and frothy (2 – 3 minutes), then gradually add the melted butter and vanilla then beat for 2 minutes longer.
![]() With mixer on medium speed, add half the dry ingredients. As soon as they are incorporated, add all the milk, then the remaining dry ingredients. Mix only until well combined; don’t overmix the batter.
With mixer on medium speed, add half the dry ingredients. As soon as they are incorporated, add all the milk, then the remaining dry ingredients. Mix only until well combined; don’t overmix the batter.
![]() Divide batter among 12 paper-lined muffin tins. Bake 17 – 20 minutes until tops spring back when lightly pressed with a finger. Remove carefully from pan and let cool on a wire rack.
Divide batter among 12 paper-lined muffin tins. Bake 17 – 20 minutes until tops spring back when lightly pressed with a finger. Remove carefully from pan and let cool on a wire rack.
![]() While cupcakes are baking, prepare buttercream frosting. In a stand mixer fitted with a whisk (or use a large mixing bowl and an electric beater), combine sugar and butter.
While cupcakes are baking, prepare buttercream frosting. In a stand mixer fitted with a whisk (or use a large mixing bowl and an electric beater), combine sugar and butter.
![]() Mix on low speed until well blended and then increase speed to medium and beat for another 3 minutes.
Mix on low speed until well blended and then increase speed to medium and beat for another 3 minutes.
![]() Add vanilla and 2 tablespoons of the cream. Continue to beat on medium speed for 1 minute more, adding more cream if needed to have it the right consistency for piping (a tiny bit runnier than you would for spreading on a cake).
Add vanilla and 2 tablespoons of the cream. Continue to beat on medium speed for 1 minute more, adding more cream if needed to have it the right consistency for piping (a tiny bit runnier than you would for spreading on a cake).
![]() Set aside until ready to pipe onto cupcakes; refrigerate if not using within 6 hours.
Set aside until ready to pipe onto cupcakes; refrigerate if not using within 6 hours.
![]() While cupcakes are cooling, prepare caramel sauce by putting sugar in a medium-sized, heavy-bottomed pot. Over medium heat, warm sugar until it melts. Swirl pot occasionally to ensure even heat distribution. The sugar will turn golden brown as it melts and caramelizes. When sugar is completely melted and golden, add butter. The mixture may foam up as the butter melts. Stir with a metal spoon. When butter is melted, add cream – watch for foaming again. Note that when the cream is added, the sugar will likely seize up and become a hard, sticky mass; it will melt as you continue to heat and stir the sauce (so be patient).
While cupcakes are cooling, prepare caramel sauce by putting sugar in a medium-sized, heavy-bottomed pot. Over medium heat, warm sugar until it melts. Swirl pot occasionally to ensure even heat distribution. The sugar will turn golden brown as it melts and caramelizes. When sugar is completely melted and golden, add butter. The mixture may foam up as the butter melts. Stir with a metal spoon. When butter is melted, add cream – watch for foaming again. Note that when the cream is added, the sugar will likely seize up and become a hard, sticky mass; it will melt as you continue to heat and stir the sauce (so be patient).
![]() Continue stirring until sugar has melted and sauce is thick and golden. Transfer sauce to a heatproof jar or jug and store in fridge if not assembling cupcakes within 6 hours. The sauce (which is fabulous on ice cream) will keep in the fridge for up to two weeks; it can also be frozen.
Continue stirring until sugar has melted and sauce is thick and golden. Transfer sauce to a heatproof jar or jug and store in fridge if not assembling cupcakes within 6 hours. The sauce (which is fabulous on ice cream) will keep in the fridge for up to two weeks; it can also be frozen.
![]() To use sauce that has been in the fridge, reheat gently in the microwave until just melted (but not hot). The sauce will take on a thinner consistency when warmed. Stir to thoroughly mix before pouring.
To use sauce that has been in the fridge, reheat gently in the microwave until just melted (but not hot). The sauce will take on a thinner consistency when warmed. Stir to thoroughly mix before pouring.
![]() To assemble, remove paper liners from cupcakes. Place each one inside a sundae cup and pipe room-temperature buttercream frosting on top to resemble whipped cream. You can use a piping bag or a sealed ziplock bag with a corner snipped off. Drizzle with caramel sauce and add a cherry on top.
To assemble, remove paper liners from cupcakes. Place each one inside a sundae cup and pipe room-temperature buttercream frosting on top to resemble whipped cream. You can use a piping bag or a sealed ziplock bag with a corner snipped off. Drizzle with caramel sauce and add a cherry on top.
Makes 12 cupcake sundaes.

I often think about the geniuses who came up with combinations like peanut butter and chocolate, baked potatoes and sour cream, popcorn and butter or Buffalo wings and ranch dressing. Taking two great things and putting them together is just brilliant.
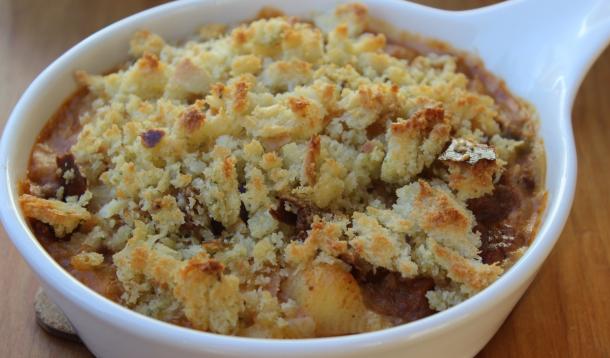
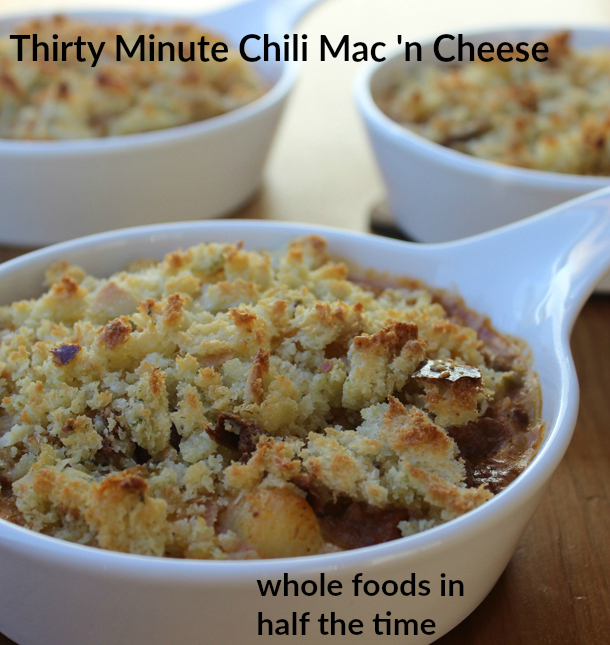
My husband loves to combine foods in weird and wonderful ways, but I really doubt that his beloved toast with jam, cheese and a fried egg on top is ever going to become an entrenched staple of North American cuisine. I do, however, think that this dish stands a fighting chance. Take the creamiest, tastiest homemade macaroni and cheese ever, mix it with your favourite chili, top it with garlicky breadcrumbs and bake quickly until it’s bubbly in the middle and crunchy on top. Absolute heaven.
You can use whatever kind of chili you like – homemade or store-bought, with meat or without. Heck, you could even skip the homemade mac and cheese and use the boxed stuff, but really…it only takes fifteen minutes to make your own, so I encourage you to give it a try. Note that this dish takes less than thirty minutes from start to finish but it can also be made ahead and refrigerated or frozen so it’s perfect for a super busy weeknight, as a belly-warmer after outdoor activities or just as the ideal comfort food anytime at all.
Ingredients
2 cups elbow macaroni or other small pasta
2 tbsp butter
2 tbsp flour
2 cups milk
Few grinds pepper
2 cups grated white cheddar (I like extra old for this dish)
1 cup fresh breadcrumbs
3 tbsp melted butter
1/4 tsp garlic powder
2 cups prepared chili, at room temperature
Directions
 Preheat oven to 350F.
In a large pot of boiling water, cook macaroni until just tender.
While macaroni cooks, make cheese sauce. Melt tablespoons butter in a medium saucepan over medium-low heat; stir in flour and cook, stirring, two minutes.
Gradually whisk in milk and pepper. Simmer, stirring often, for 5 minutes, until smooth and thickened. Remove from the heat, stir in grated cheese.
Prepare breadcrumb topping by combining crumbs, melted butter and garlic powder. Set aside.
Drain the macaroni as soon as it’s cooked to al dente (about 8 - 10 minutes), shaking it in the colander to remove excess moisture.
Return macaroni to the pot it was cooked in, then add the cheese sauce and stir well.
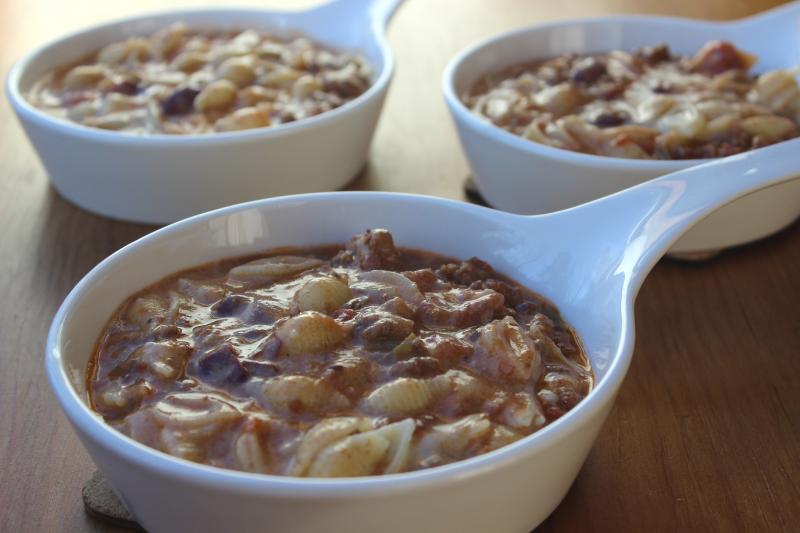
Add the chili to the macaroni and cheese and stir gently until just barely combined.
Divide the macaroni and chili among four 1.5 cup sized oven-safe ramekins (or use a two quart casserole dish).
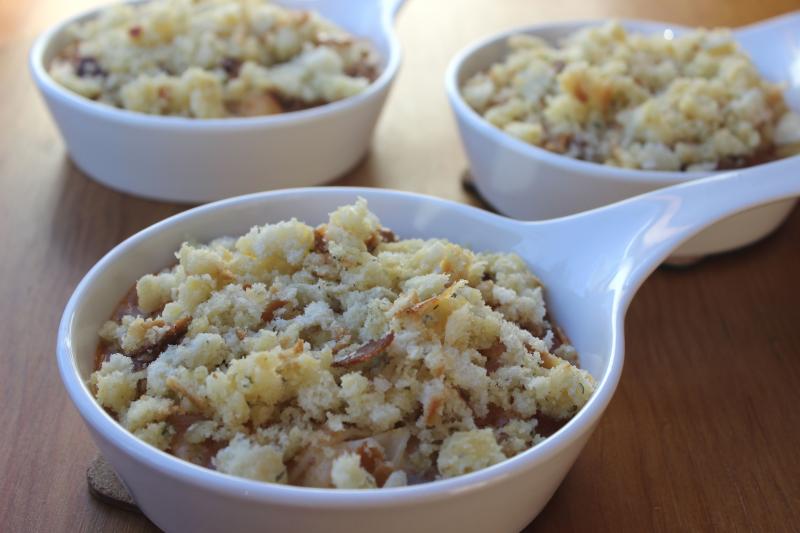
Sprinkle breadcrumb topping evenly over the mixture.
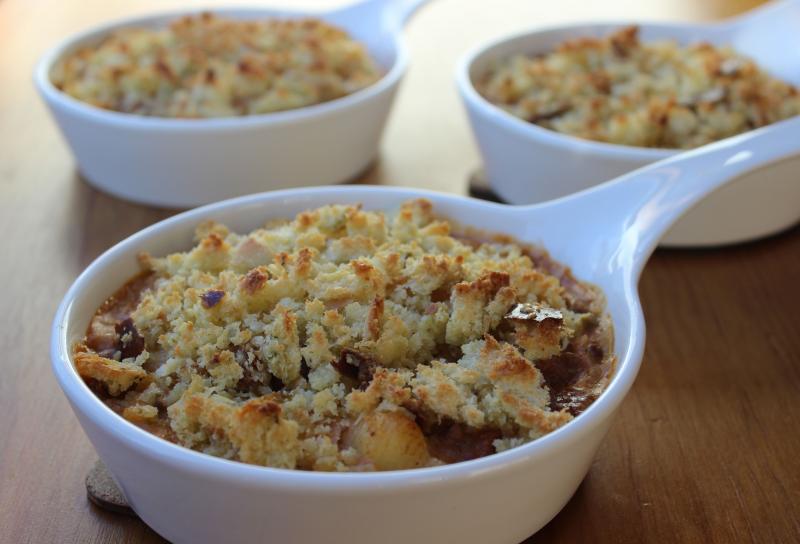
Bake at 350 until the breadcrumbs are browned and the sauce is bubbly, about 10 minutes. Let cool 2 minutes before serving.
Serves 4.

Miso soup is one of the quintessential Japanese comfort foods, and is making its way into the mainstream elsewhere because it’s both delicious and incredibly nutritious. Most miso soup recipes call for a collection of hard-to-find ingredients like kombu and dashi but this version delivers all the flavour with more common elements. Look for miso at your local farmers’ market or health food store; you can store it, tightly sealed, in the refrigerator for up to 18 months.
Miso paste is made from fermented soybeans and is packed with antioxidants, beneficial fatty acids and isoflavones that provide protection against some forms of cancer, including breast cancer. As if these weren’t enough reasons to embrace miso, how about the fact that it’s an excellent concentrated protein source as well? The one trick with miso is that it should never be brought to a boil, as this will destroy most of its nutrients, so that’s why in this recipe I recommend adding it after the soup has been taken off the heat. Similarly, fish sauce should only be added at the very end – adding it to boiling liquid creates a cloud of fishy steam that can smell unpleasant and also render the fish sauce pretty bland in your dish. Be sure to taste the soup just before serving and adjust seasonings to suit your preference. While the Japanese tend to eat this daily as a breakfast food, I love it for a fast, healthy lunch option. This recipe could easily be multiplied to feed more people.
Ingredients
Directions
 Warm the broth, chili-garlic sauce and sesame in a small saucepan over medium heat until it is just coming to a boil then reduce heat to a simmer. Whisk to blend well.
Add the nori, tofu and greens and wait 3 minutes until greens have softened.
While waiting, put the miso paste in a small bowl. Ladle 1/2 cup of the broth from the pot into the bowl and whisk to blend well and dissolve the miso.
Remove the pot from the heat and add fish sauce and dissolved miso paste. Stir gently to combine then taste and adjust seasonings if desired.
Ladle into one deep bowl (not a broad soup ‘plates’), sprinkle with green onions and serve hot.


