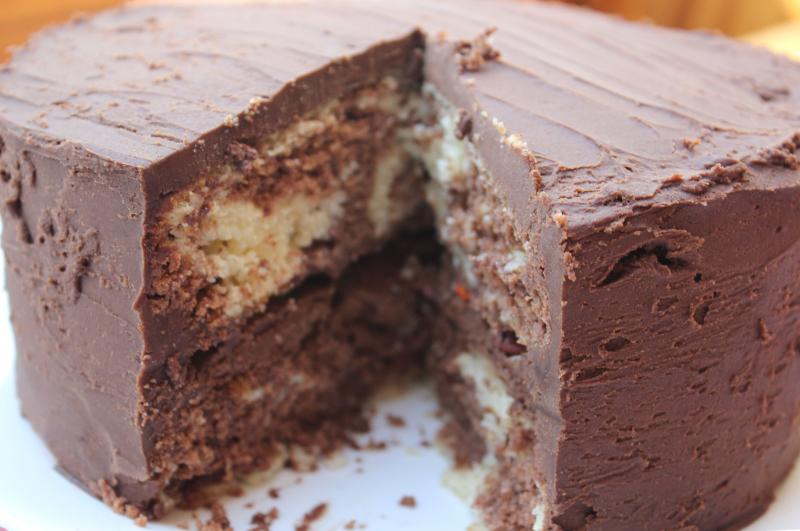
This cake was a family favourite when I was growing up. When I was really little I was more than a little alarmed by the name, thinking EVERY SINGLE TIME there were actual marbles in the cake. Who knew that the art of swirling vanilla and chocolate batter together was also called marbling? Not five year-old me, that's for sure.
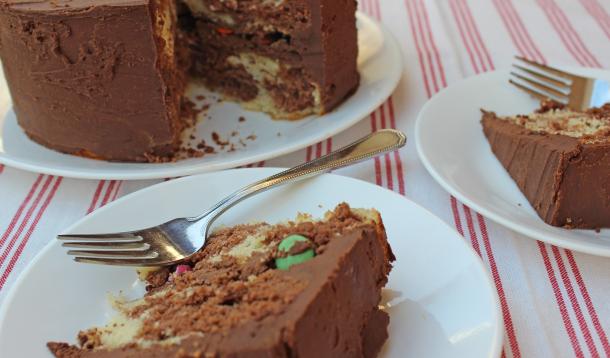
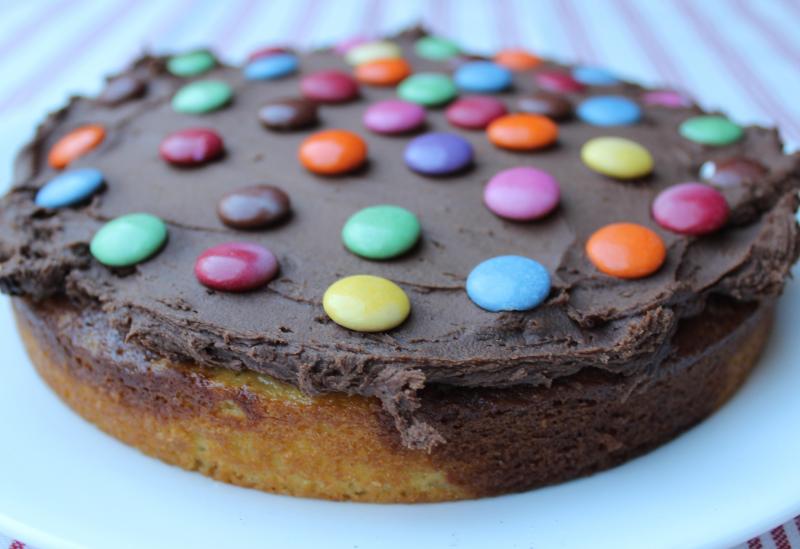
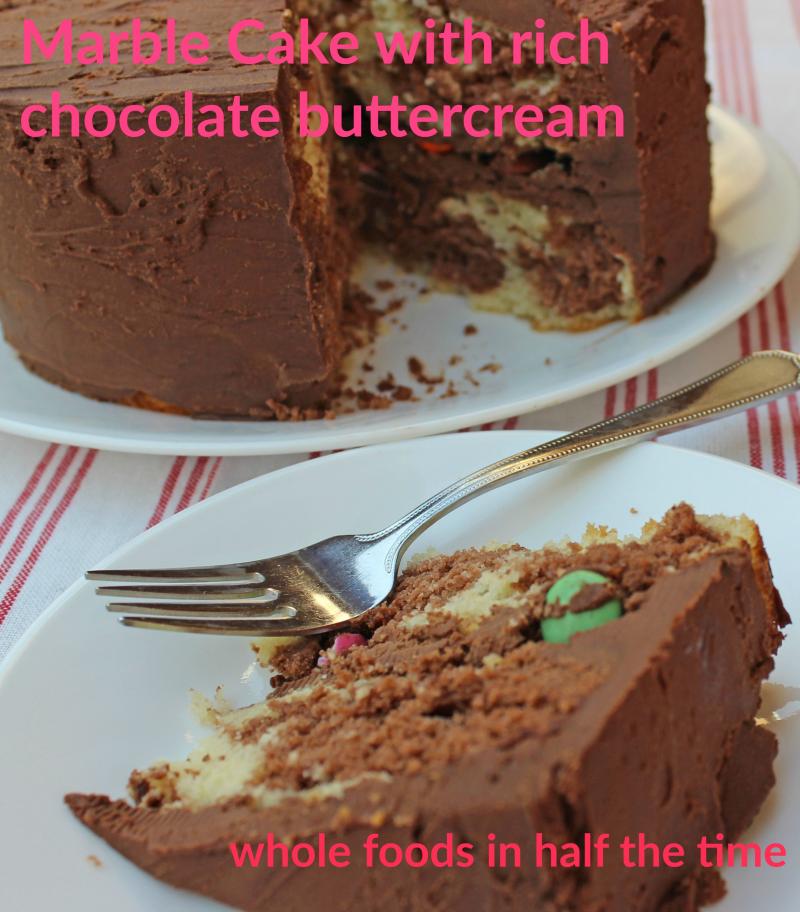
I’d forgotten all about it until a few weeks ago when my brother asked if I could bring his favourite dessert to dinner. I pondered for a moment, wondering which dessert exactly, of the many we enjoyed, it could be, but then I remembered this cake, and how much he adored it as a kid. Our mom used to bake it in an 8x8 inch square pan but I chose to transform it into a layer cake just so I could have an excuse to slather some additional buttercream and a layer of Smarties in the middle. Who knew something as simple as a box of Smarties could elicit whoops of joy from young taste testers? This cake is great for special occasions but pretty awesome for everyday fun too.
Ingredients
Cake Base
Chocolate addition
Buttercream
Optional but delicious: 1 regular sized box of Smarties
Directions
 Grease two 9 inch layer cake pans and set aside.
Preheat oven to 350F.
To make the vanilla cake base, cream together the sugar and butter. Add eggs, vanilla and milk and beat well. Add flour, baking powder and salt and beat until well blended.
Divide the mixture, placing half in a separate clean bowl.
Make the chocolate addition by stirring together in a small bowl the cocoa, sugar and salt. Add the vanilla and butter, then drizzle the hot water over top. Stir to form a smooth paste.
Add the chocolate to one half of the cake base, stirring to blend well.
Pour the vanilla and chocolate mixtures alternately into the prepared cake pans, swirling as you pour to create a marbled effect.
Bake for 27 – 30 minutes until a tester inserted into the middle comes out clean.
Let cakes cool for 30 minutes on a wire rack before removing from pans to cool completely.
Once cooled, I recommend freezing the cake layers in an airtight container, separated by parchment paper, as they will be much easier to frost and you’ll get fewer crumbs in the frosting.
While cake is baking or cooling, prepare the buttercream. Add cocoa and butter to a large bowl (use a stand mixer if you have one).
Beat together butter and cocoa powder until well blended.
Add vanilla extract and espresso powder and beat until blended.
Add sugar and milk alternately to cocoa mixture (1/2 cup of sugar and 1 tbsp of milk at a time), beating well after each addition. Repeat until all sugar and milk have been added. Add a bit more sugar (a tablespoon at a time) or milk (a teaspoon at a time) until the frosting has the consistency you like. If you make the frosting more than 12 hours ahead, it should be refrigerated. Be sure to bring it back to room temperature before using.
Assemble the cake by spreading a generous layer of buttercream on the upper side of the bottom layer. Press Smarties (if using) into the frosting.
Spread a layer of buttercream on the underside of the top layer and place on top of the bottom layer.
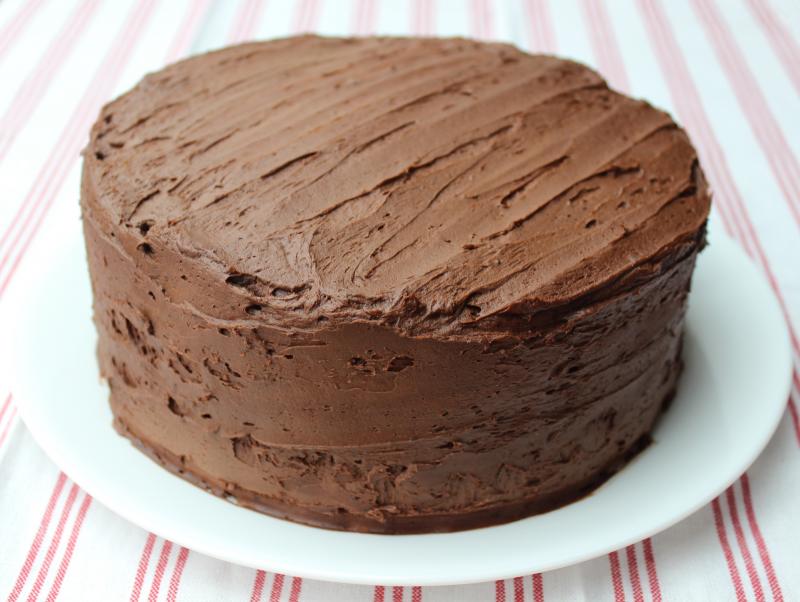
Cover the top of the cake with frosting and then the sides. Use a spatula to smooth the buttercream and fill in any holes as needed.
If your cake layers were frozen, you’ll need to allow a few hours for the frosted cake to thaw before slicing.
Store, covered, at room temperature for up to 3 days.
Serves 12, unless you’re my brother.
![]() RELATED: A Jaw-Droppingly Delicious Cookie And Cake Collision!
RELATED: A Jaw-Droppingly Delicious Cookie And Cake Collision!

