It's not quite the Twelve Days of Christmas, but we've started to decorate for the holidays. Every year I try to remember to take a shot of our Christmas tree, but I always seem to forget. This year, I'm going to capture our tree AND help you take a better picture of yours.
![]() Create Custom Bokeh Shapes With Your Camera
Create Custom Bokeh Shapes With Your Camera
Photographing a lit Christmas tree can be challenging, but these steps should help. You might need to find your camera manual to find these settings if you've been shooting on automatic all this time. (Quick tip: if you threw it out or can't find it, most camera manufacturers have manuals available for download on their websites.)
Just turn it off. Trust me. If you don't, it will wash out all the lights and look cold and flat. We're going for twinkly and warm here, right?
If you have this setting on your camera, use it. It's going to make this shot easier. (If you have a camera that only shoots in automatic mode, skip to step 4.) Set your camera to a relatively small aperture, like f/16 or higher. We will let the camera set the shutter speed, which is going to be slow. Note that this aperture will keep everything in focus, not just a selective branch or two. We aren't going for a shallow depth of field here. The smaller aperture is also what will make the lights look twinkly.
Set your ISO to its lowest possible setting. We want to eliminate as much noise or grain in the picture as possible. I know what you're thinking - if you're not using a flash in a (relatively) dark room, shouldn't we be raising the ISO to let in as much light as possible? Raising your ISO is a good option if you have limits on how slow your shutter speed is. Not the case here. The slow shutter speed that the camera picks will let enough light in. But the slow shutter speed means that you are going to need to...
This means use your tripod, Gorillapod, table or stack of books (or some combination of all of those items) and be certain that your camera is both still AND safe.
![]() Check out our 2014 Gift GuIde for Photography Enthusiasts
Check out our 2014 Gift GuIde for Photography Enthusiasts
The lights in the room, that is. Keep the Christmas tree lights on.
Here's the thing: your camera is going to set a shutter speed that is REALLY slow for this picture. Depending on the ambient light around you and how bright your tree is, it could be anywhere from 1-20 seconds, maybe even longer. Usually we're worried about such a slow shutter speed when we take a picture, because it causes blur. This isn't a real concern here - your tree won't move! If you have a self timer option on your camera (or a remote or cable shutter release for a dSLR) you might want to use that. With such a slow shutter speed, even the action of pressing on the shutter could cause some shake and blur.
Take a look at what you created. If it's too bright or too dark, you may need to adjust your aperture or your ISO. Even better, write down the shutter speed that the camera chose for you (hit the "info" button when looking at the playback of your image) and then switch to manual mode (most point and shoot cameras have this now) to replicate each settings. From there, you can play with the shutter speed until you get the precise twinkles that you're looking for.
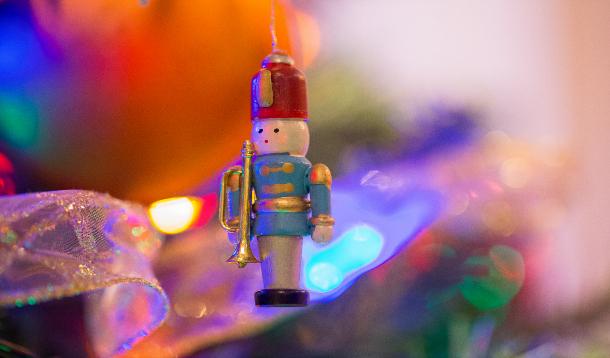
Don't forget to stop and capture pictures of your favourite ornaments up close. For this, you'll want to pick a lower aperture (f2.8 if you can get it) and a faster shutter speed to match to get that dreamy bokeh for the background.
We'd love to see the photos you take of your tree, so feel free to share a link to them in the comments! Or share them with the hashtag #YMCTree.
Here's our tree:

Happy shooting, and Happy Holidays!

