
Our momstown Victoria moms and kids did something incredible at our Little Scientists program last month! Kids love to get their hands dirty and experiment, so what better way to teach your little ones about science than with these cool and messy recipes for magic mud and silly putty.
Fun with Magic Mud
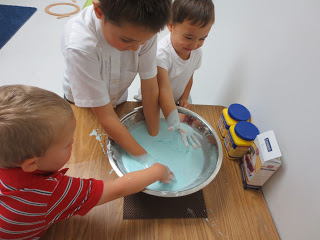
Magic Mud is a suspension of cornstarch in water that has the bizarre property of being a liquid when it is resting or moving slowly, but solidifies once you slap, punch, or squeeze it. The science behind it? The cornstarch is ground into such fine particles that the molecules line up like little plates.
We mixed up a huge blue batch, and let our lil' scientists dip their hands into it, squeeze it into a solid, and punch the surface, which would become instantly hard. Amazing! You can also do a lot of other cool tricks with Magic Mud (also known as Oobleck), like using sound waves to make it take on life-like movements, or running across a huge container of it!
Magic Mud Recipe:
Stir together approximately:
3 or 4 parts cornstarch
1 part cold water
Optional: several drops of food colouring
Getting Silly with Silly Putty!
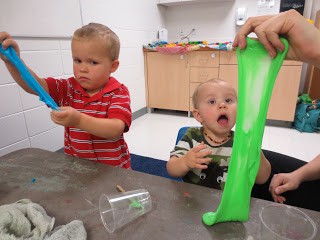
We gave each child a cup and added Elmers Glue, water, and food colouring. We mixed our ingredients and then added a solution of borax and hot water. When the ingredients started to solidify, we took them out and started to squish and knead. Voila, silly putty!
Like Magic Mud, silly putty is another non-Newtonian fluid. It has characteristics of a fluid and will form a puddle if left to rest, but it has elastic properties and can stretch and bounce, or even break if given a sharp blow. Our kiddies had so much fun playing with these bizarre properties!
Silly Putty Recipe:
1. Mix 250 ml of hot water with 7 ml of borax powder until all the borax dissolves. Set this solution aside. It is called borax solution.
2. Get a cup and mix 30 ml of Elmers White Glue with 20 ml of water. (Elmers works best!)
3. Add two or three drops of food colouring to the glue/water mixture.
4. Once the glue, water, and colouring is mixed together well, add 20 ml of borax solution. Stir this all together.
5. Take the mix out of the cup and knead it in your hands (it's messy). Be sure to pop all of the bubbles of glue. More borax solution can be added if it is very gluey. Knead it until it has a consistent texture. You now have silly putty!
Keep it in a closed ziploc bag when you are not using it.
Experiment! Does the silly putty bounce? Does it stretch? Can you break it?
Kids, do try this at home!
For more fun craft ideas to do with your kids, click here.
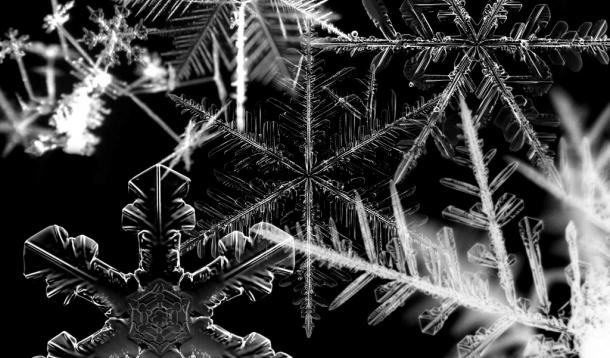
Whether there's snow outside or not, you can bring snowflakes into your playroom with momstown's Eight Great Snowflake crafts!
Tis the season for snowflake making! My kids are on a cutting spree, as they love to use scissors, and cutting snowflakes is right up their alley! If your child is learning to use scissors, give them a hand and make your snowflakes together. They will love the surprise when you unfold them and see the uniqueness of each one.
Snowflake Ribbon Craft:

The idea to hang the snowflakes resulted from a window with condensation, making our snowflakes kind of soggy when stuck to the window.
Voila! The ribbon idea hangs your crafts in a pretty way, and keeps them away from the window pane.
We all know how to make snowflakes—fold any paper in half, then in half again, and then cut out shapes and designs while avoiding the one folded side. If you want to get fancy, here are some neat instructions for the adult snowflake maker. For the kids, let them explore, as the fun of making a snowflake is the surprise of what it turns into once opened.
Make lots of snowflakes, try different paper, and different colours. We used construction paper, white printer paper, napkins, coffee filters, and card stock. The more variety, the better this craft turns out!
To hang the snowflakes, you will need some ribbon or string. Measure the width of your window and cut the ribbon that length, thread your snowflakes along your ribbon (either through the holes already there, or cut small slits and slip the ribbon through), and then tape up the two ends of the ribbon to make a very pretty window display! Pretty, pretty!
Want even more fun with "snow"? We've got crafts for every age!
Snowflake Crafts for Babies & Toddlers
Reverse paint snowflake painting
Snowflake Crafts for Preschoolers
Double-layered snowflake craft
Snowflakes turned snowman craft
Snowflake Crafts for School-agers
For more winter craft ideas, click here.

We all need a good dose of Poppy Perspective this Remembrance Day.
It’s Remembrance Day week—a time to take a minute (please!) to remember and recognize the reality and sacrifices that our veterans and current Canadian forces have sacrificed on our behalf.
Sometimes, recognizing the small things is an act of Remembrance. It’s showing appreciation for the privilege of being Canadian. This 12-11-11 take a moment to embrace this kind of Poppy Perspective.
Easy Poppy Craft to do with your Preschooler
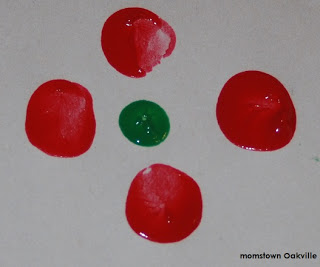
Remembrance Day is hard to explain to little ones but I wanted to do something with my kids if only to get them to start recognizing the poppy and eventually understand its significance. So this morning my toddler and my preschooler set to work on making fingerprint poppy wreaths.
What you need:
![]() White or light coloured piece of construction paper
White or light coloured piece of construction paper![]() Red finger paint
Red finger paint![]() Green or black finger paint
Green or black finger paint![]() A small plate or something to put the paint on
A small plate or something to put the paint on
Ready to paint!

Use your thumb dipped in red paint to make the outside of the poppy. Use your index finger (or adults can use their baby finger) dipped in green paint to make the centre of the poppy. Black paint works for the centre too.

Thank you to all who have contributed in making our country great, strong and free. And allowing us Canadians the privilege to believe we have a right to complain. Even though our life here is safe, sound and beyond miraculous.
Looking for more Remembrance Day crafts?
Submitted by momstown Oakville

