I am always trying to one-up myself each Christmas. I love decorating for the season and anytime I can incorporate something new, I jump at the chance. One challenge I had never taken on, was working with real cedar. That is, until my husband surprised me with a bundle.

Although I had always talked about splurging on real cedar each year, he was finally calling my bluff. I just stood there, staring at this deliriously scented gift. I had no idea what I was doing.
After doing some research, I was ready to dive in. I had read that before wiring your garland you should soak the branches to give it a longer life. So I started running the bath, prepared to give my cedar branches a full spa-treatment.
With gardening gloves on, and clippers in hand, I snapped the twine. To my surprise, a pre-wired garland unraveled, ready to go. Although I was a little disappointed that I wasn’t going to have the challenge to wire it myself, it gave me a glimpse into how the pros do it. Here is how you treat, and wire cedar garland…
If you have purchased loose cedar branches, the first thing you want to do is let them soak in water for a couple of hours. Let them dry before wiring.
Lay your branches out along the floor, each pointing in the same direction and overlapping each other.
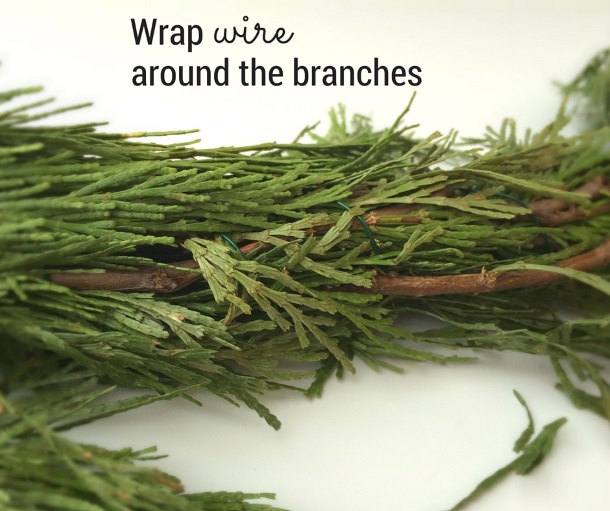
Cut a piece of twine, (preferably green or black in colour), the entire length of your garland. Try to place the twine as close to the branches as possible.

Using green floral wire, wrap it tightly around the branches and twine, connecting each branch. Again, conceal the wire as much as possible within the greenery.
With a spray bottle of water, mist your garland daily. The garland will last longer if used outdoors in the cold. If you decorate the inside of your home with the garland, it will last a couple weeks before drying up, due to the warm, dry air.
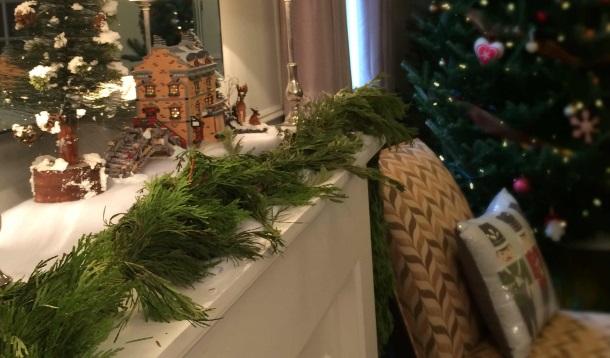
Our cedar garland added a beautiful scent and a special touch to our Christmas décor. Although it shed its needles a bit and only lasted a couple of weeks, I would add this natural element to our home in the future. Next time, I plan to beef it up a bit by adding some extra branches in the middle of the garland.