You know those situations when your house is a complete disaster and everyone's like "I'm hungry, feed me"? That was me all weekend. I have a few recipes that serve as the ermergherd what do I make butt-savers. One is my pasta with olive oil and garlic (you literally can't go wrong with that recipe cause it has infinite possibilities). Chili Cheese Fries are another.
It's great, because 1) nobody argues with French fries for supper. Nobody. 2) You can make this one in 20 minutes. 3) You can keep cans of chili for dinner emergencies, or individually freeze small quantities of your own favourite chili whenever you make it for this purpose. 4) Did I mention these chili cheese fries are ready in the same time it takes to bake the French fries?
I don't always make chili, but when I do, I have enough to feed a small army, so this is a great way to use it up.
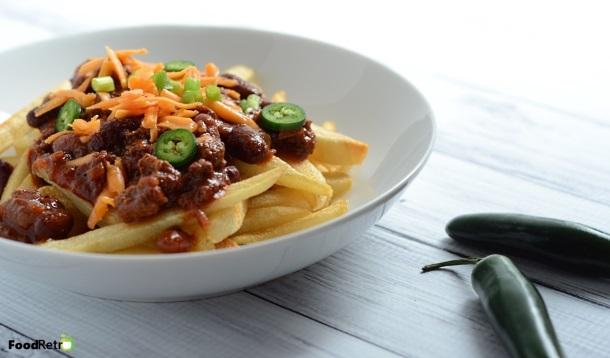
A few fries, a sprinkle of cheese, and a heap of chili make a super satisfying comfort food meal. And I bake my fries - they still turn out crispy, and you can feel less guilty about treating yourself to a few fries once in a while.
Ingredients
1 can of your favourite chili (or two cups homemade)
1 cup sharp grated cheddar cheese
1 (650g) bag of French Fries
Olive oil, salt & pepper
Jalapeño, sour cream, and scallions for garnish (optional)
Directions
 Preheat oven to 450F.
Toss fries with a little bit of olive oil and then sprinkle with salt and pepper. Spread in one flat layer on a nonstick cookie sheet. Bake for 15-20 minutes, or until desired crispiness, turning once.
Heat up the chili in a small saucepan till simmering and hot all the way through.
Transfer fries to plates and top with hot chili, cheese, and your favourite extras.
Enjoy!
![]() RELATED: A Recipe For Wendy's-Inspired Chili In The Crockpot!
RELATED: A Recipe For Wendy's-Inspired Chili In The Crockpot!

So this all began a few years when I lost my job and therefore had no reason to come within close proximity of Pam’s Coffee for my one guilty pleasure: a chai tea latte, 1% milk, no extra cinnamon.
I know, I know, there are chai bag teas. But they are not the same. You and I and everyone knows that no matter how long you boil a chai tea bag in a saucepan of milk, it will never have that infused chai flavour. Right? Right. Of course I'm right. It's a bag, holding in all that flavour goodness.
I needed a powder. An instant tea powder, one that would dissolve into milk, with all the intense spice flavourings I was accustomed to with my latte. In theory, to make it was stupid simple, because you need: milk, seasonings, sugar, and a tea powder. So I set about making my holy grail of winter drinks and came across the sort of hiccup that only an American living in Canada could experience.
Canada doesn't sell unflavoured, unsweetened tea powder.
So... Fair warning: you will have to cross the border for this recipe. But I know a ton of people do this (or know someone else who does this), so it shouldn't be a huge setback for most of us. Just go shopping at the nearest Super Walmart or Target and pick you up a few glass canisters of unsweetened tea powder. Or shop for it online - Amazon.com can ship to most places in Canada. Buy at least three and make the trip worthwhile. It won't go bad :)
I published this recipe ages ago on FoodRetro and it's been a big hit. But I never just rest on my laurels here. One of the only downsides to the original recipe was that I used granulated sugar, and while that doesn't sound like such a big deal in and of itself, the grains were heavier than the rest of the mix, and the sugar would, over time, sink to the bottom of the jar. This would require you to shake or mix it up periodically. I've made this one with powdered sugar, and that one stays blended much better, but it takes up more volume.
P.S. I'm working on a zero-cal one with stevia too, but believe it or not, the stevia overwhelms the flavours of the seasonings - stevia is all I tasted. So that one will probably be a bit of a work in progress requiring a lot of retooling to balance the sweetness and the spice. If you want to try it your own shot with other more neutral-tasting zero calorie sweeteners and have good success, please let me know in the comments!
You'll get a couple of batches out of every cannister, and every batch is approximately 32+ servings, so order extra if you'd like to make some to give away - it's a great alternative to making homemade hot chocolate mix as gifts for teachers and friends.
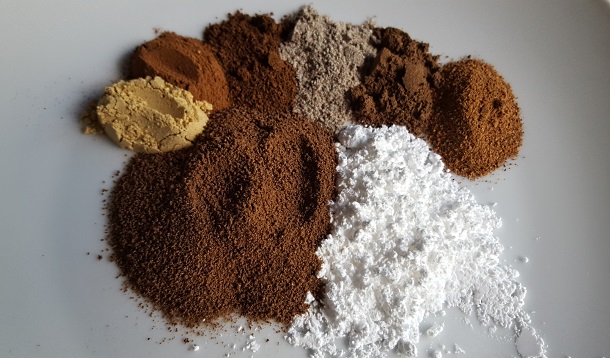
2 cups slightly rounded instant tea powder
2 1/2 cups powdered sugar
2 rounded teaspoons ground ginger
2 rounded teaspoons ground cinnamon
1 rounded teaspoon ground cloves
1 rounded teaspoon ground cardamom
1 rounded teaspoon nutmeg
1 rounded teaspoon allspice
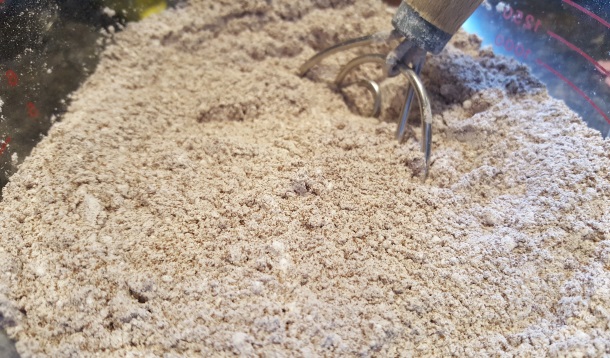
Mix all of the ingredients and store in a VERY DRY airtight jar. Make sure the jar and its ingredients stay dry, or you will end up with instant tea when you don't want it!
Mix the powder in hot milk (or alternative milk) to taste, approx. 1-2 tablespoons per mug

![]() RELATED: Epic Eggnog by the Cup
RELATED: Epic Eggnog by the Cup

Do you stress over cooking holiday meals, because you only cook a turkey, leg of lamb, or prime rib once a year? Are you constantly Googling cooking time guides? Here's a quick and dirty guide to being able to tell when your food is done... and cooked to perfection.
One advance tip: Remember, when using instant-read thermometers, the temperature taken at the time of reading will not be the final temperature of meat. Temperatures will increase about another 5 degrees Farenheit (about 3 degrees Celcius) or so after being removed from the oven as it rests. So if you're a mere couple degrees under "done"... take it out!
Most people overcook chickens because a lot of recipes say that the temperature should be 160F (71C), which results in an overdone bird. The problem is that a perfectly cooked, juicy chicken breast takes less time than the thighs.
Using an instant-read thermometer: insert the thermometer in the section of skin that separates thigh from breast. Slide the thermometer in along the inner thigh until you touch the joint. Withdraw the thermometer from the bone about 1/4 inch, wait 5 seconds, and check the reading. The correct temperature, taken at this location, should be 140F (60C).
Without a thermometer: chicken is a little more difficult than turkey to determine without cutting open along the leg, but the easiest way to to tell is to check the juices inside the cavity. They should be clear and streaked with dark red--and there will not be much of it, unless you added liquid. An undercooked bird's juices will be cloudy and pink-red. An overcooked bird's juices will be completely clear. Thigh meat will still have a little pink to it, but pink does not equal raw.
If you prefer your thighs to be more cooked, sever them at the joint and return them to the oven for five minutes, and keep the rest of the chicken warm.
To get a ballpark estimate on cooking time for planning's sake, It's ABOUT 12 minutes per pound when the turkey is unstuffed and fully thawed. Unstuffed turkeys between 9-18 lbs (approx 4.08-8.16kg) will take 3 to 3.5 hours at 325F. Larger turkeys, 18-22 lbs (8.16-10kg), will be about 3.5-4 hours.
Like chickens, the dark meat of the turkey takes longer to be well done than the breast meat, but because of their size, the time it takes is much more pronounced! Help slow the cooking time of the turkey breast by covering just the breast portion with oiled aluminum foil for about 2/3 of the cook time.
Using an instant-read thermometer: The temperature of the dark meat should be 140F (60C) with an instant read thermometer, taken in the same location as in a chicken--close to the thigh joint, but not touching the bone.
Without a thermometer: Like in a chicken, juices only within the cavity will be mostly clear but streaked with a little red. Juices from the breast will run clear.
Legs of lamb are awkwardly-shaped pieces of meat--impossible to roast to one uniform temperature. So don't even try! Like beef, lamb can be done to varying degrees of doneness to people's preferences, so use the shape and the location you cut from to please everyone.
Using an instant-read thermometer: Insert the thermometer into the thickest part of the meat, making sure to not contact bone. 125F (52C) is medium rare; 130F is medium
Without a thermometer: More guesswork is involved, but there are some key indicators... when blood begins to leak onto the surface of the meat, you have a good indication that heat has begun to penetrate the middle. At this point, the lamb is rare, and will move to medium rare within a few minutes. When pressed with a finger, at medium-rare the meat will have a texture approximately the same as the pad of your palm at the base of your thumb as you make a circle that touches your middle finger to your thumb with a relaxed hand. At medium, it should feel like the pad at the base of your thumb when you touch your ring finger to your thumb.
I strongly recommend a thermometer for lamb, since the touch-test can take some practice to be comfortable with!
A well-cooked prime rib can be a thing of true beauty in the home-chef's cooking repertoire, but it can be a tricky thing to master.
Low and slow is the name of the game to prevent the outer edges from cooking too much faster than the inside. Be prepared to invest a good chunk of oven time at 225F. Your oven's actual temperature will dictate time some depending on whether it runs high or low; you know your equipment best. At low temperatures, whether your cut has bones or not should not affect the overall cook time per pound.
You're still going to look at a very rough ballpark of 24 minutes per pound at 225F, give or take a minute or two depending on whether your oven runs high or low.
An instant-read thermometer is an absolute must. Since the meat will continue to rise in temperature as it rests (and you will let it rest, right?), for a perfect medium rare, you must pull the roast out at 115-120F. For medium, the digital readout should be 125-130F.
Do not pre-sear the meat. Let the meat rest outside of the oven while you're raising it to its maximum temperature (500F or so, depending on your oven) and then stick it back in to develop the crust. It's less likely to overcook the outside. I learned this awesome tip years ago from the prime rib king at Serious Eats, and it works.
No matter what you celebrate, treat yourself to some homemade eggnog to stay sane, and have a happy holiday season!

