It is no secret, I love crafting. My girls (the big kids) also love crafting. It is a creative and productive activity. Any birthday party we host, a craft activity is part of the entertainment and you will take that craft home in the loot bag! This week's dream catcher DIY craft re-purposes things around the house, making it both creative and eco-friendly. Easy and unique—this craft is gift-worthy.
Aside: This crafty DIY is shared with us by Dara of http://designherco.com/ (Tweet her at @designherco)
This is what you’ll need...
(Hint: This is a perfect project to raid your odds & ends supply stash, and lot of broken jewelry):

Embroidery hoop (the size is your choice)
3 wooden skewers or long twigs
Assorted ribbons, twine, yarn, cord
Assorted charms and findings
A few pieces of chain (optional)
A few feathers (optional)
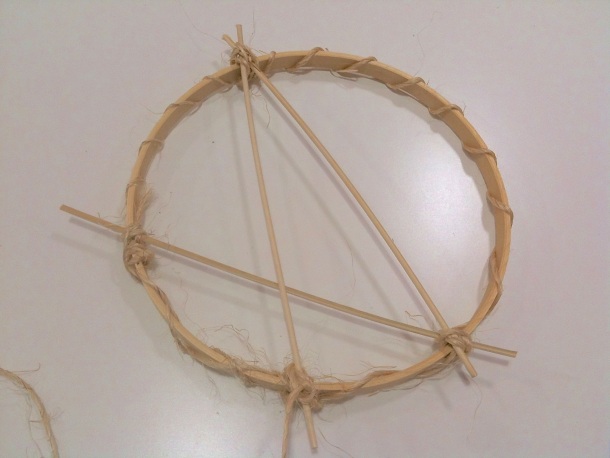
Start by breaking the skewer so they’re just longer than the embroidery hoop when situated at the angle you want. Using twine or yarn, wrap the length around the hoop, securing the skewers in place as you go. Tie a knot around the hoop once complete.

Tie the assorted pieces of ribbon, twine, yarn and cord along the bottom half of the hoop with a basic knot.

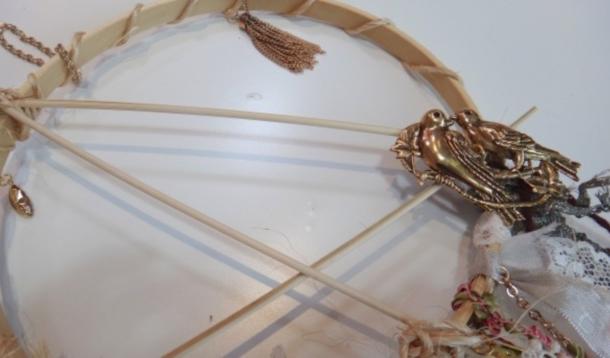
Add charms to the bottoms of any strings that aren’t sitting right to add weight. They can also be added anywhere you see fit.

Add charms randomly to the web of the hoop. You can use string, twist ties, a glue gun, or jump rings to fasten in place.

Voila! Practical and chic is possible!
It’s so important to push the envelop with your children, and delve outside the world of Popsicle stick boxes, and in to a project which challenges them to create something that you can both treasure forever!
*DesignherCo is a Toronto area craft studio offering 6 week craft sessions—for adults and kids, birthday parties, school break camps, and more.

