Growing up in the 1970s meant decorating for Halloween was simple. My mom and I would scoop slimy seeds out of a pumpkin, and I would try (unsuccessfully) to carve a straight set of angular features into the hard orange flesh without slicing off my fingertips.
In addition, because we lived at the end of a long, dark and largely uninhabited road, we rarely - if ever - welcomed any trick-or-treaters. Not that we didn't try. Remarkably, repeatedly screaming “WE’VE GOT CANDY!” at the top of my lungs from the end of my driveway didn't amount to much. Inevitably, any kids in the vicinity had to drag their crinkly homemade costumed bodies into their fathers' station wagons (me included) in order to be shuttled to distant taffy-distribution houses.
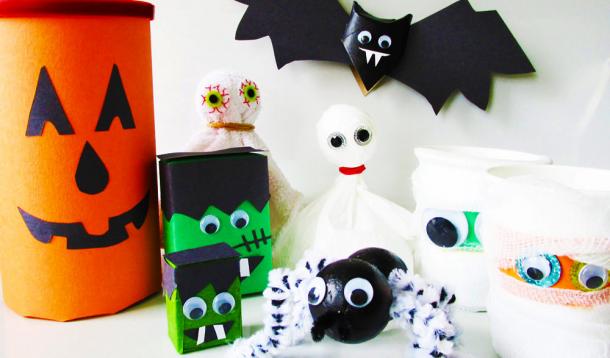
I’m all about holding onto 1970s holiday minimalism, which is why you won't find blow-up ghosts, animatronic goblins, or spooky sound effects at our house on October 31st. What you will find is butchered pumpkins along with a handful of humble homemade decorations.
If you’re looking to keep it simple this Halloween, you will love these quick, easy and cheap crafts you can make with your kids using items you probably already have around your home.
I came up with the idea for these little ghosties while in the shower. Little did I know my daughter would latch onto the concept so severely that we would quickly run out of terrycloth. I am not exaggerating when I tell you we have at least forty of these swirling around our house - with more (paper versions) in production.
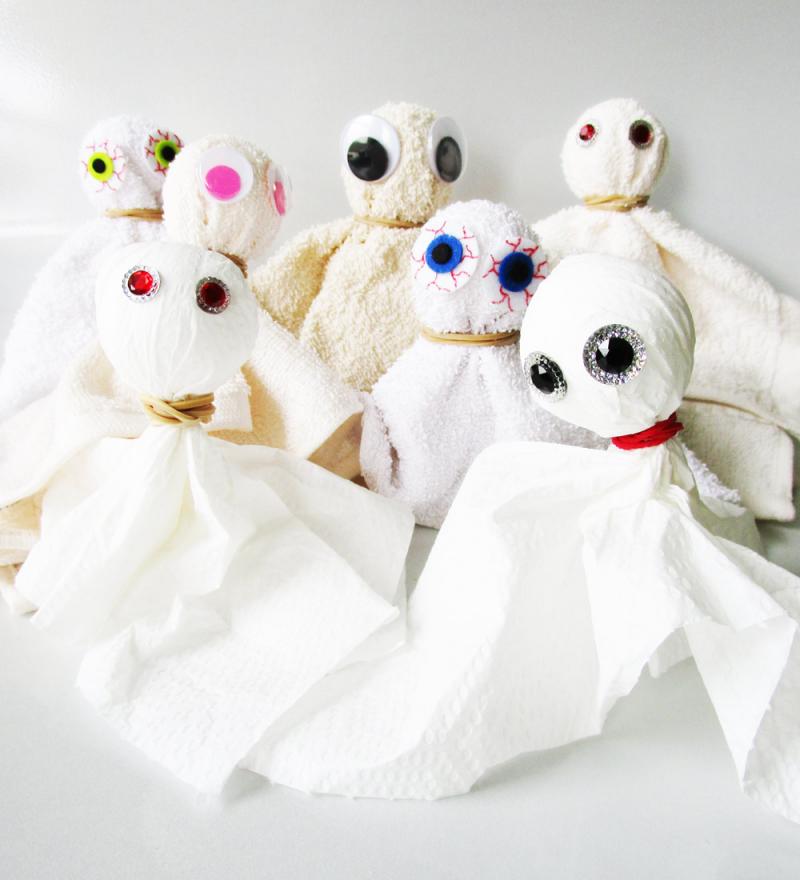
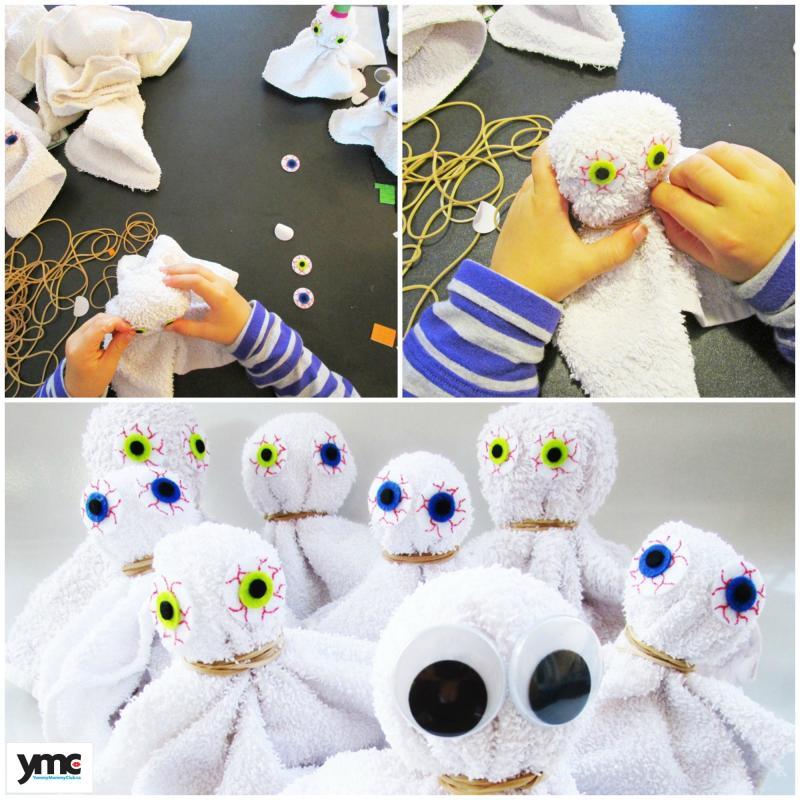
![]() Grab a facecloth (or a sheet of paper towel).
Grab a facecloth (or a sheet of paper towel).
![]() Drape cloth over some cotton or a bouncy ball, and tie off with an elastic band.
Drape cloth over some cotton or a bouncy ball, and tie off with an elastic band.
![]() Attach eye stickers, self-stick gems or googly eyes.
Attach eye stickers, self-stick gems or googly eyes.
![]() Note: Use stickers or tape instead of glue for the eyes if you would like to eventually reclaim your facecloths.
Note: Use stickers or tape instead of glue for the eyes if you would like to eventually reclaim your facecloths.
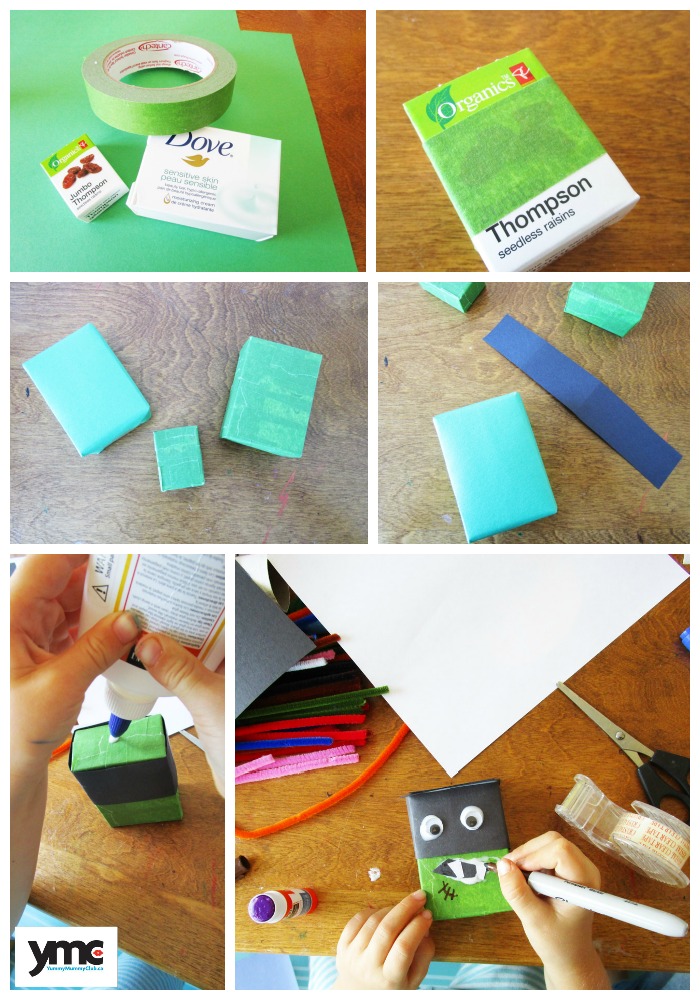
I love the idea of breathing new life into old items, which is why I think these little green monsters made of soap and raisin boxes are so fantastic. Incidentally, it was my 6 year old who came up with the idea of using painter's tape instead of construction paper to cover the boxes. Just when I think I'm the clever one...

![]() Save your old soap and raisin boxes.
Save your old soap and raisin boxes.
![]() Wrap boxes like a present with green construction paper, or cover them with green painter's tape.
Wrap boxes like a present with green construction paper, or cover them with green painter's tape.
![]() Then, use construction paper, googly eyes and markers to create a monster.
Then, use construction paper, googly eyes and markers to create a monster.
![]() Note: Juice boxes would work well for this project.
Note: Juice boxes would work well for this project.
If you've ever seen a bat up close, you'll know they are actually really cute. Unconvinced? Stick with these non-living versions instead.

![]() Paint a toilet paper roll black and let dry. Or, leave it unpainted.
Paint a toilet paper roll black and let dry. Or, leave it unpainted.
![]() Push the middle of the roll down at one end, to create two points.
Push the middle of the roll down at one end, to create two points.
![]() Cut the roll into a point at the other end.
Cut the roll into a point at the other end.
![]() Snip a set of bat wings out of black construction paper. You can use the template here.
Snip a set of bat wings out of black construction paper. You can use the template here.
![]() Cut two slits into the paper roll and slide the bat wings inside.
Cut two slits into the paper roll and slide the bat wings inside.
![]() Make a face with construction paper, googly eyes and/or markers.
Make a face with construction paper, googly eyes and/or markers.

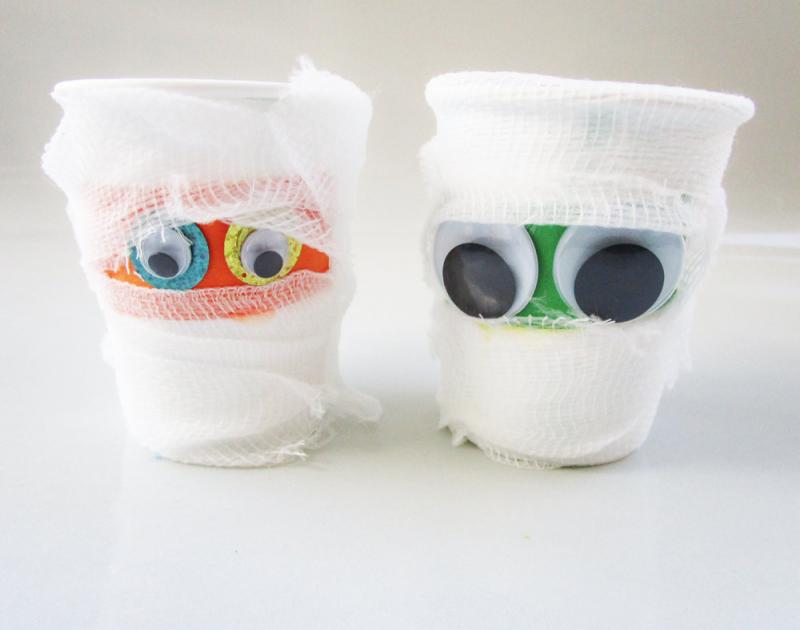
These little mummy cups are so sweet and while I wouldn't recommend drinking out of them, they would make ideal containers for candies, pencils or glow sticks. I've seen kits like this sell for up to $10 at craft stores. Mine cost just pennies.
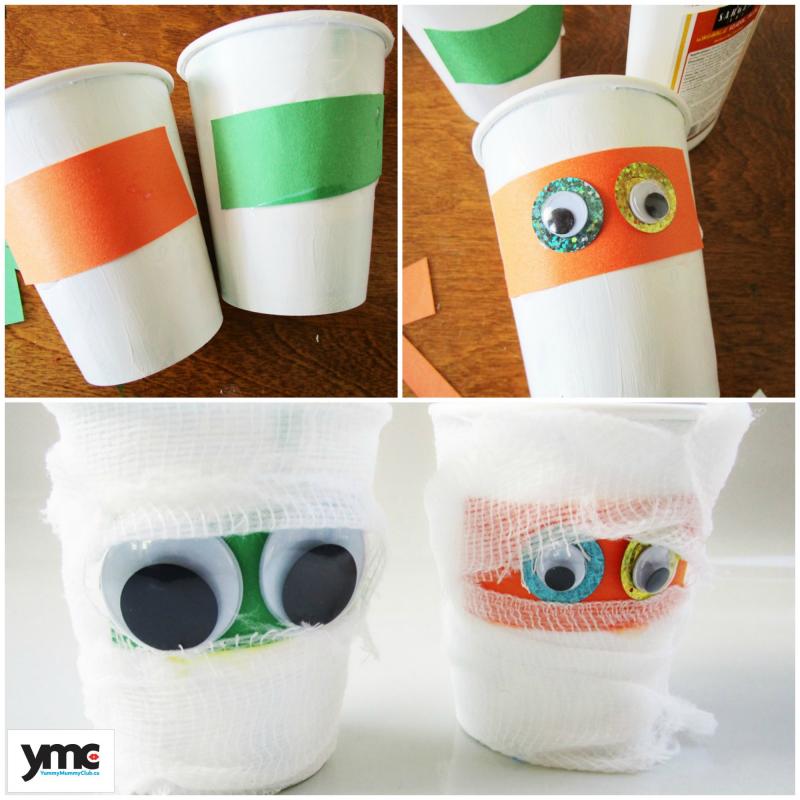
![]() Rescue a white paper coffee cup from the trash, or do like I did and paint a colourful party cup white.
Rescue a white paper coffee cup from the trash, or do like I did and paint a colourful party cup white.
![]() Cut a strip of construction paper and glue it onto the cup.
Cut a strip of construction paper and glue it onto the cup.
![]() Attach googly eyes to the paper.
Attach googly eyes to the paper.
![]() Wrap with gauze (or toilet paper).
Wrap with gauze (or toilet paper).
![]() Note: If you don't have any cups on hand, you could use toilet paper or paper towel rolls instead.
Note: If you don't have any cups on hand, you could use toilet paper or paper towel rolls instead.
Full disclosure: I hate spiders. But, my kid loves them - a lot - which is why she is the only one in our family who has ever volunteered to hold a tarantula. Twice. As for me, I'm sticking to styrofoam.
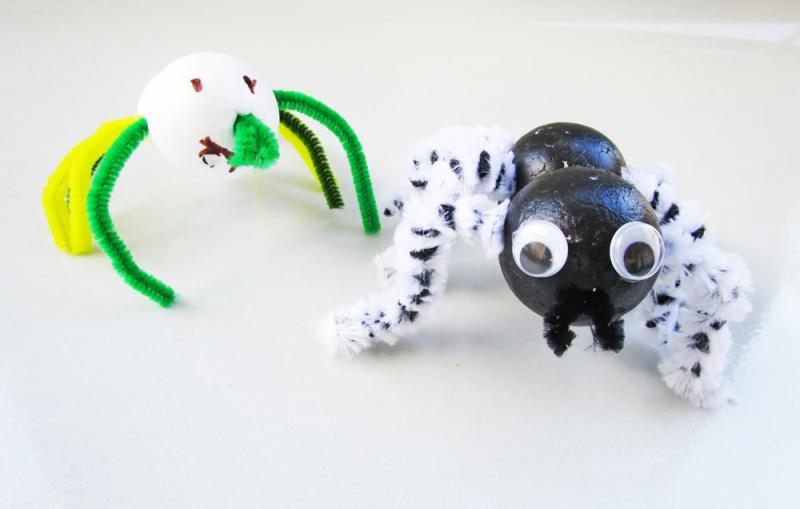
![]() To make these critters, paint a couple of foam balls black - or leave them unpainted (in lieu of foam balls, you could use pom poms or an egg carton cup).
To make these critters, paint a couple of foam balls black - or leave them unpainted (in lieu of foam balls, you could use pom poms or an egg carton cup).
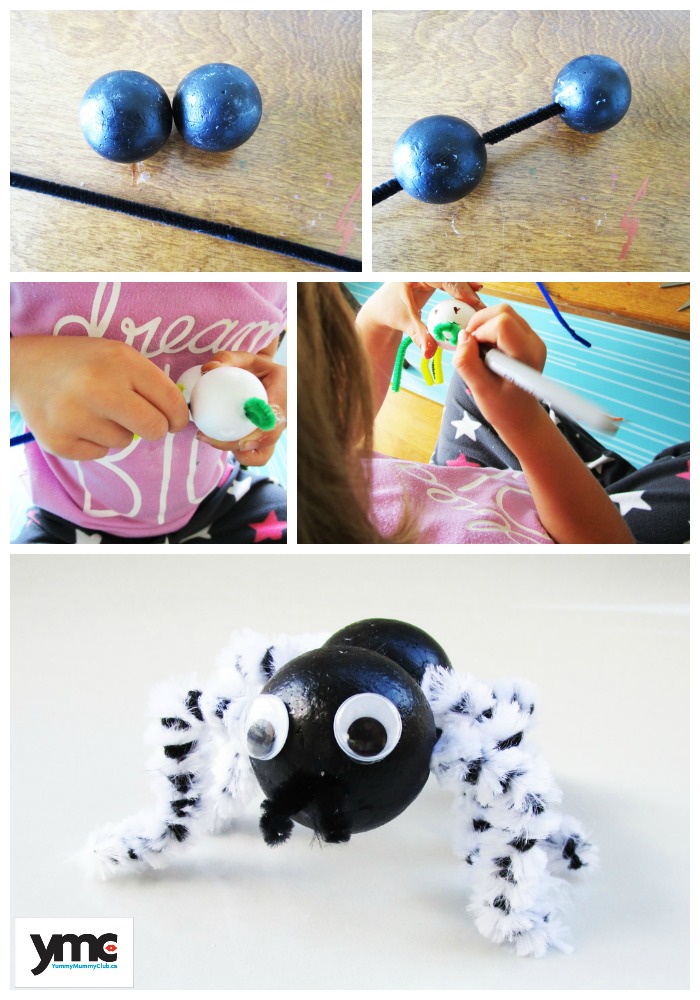
![]() Stick a chenille stem (pipe cleaner) through the balls and spread it out at the ends so the two balls are attached together.
Stick a chenille stem (pipe cleaner) through the balls and spread it out at the ends so the two balls are attached together.
![]() Stay with me.
Stay with me.
![]() Then, create legs using chenille stems. My kiddo insisted on pushing four pipe cleaners right through the body of her spider, thus making eight legs. I took the easy way out and cut my chenille stems into eight pieces and poked the ends into my spider's abdomen.
Then, create legs using chenille stems. My kiddo insisted on pushing four pipe cleaners right through the body of her spider, thus making eight legs. I took the easy way out and cut my chenille stems into eight pieces and poked the ends into my spider's abdomen.
![]() Finish by adding some googly eyes with glue, (or draw some features using magic markers).
Finish by adding some googly eyes with glue, (or draw some features using magic markers).
Oatmeal boxes just scream out to be upcycled. At our house, they typically become pencil holders, or pen holders, or paintbrush holders (you get the idea). However, by adding some Halloween flavour, oatmeal boxes can become, well... pencil, pen and paintbrush holders that look like Jack-o-Lanterns. Or, you could use them to store leftover Halloween chocolate on your desk. I'm just saying...
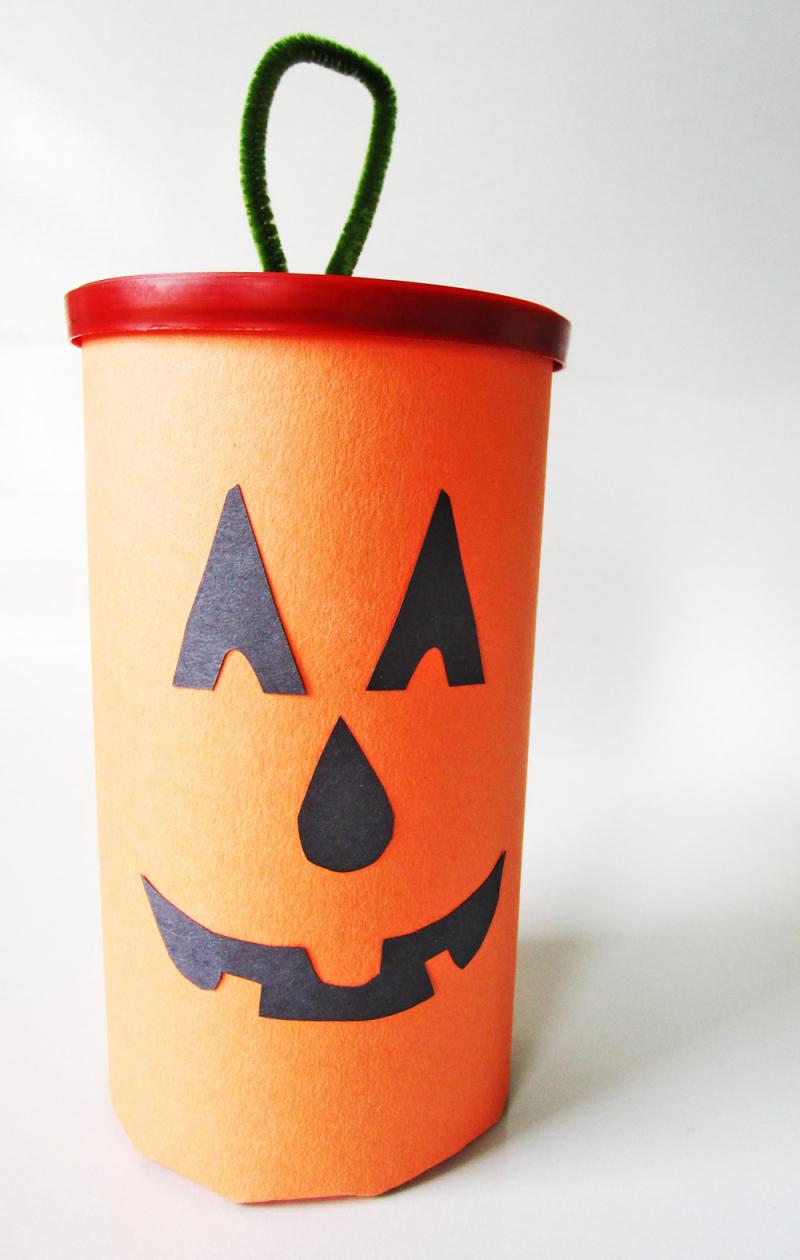
![]() Wrap an empty oatmeal box with orange paper.
Wrap an empty oatmeal box with orange paper.
![]() Cut Jack-O-Lantern features out of black construction paper and glue them onto the orange paper.
Cut Jack-O-Lantern features out of black construction paper and glue them onto the orange paper.
![]() Pop a green chenille stem into the lid.
Pop a green chenille stem into the lid.

How will you decorate this Halloween?

![]() RELATED: 10 Cool Halloween Ideas From Etsy
RELATED: 10 Cool Halloween Ideas From Etsy

