Whether you're thinking about starting seeds for an outdoor garden, a mini-garden for your window ledge, or a container garden for your patio, you will need lots (and lots) of pots. And while it's true that you could use containers you pick up - as is - from the garden centre, decorating and personalizing your own vessels can be so much more rewarding. And fun... especially for children.
![]() Top 5 Best Pot Garden Vegetables
Top 5 Best Pot Garden Vegetables
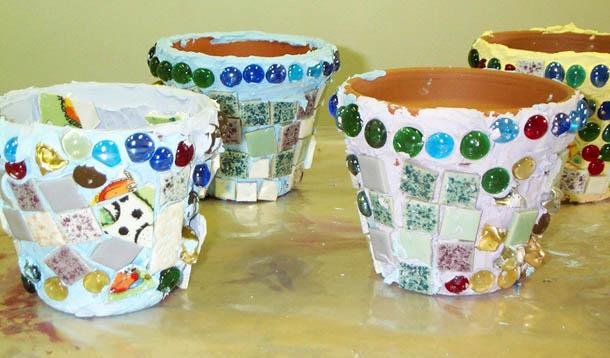
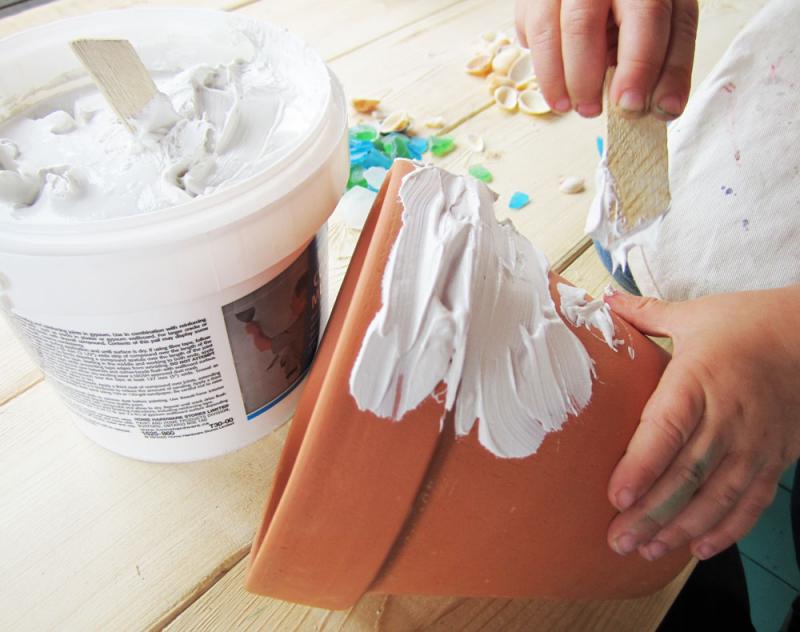
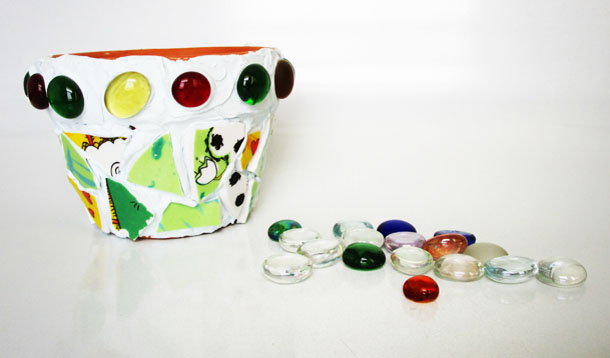
To get started, simply gather terra cotta pots, a small container of drywall compound*, some glass gems from the dollar store, seashells, beach glass and/or broken dishes. (If you are going to use broken dishes, safely smash them into smaller pieces by placing them in a plastic grocery bag, wrapping them in an old towel and whacking the heck out of them with a hammer (while wearing safety glasses). If the edges are sharp, sand them down with a medium grit sandpaper.)

Begin by slathering a thick layer of drywall compound onto the pot with a craft stick. Do this one small section (half the pot at the most) at a time rather than covering the entire surface at once. This is so easy, kids can do it on their own without much supervision. (Note: You can colour the drywall compound by mixing it with some tempera paint. Some may be concerned with kids using drywall compound while crafting. However, since you won't be sanding the compound once dry, no dust will be inhaled and so it is perfectly safe, as long as kids don't consume the product! Also, when I say drywall compound, I don't mean Polyfilla (it dries too quickly) I mean wallboard joint compound.)
Then, start sticking the shells, beach glass, gems, etc. into the wet compound.
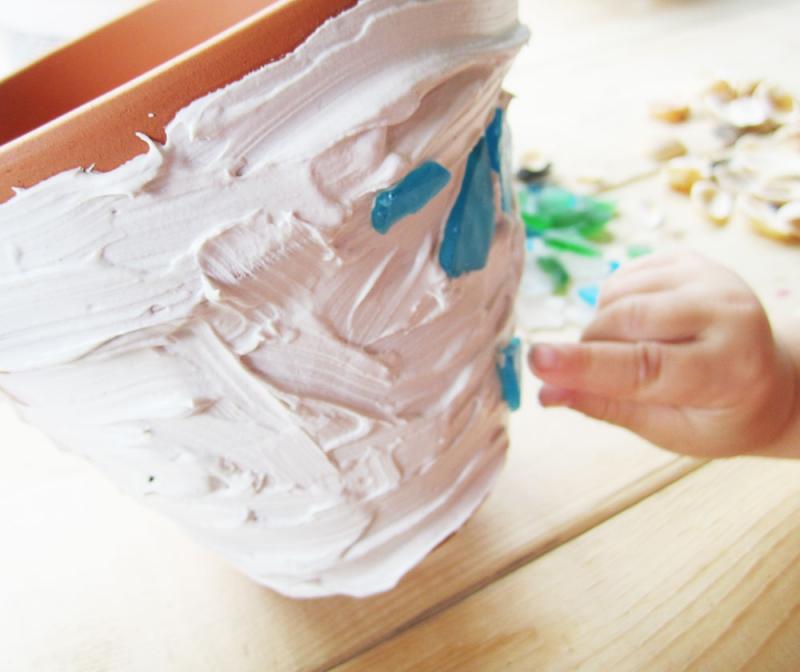

Continue until the pot is full of decorations.
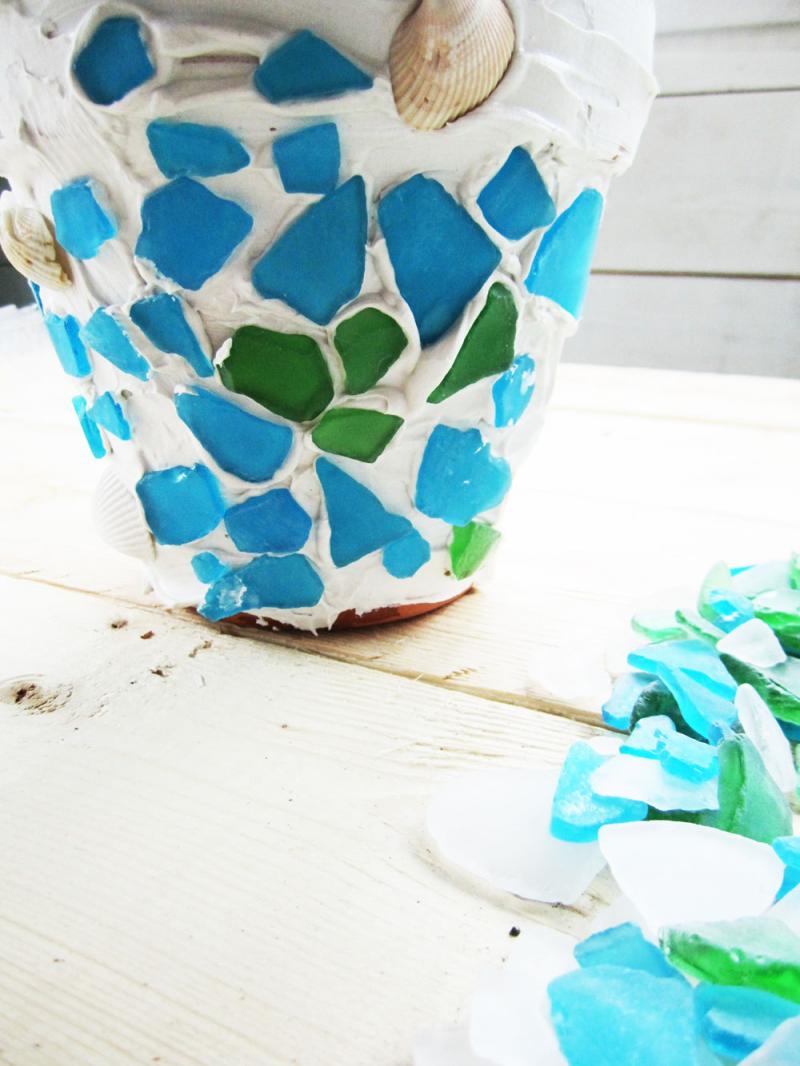
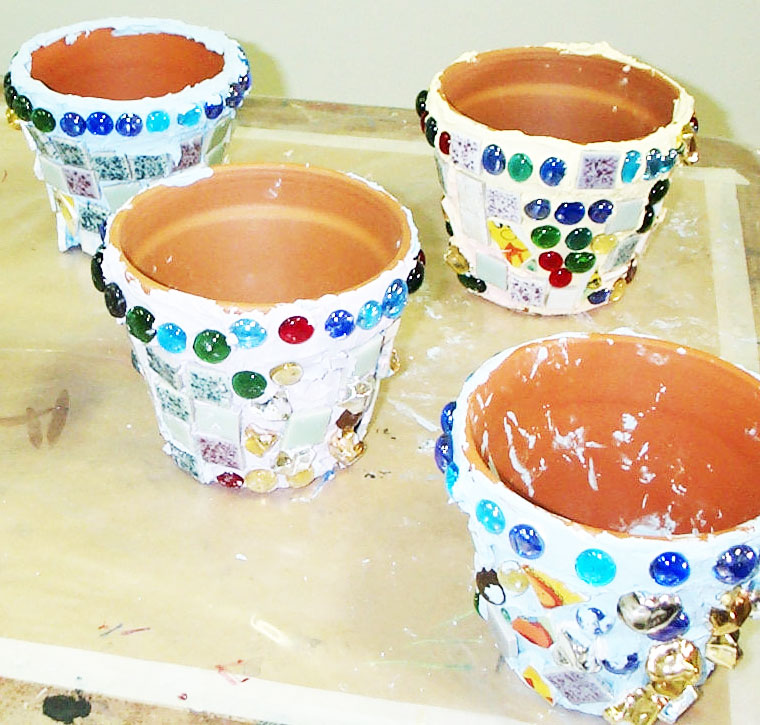
Let everything dry and that's all there is to it! Talk about a great activity for kids.
Now, about those seeds...
But before I begin, I have a confession to make.
I am not a gardener.
As a result, any and all plants that survive in my presence do so in spite of my efforts, not because of them.
I come from a long line of plant killers. I clearly remember the twisted pile of gnarled Chrysanthemum roots stacked up in the corner of our backyard. It was in this spot that Mother’s Day gifts went to die. Without dignity. Years later, I discovered that in order to keep houseplants alive, you need to place them in sunlight. And give them water.
Like I said, I am not a gardener.
So it was with a giant leap of faith that I procured some vegetable seeds and decided to experiment with germination in an effort to teach my daughter how plants grow.
Those who know these things, know that a wide variety of containers can be used for starting seeds (everything from coffee cups to eggshells). I however, took my mother's advice and cheated. In other words, I let her buy us a kit, which consisted of starter soil, a shallow tray, a domed lid, a bunch of little coconut husk cells and step-by-step INSTRUCTIONS.
To begin with, we tossed some soil in a bowl and added a bunch of water to make it damp, but not dripping. Then, we loosely filled the cells to about half. We did this because the instructions said we should.

Next, we placed some seeds (no more than 2 per cell) on top of the soil. We also added some craft stick markers (one per row) so we knew what we were growing. Just in case anything actually started to sprout. Had I been feeling less anxious about the process, we may or may not have decorated those craft sticks with paint.
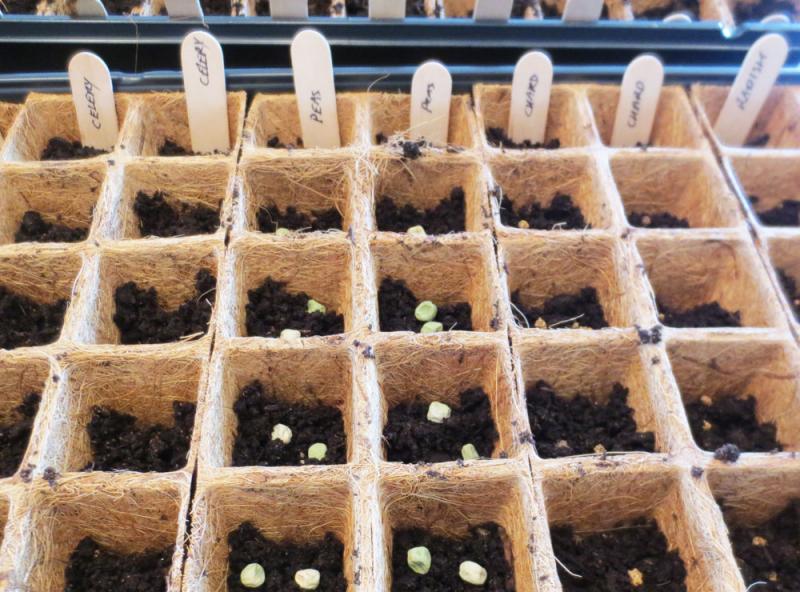
Then we covered the seeds with more damp - yet fluffy - dirt.
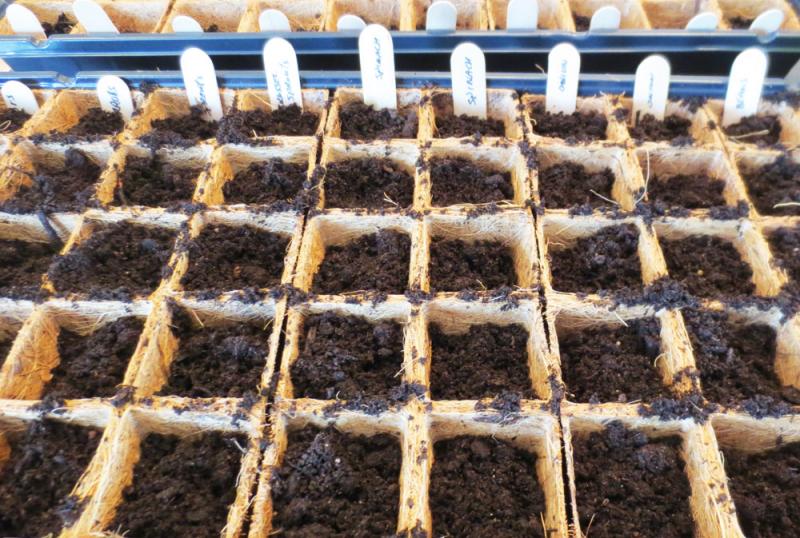
After that, we put the trays on a shelf in the sun and covered them with the clear dome. Over the next number of days, my daughter watered the soil whenever it felt dry and what happened next was nothing short of a miracle.
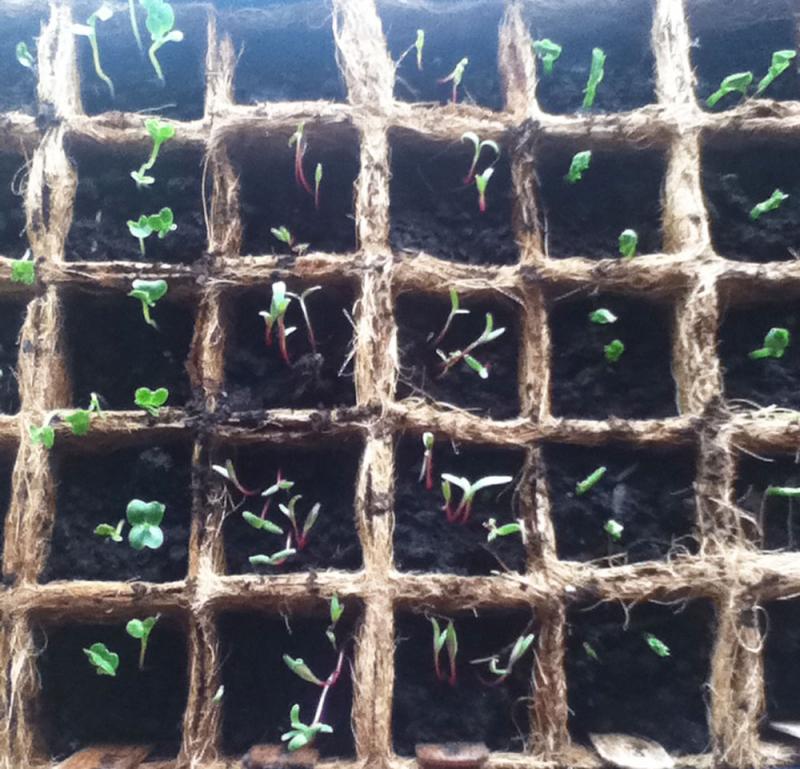
Once we saw green, we removed the dome and just let those little suckers keep growing. In the sun. Adding water when the soil felt dry. Nature is amazing.
Truth be known, once the plants were poking out of the abyss, I really didn't know what to do with them. I mean, theoretically I knew they could be moved - into the ground in an outdoor garden, or inside in one of our mosaic pots. But again... not a gardener. But with the help of those with thumbs far greener than mine, I discovered that all you need to do is to put some moist potting soil into a pot, carefully move the seedling into the new container and cover the roots with more dirt. There might be more to this but truthfully, I'm still too busy riding high on my germination success to care.
But, if you are serious about gardening, here are some fabulous (and funny) resources from the YummyMummyClub experts:

