
You know Dasher and Dancer and Prancer and Vixen, Comet and Cupid and Donner and Blitzen.
But, do you know how to make them - and their friend Rudolph - using pipe cleaners and beads?
![]() Easy DIY Reindeer Gift Box: So Cute Your Kids Won't Want To Open It
Easy DIY Reindeer Gift Box: So Cute Your Kids Won't Want To Open It
You will, after reading through the following directions.
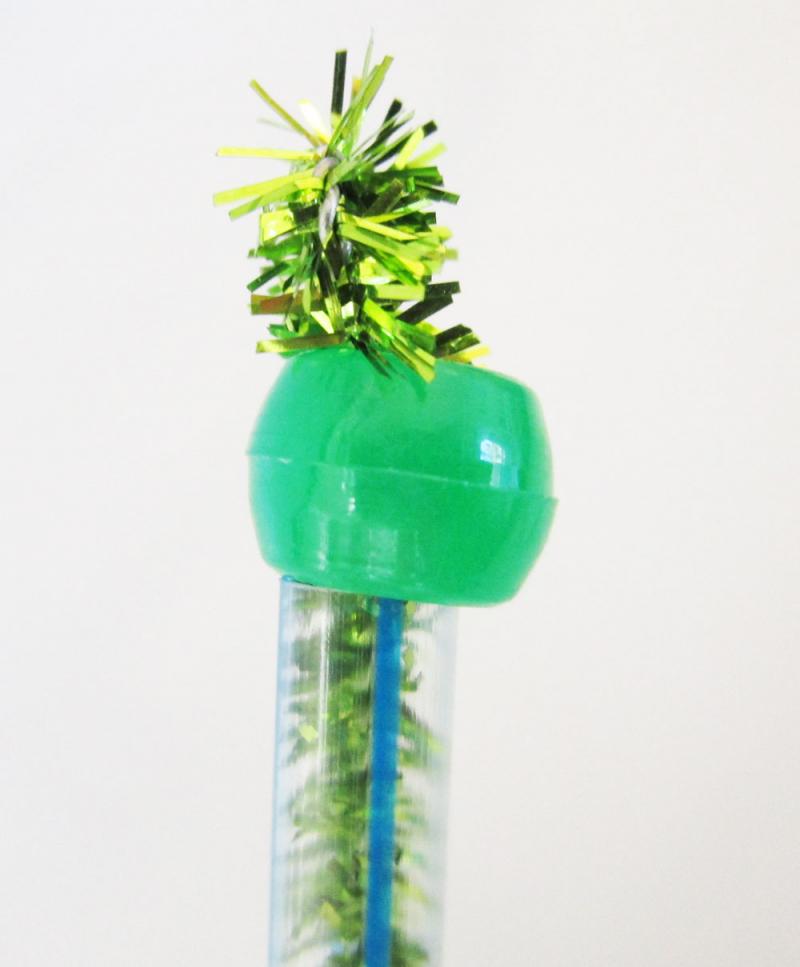
For each reindeer, you will need:
You'll also need a decent pair of scissors, a permanent magic marker and maybe a glass (or two) of eggnog.
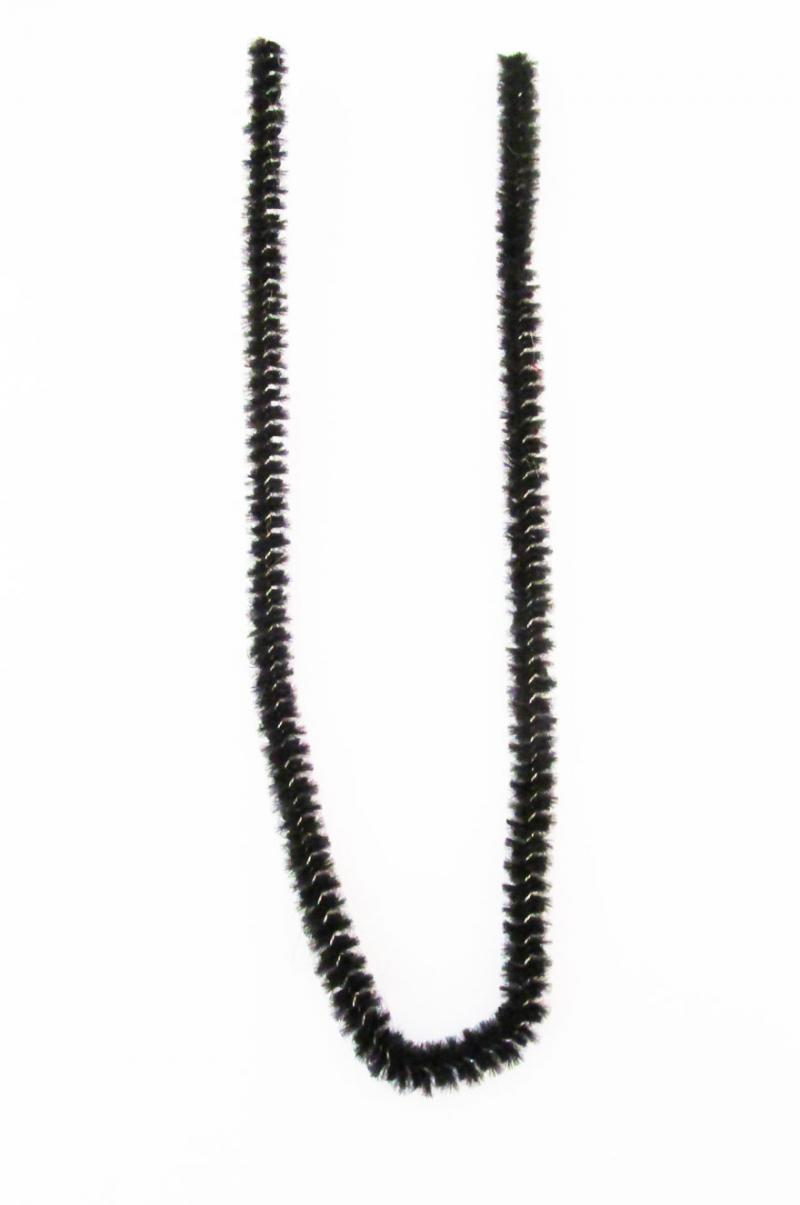
Begin by bending one pipe cleaner in half, like so.
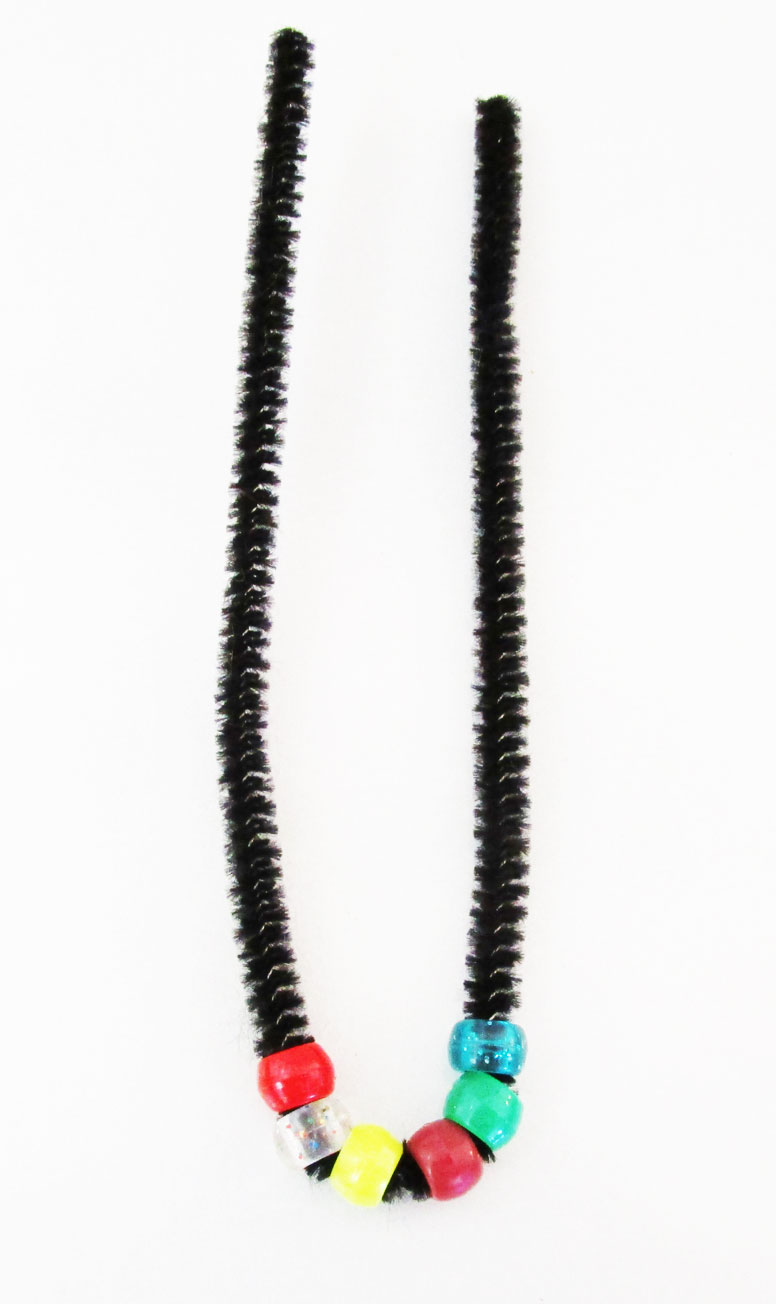
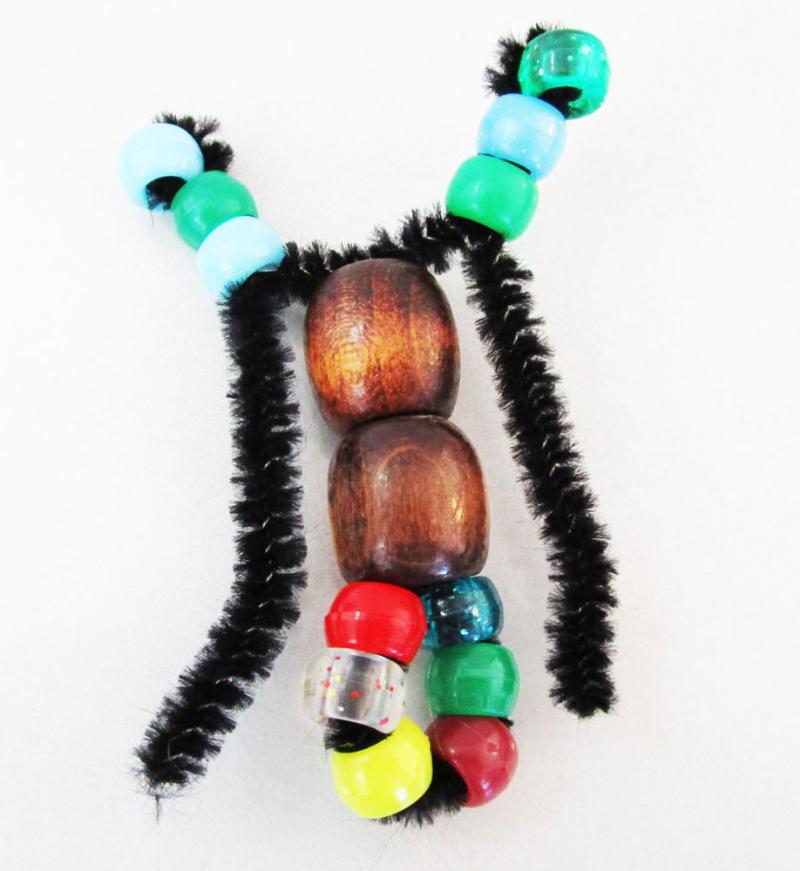
Next, string six pony beads onto the pipe cleaner and move them down to the bend.
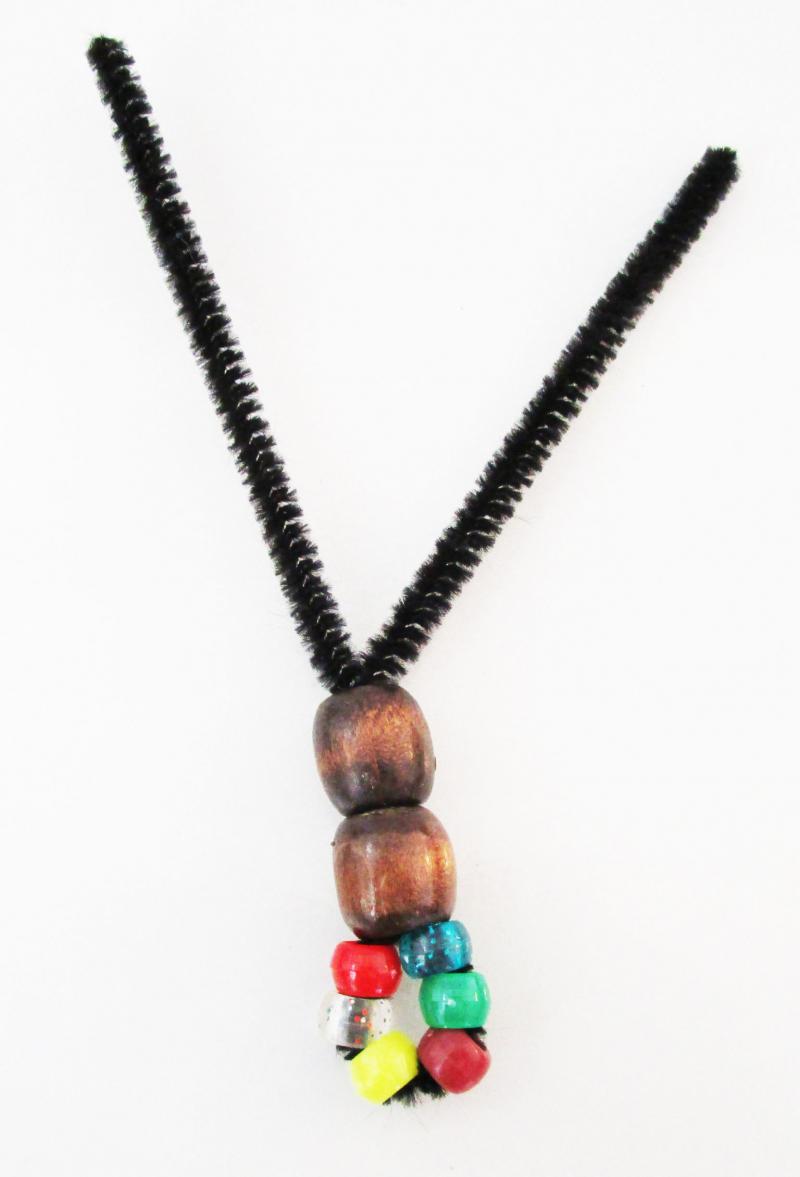
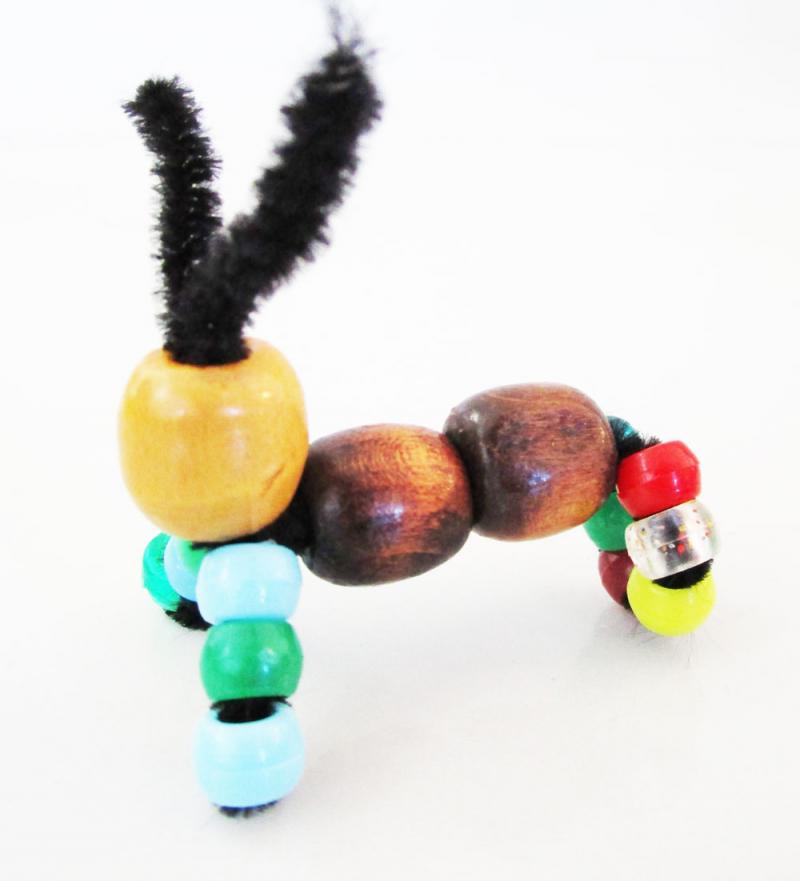
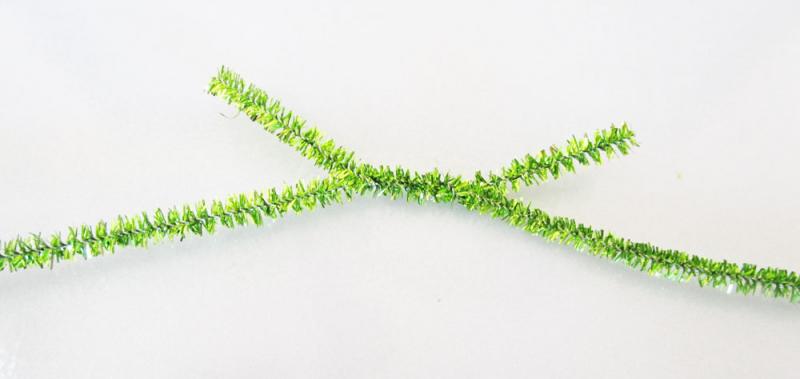
Push both ends of the pipe cleaner through two large beads and separate them at the top.
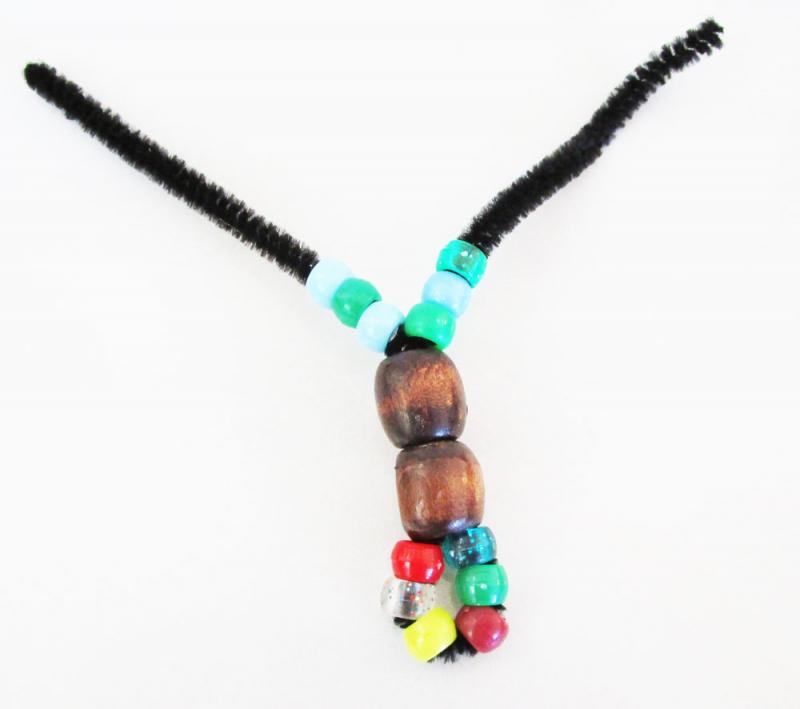
String three beads on either side of the pipe cleaner until you have something that resembles an inquisitive beetle.
Bend the ends around...
and push each one through TWO of the three top beads.
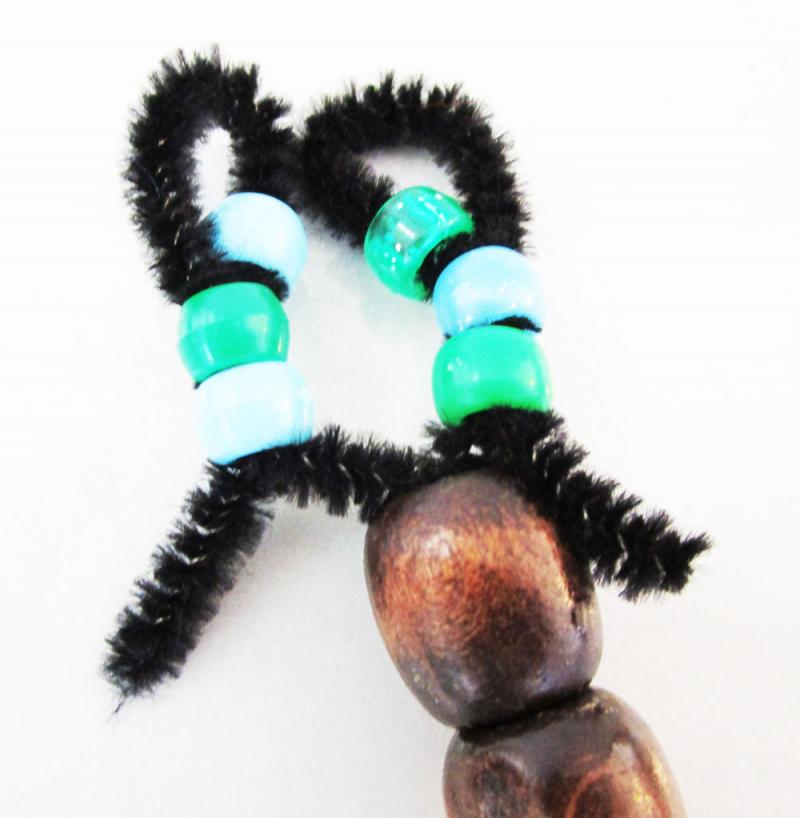
Pull until snug.
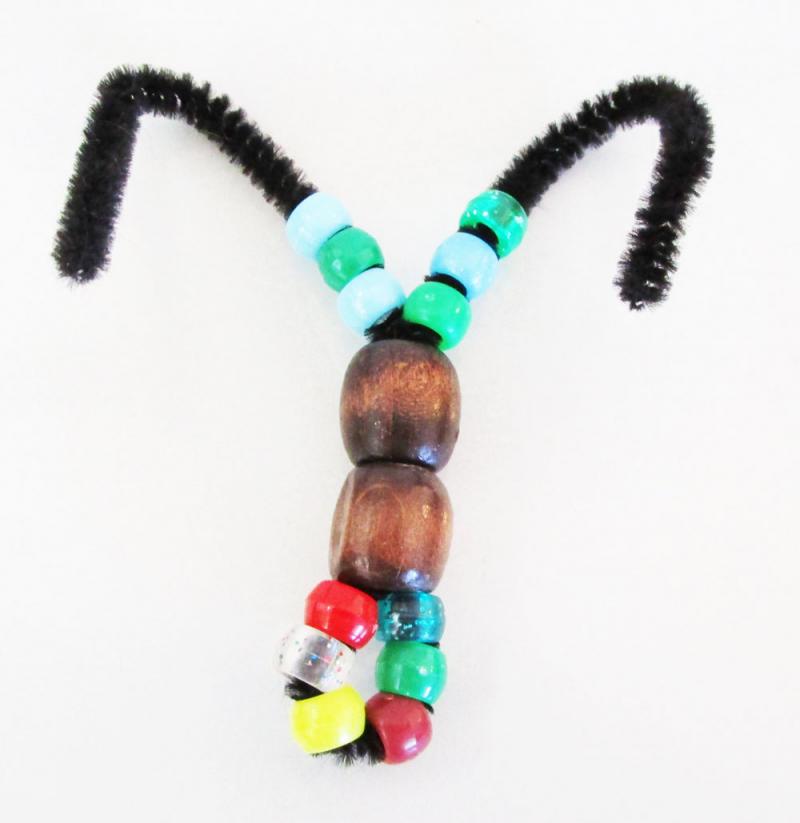
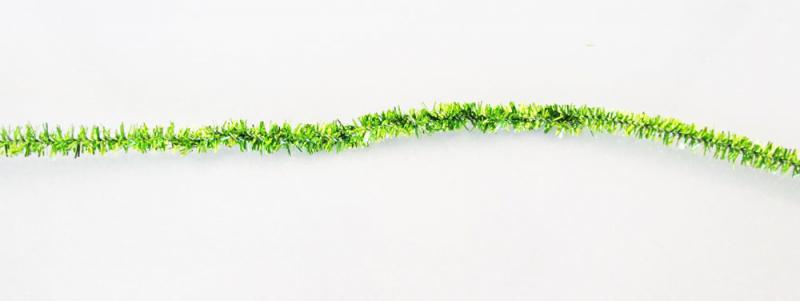
Now, bend the straight beaded end towards the looped beaded end until you have a critter that stands up.
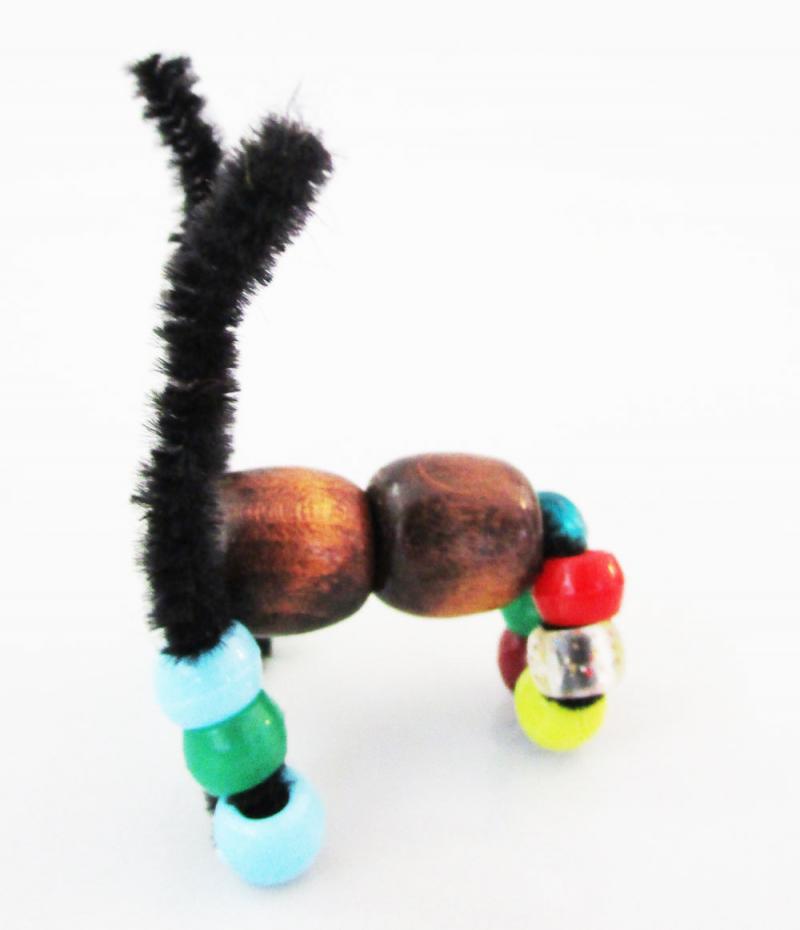
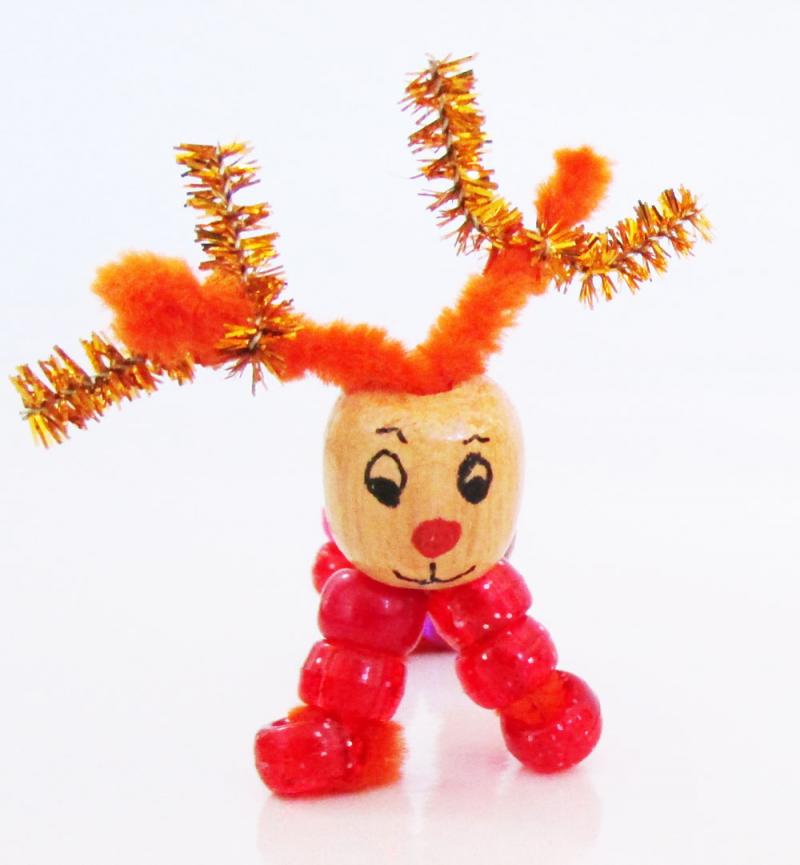
Push the two pipe cleaner ends through a big bead (this is the head), allowing the excess to poke out the top.
Cut a couple of little pieces off the second pipe cleaner and twist them around the existing ends to make antlers.
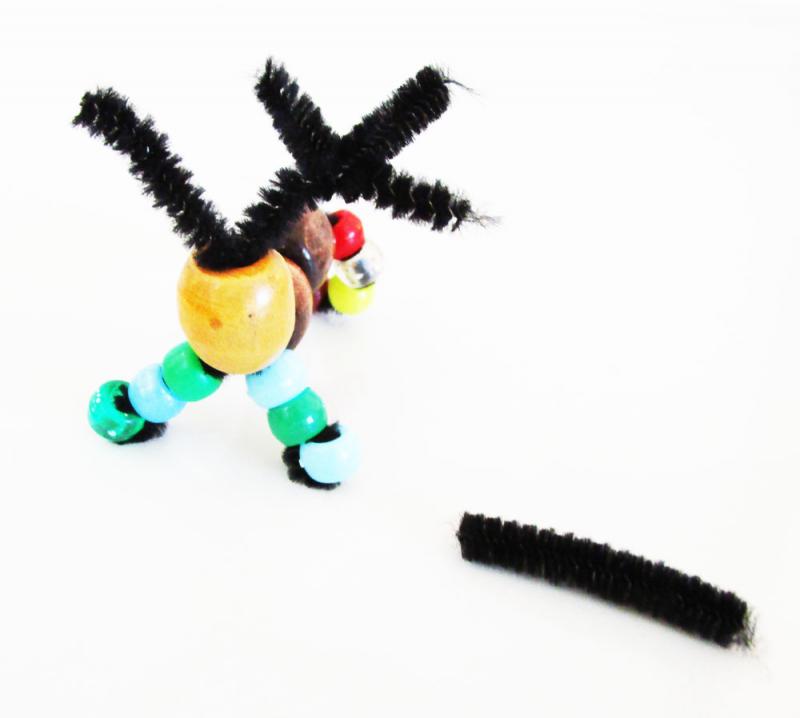
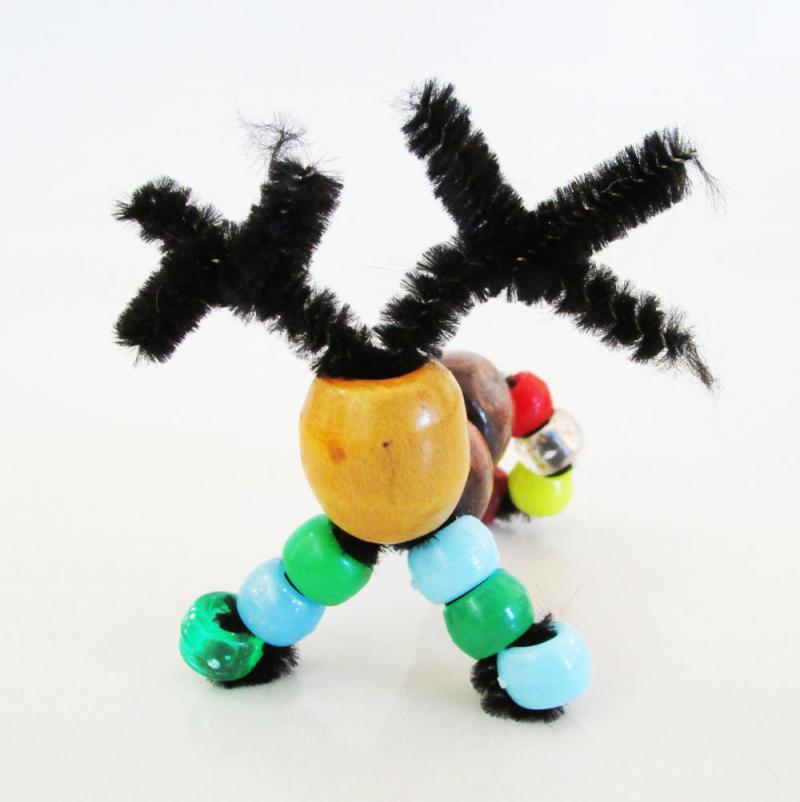
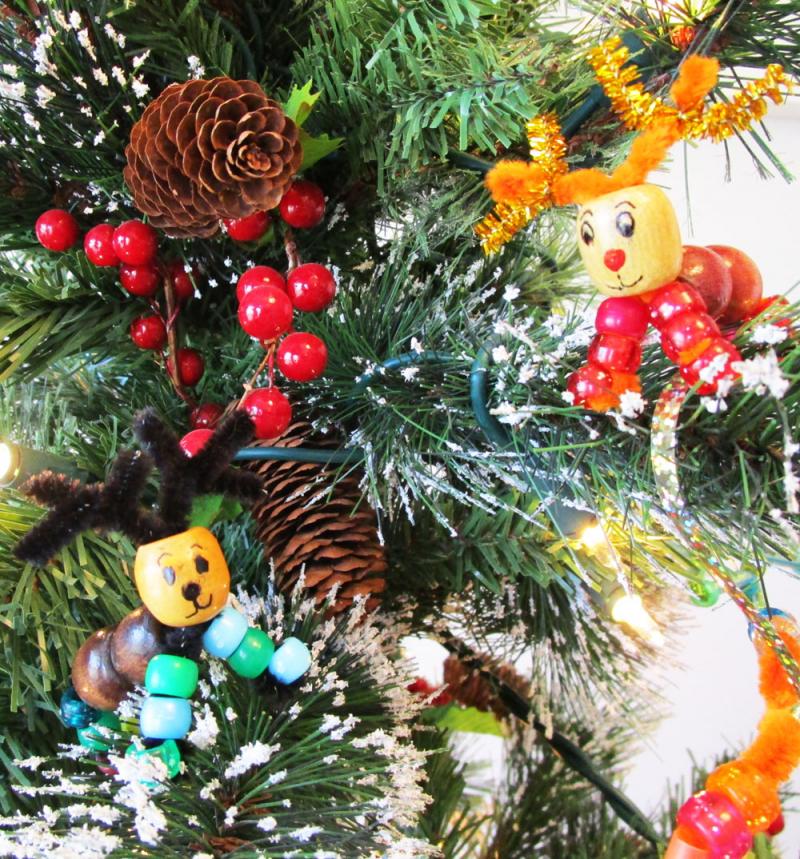
Oh my goodness, you made a reindeer!
Give him a face.
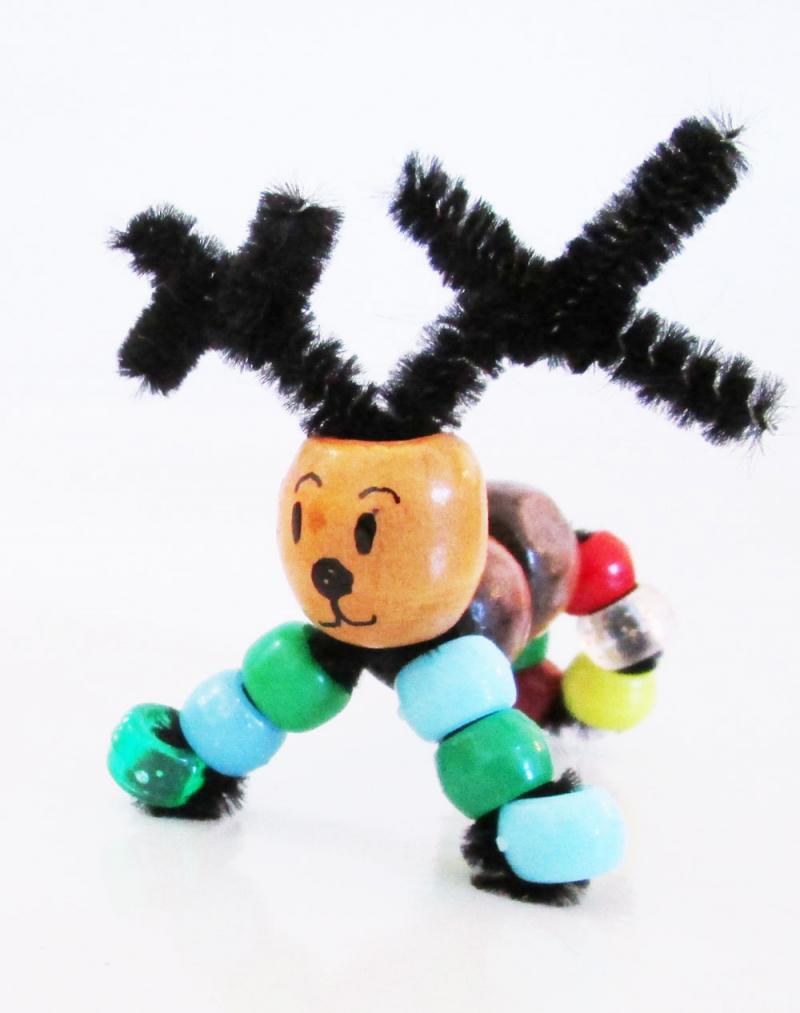
And make him a friend (or more).
Now wasn't that fun?
Go ahead, give it a try.
 You Can Also Make These Cute Christmas Ornaments With Pipe Cleaners and Beads
My uber-crafty mom and I were recently asked to run one of six Christmas ornament craft stations for six groups of kids ranging in age from three to sixteen. Rather than coming up with several crafts for different age groups, we decided to keep our activity ideas simple enough for little ones yet make them challenging enough for older kids. We also – selfishly – made a pact to stay clear of anything that involved paint while at the same time making use of easily accessible materials.
The Ingenious Way To Hang Child's Artwork On Walls Without Removing Paint
We decided on the following supplies:

The beads came from a huge stash that we've been collecting over the years. The pipe cleaners and drinking straws can be purchased at any craft or dollar store and the construction paper and hole punch were easy (not really) to find in the bottom drawer of my desk. We also dug out a pair of scissors sharp enough to cut the pipe cleaners and some sparkly ribbon.
Now, if you've never placed a bucket full of beads in front of a kid (assuming of course that kid is old enough not to put the beads in her mouth), you need to try it - soon - because something magical will happen when you do. And I'm not just talking about the fact that while your kids are happily digging around in that bucket, you will have enough time to sit down and drink a cup of tea from start to finish.
![]() A Great Way To Energize Your Tea
A Great Way To Energize Your Tea

Kids LOVE beads which makes them perfect for making the following super-easy, super-fun, super-cute holiday crafts.
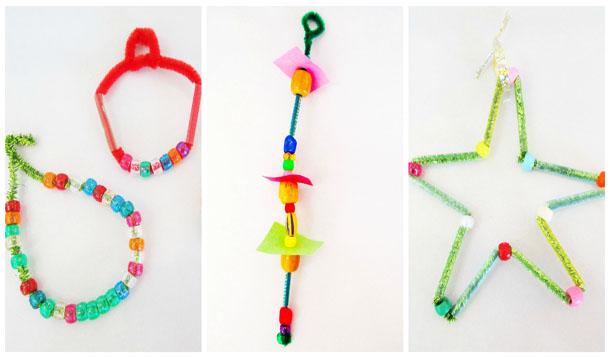
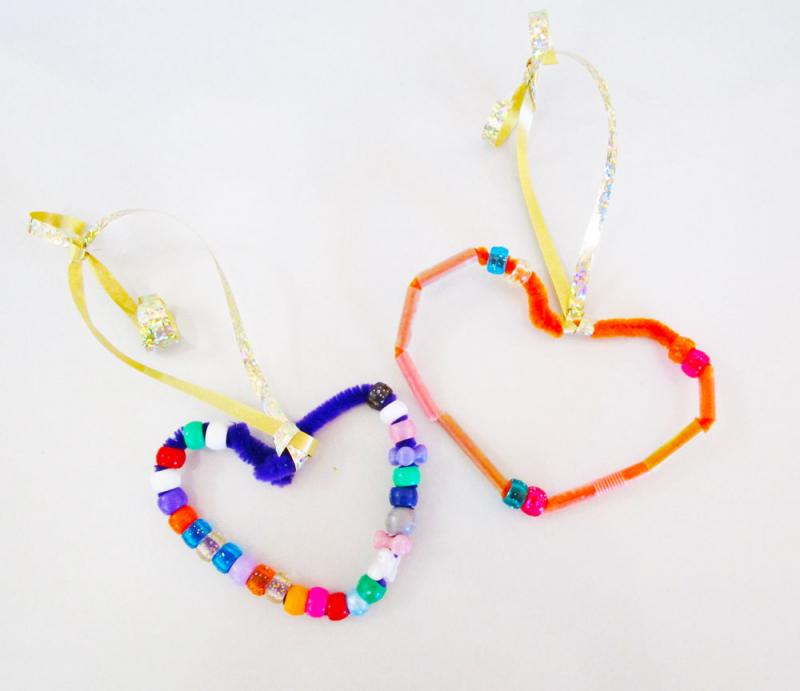
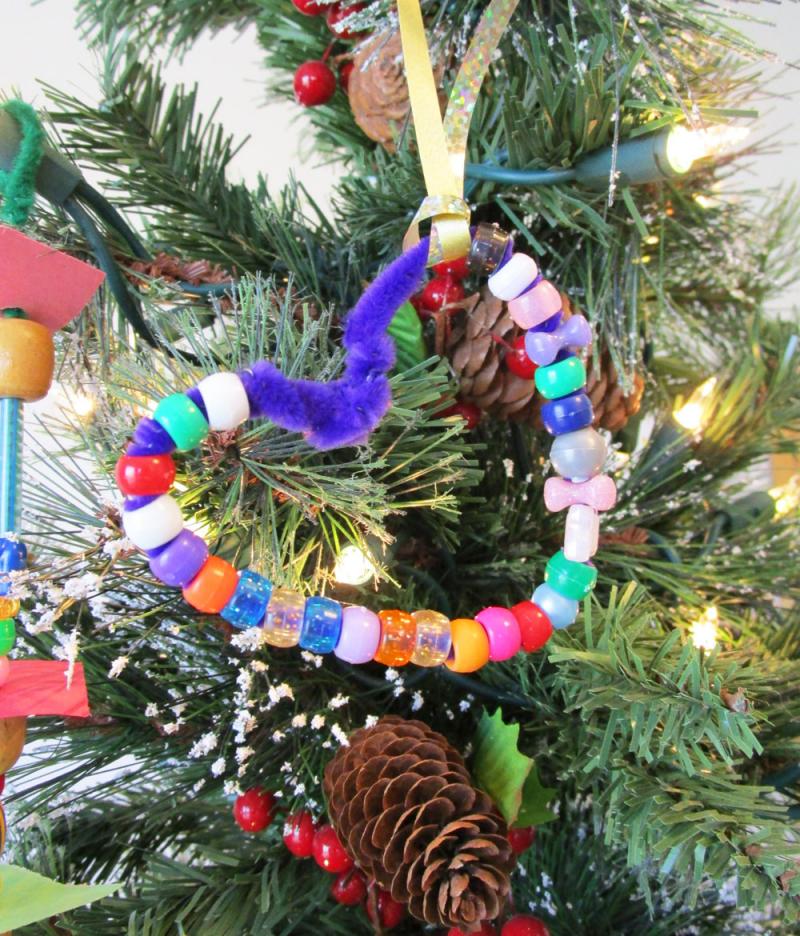
COLOURFUL CIRCLES
This is a prime example of what happens when you leave kids alone with art supplies. To make these ornaments, all you need to do is string some beads (and cut pieces of a drinking straw) onto a pipe cleaner, twist the ends into a hook and boom, you're done. Honestly, my daughter sat for hours making these.


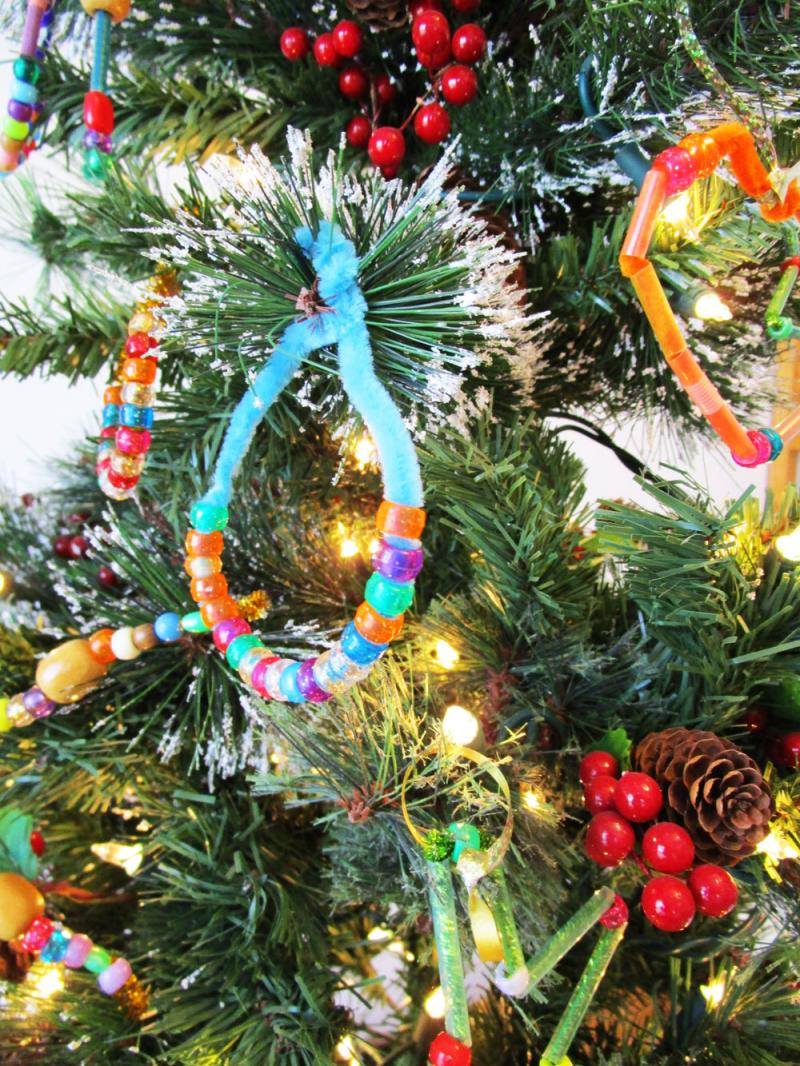
If you want to get fancy, form the circular shapes into hearts, add some ribbon and voila, you've got heart-shaped decorations.
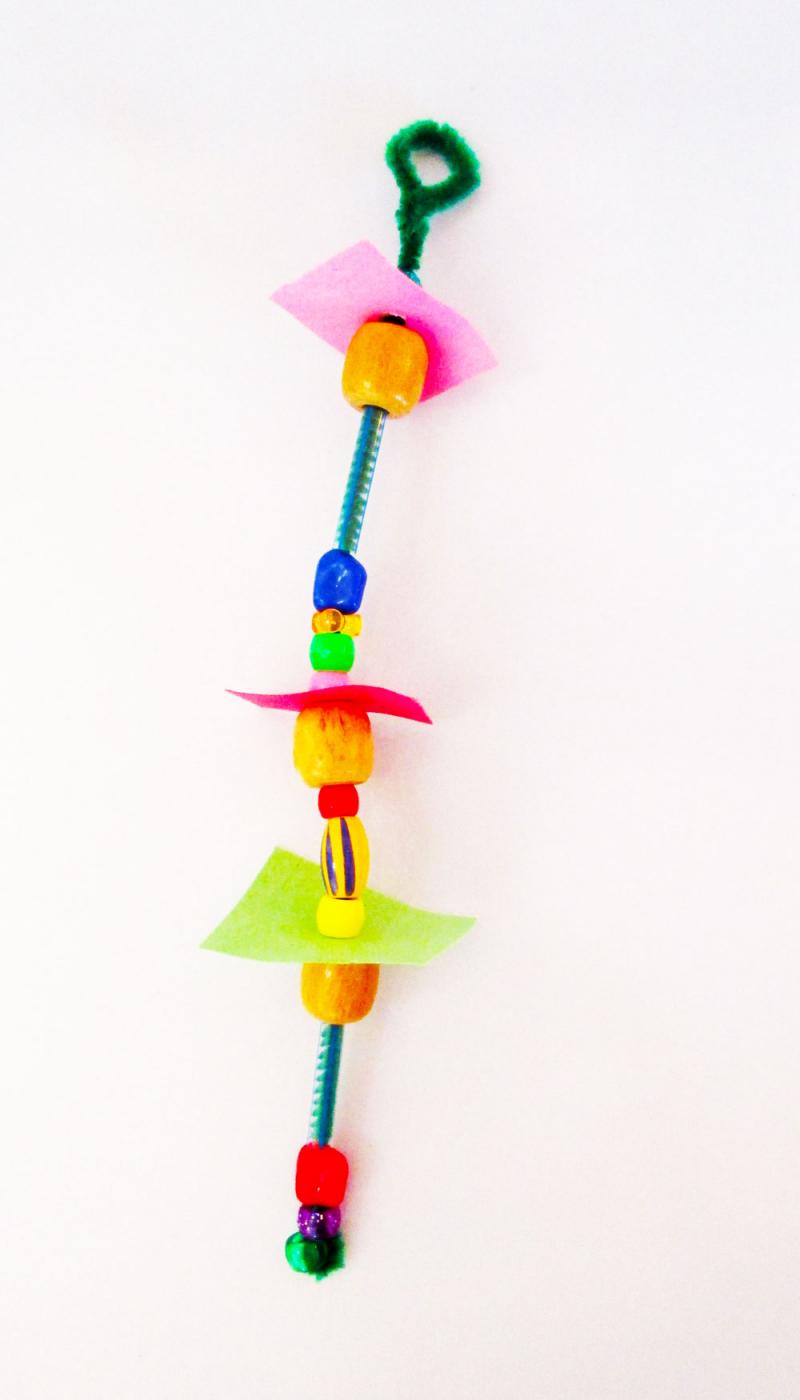
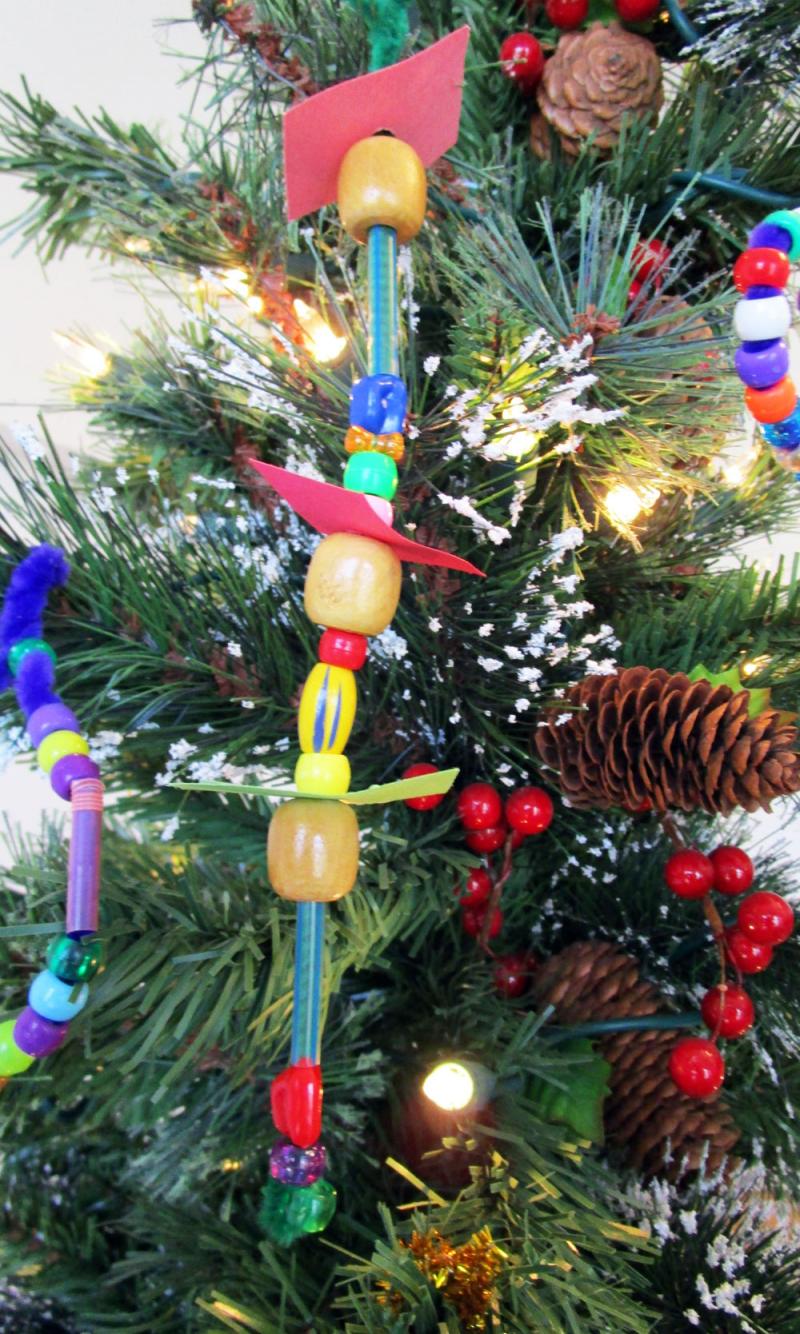
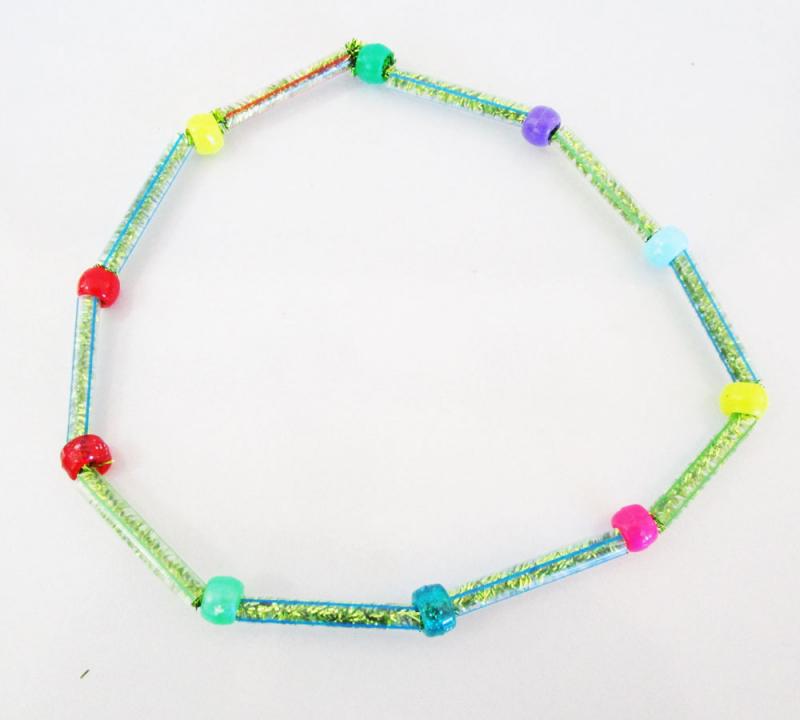
FANCIFUL ICICLES
To make this cool ornament, string a combination of beads, cut pieces of a drinking straw and bits of construction paper (punched with a hole punch) onto a pipe cleaner. Make a loop at the top to hang it on the tree.
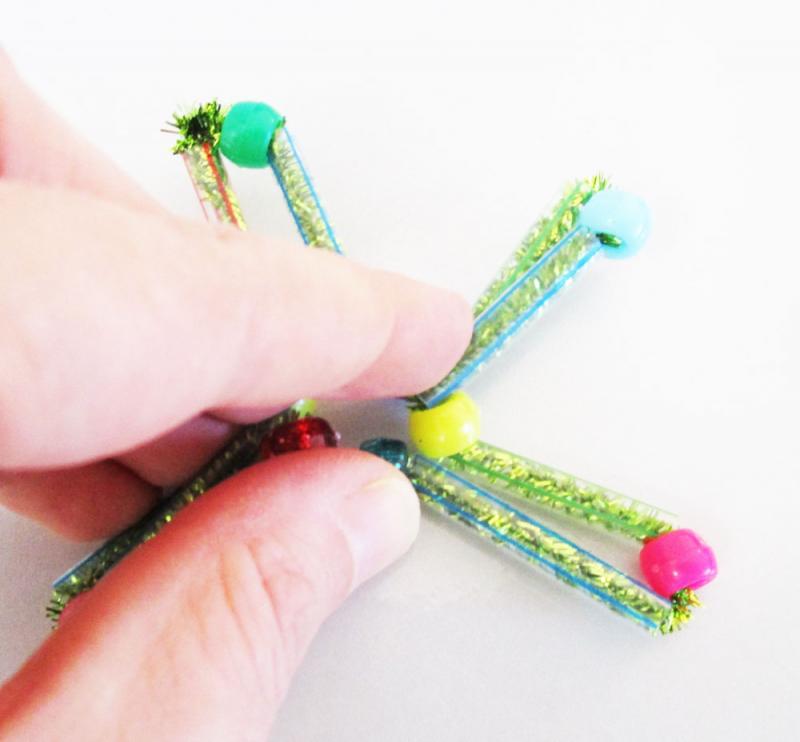
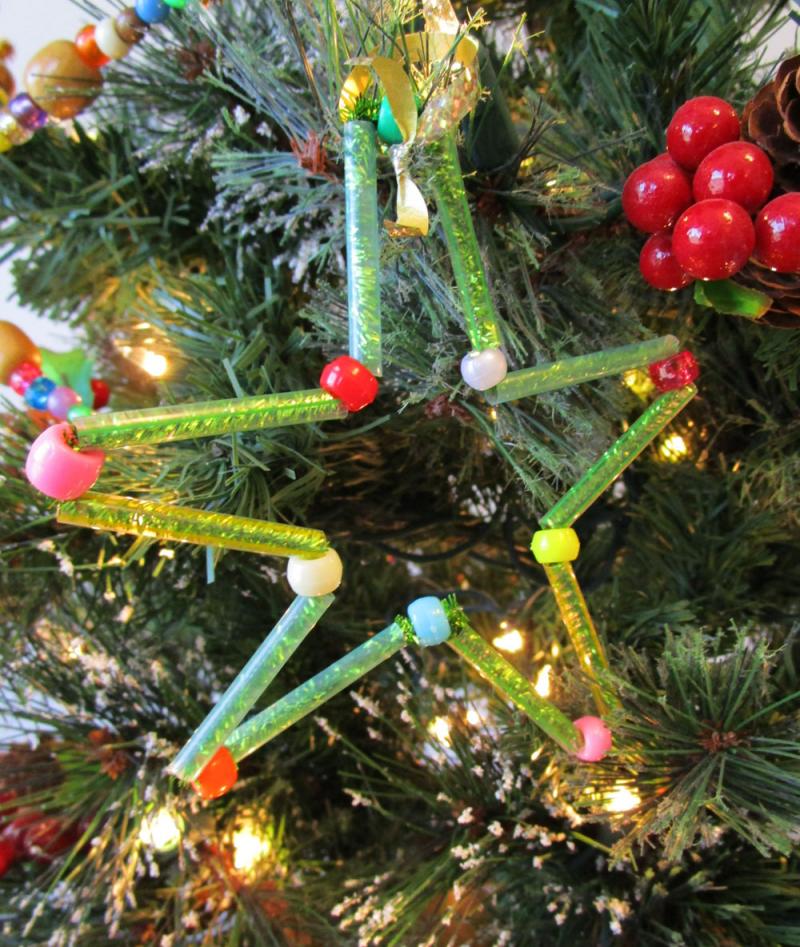
SUPER STARS
To make a star ornament, you will need:
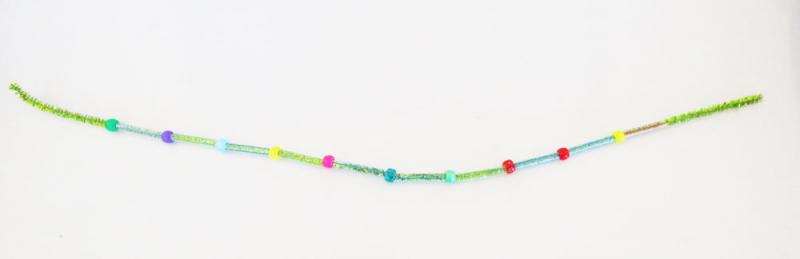
Start by twisting two pipe cleaners together to make one long piece.
Next, string ten beads and ten straw pieces onto the pipe cleaners - alternating between the two - making sure to leave room at either end. You should end up with a bead at one end, and a straw at the other.
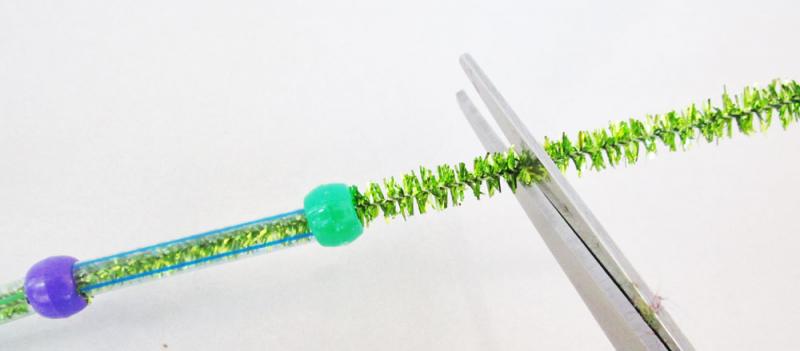
Go to the end with the bead and cut away all but a one-inch section of pipe cleaner.
Now fold that bit of pipe cleaner into the bead. This will create a little loop.
Push the other end of the pipe cleaner through the loop you made.

Snip away all but a little bit.

Fold the end and push it into the straw, thus creating a circle.
Squish and fold the circle, keeping the straws straight and the beads at the ends.
Let go and marvel at what you just made!
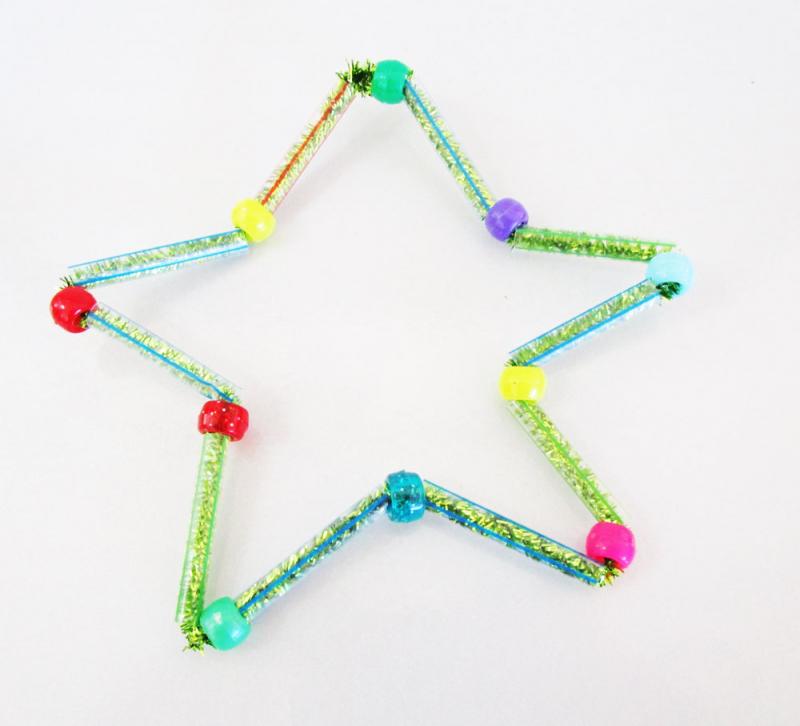
Add some ribbon and that baby is ready for the Christmas tree.
The Fine Print: If you are looking for big wooden beads like the ones in these photos, keep an eye out for car seat massage covers. Just one will give you hundreds of beads, just right for crafting. Also note that beads are a choking hazard, so if you're working with little ones, make sure you provide lots of adult supervision to prevent any accidental ingestion.
Check out Andrea's YummyMummyClub blog The Art of Childhood for more great Kid-Craft ideas.

It’s a rainy afternoon - maybe even a snow day - and you’re itching to sit down with your kids and make something cool. Only, you’re pretty sure they already know how to draw stick figures and beyond that, you’re feeling kind of inadequate.
Before you abandon the idea altogether, see if you can answer the following questions.
1) Do you have paint in the house?
(small containers from the dollar store will do just fine)
2) Do you have paper?
(computer paper is all you need)
3) Are you willing to make a mini mess?
(not too big, I promise)
If you answered yes to all three questions, then you are well on your way to having an artistic moment with your kids.
To begin, find an area in your home where you can spread out some newspapers or an old tablecloth.
Then, gather some paint, keeping in mind it doesn’t have to be fancy or expensive. You can often find little containers of acrylic or poster/tempera paints at the dollar store or at any craft store. As a bonus, if you use the primary colours (red, yellow and blue) you can turn this into a quick lesson on colour mixing. Double win!

After that, grab a stack of paper from your computer printer, a paintbrush or two (we used one for each colour) and a container of water.
The next steps are easy and fun for kids (and adults) of all ages.
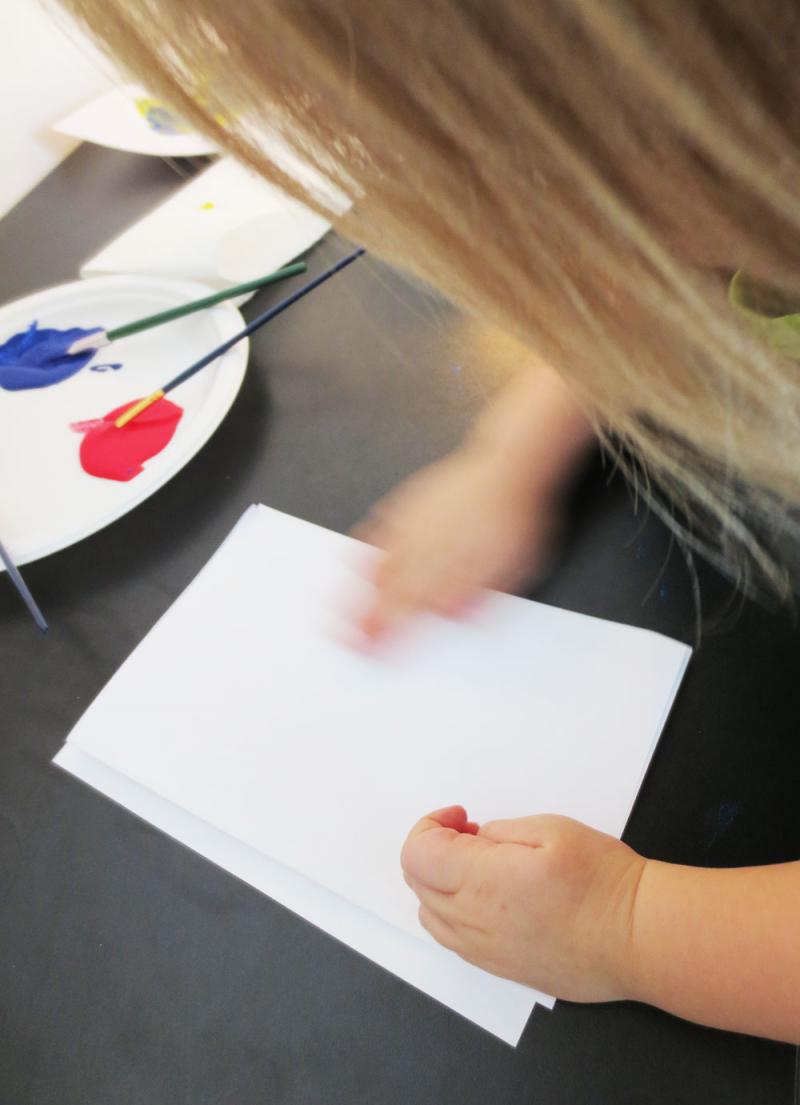
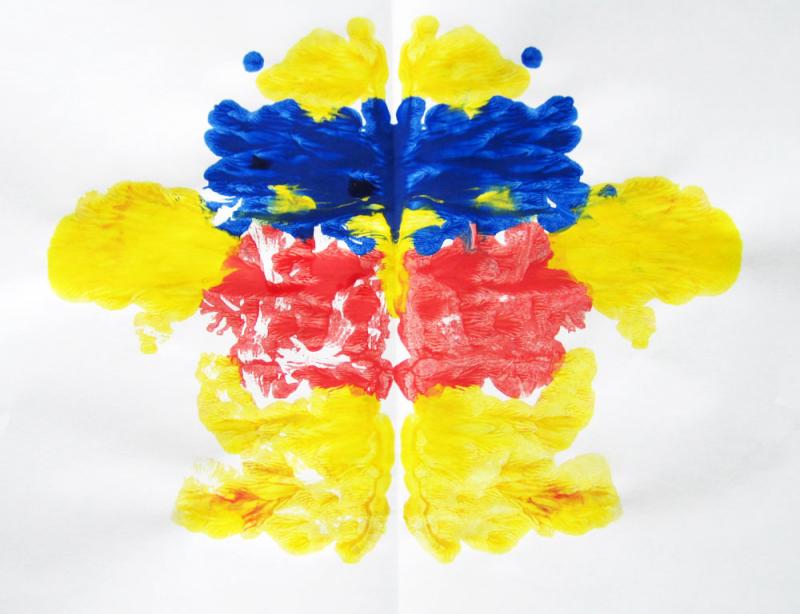
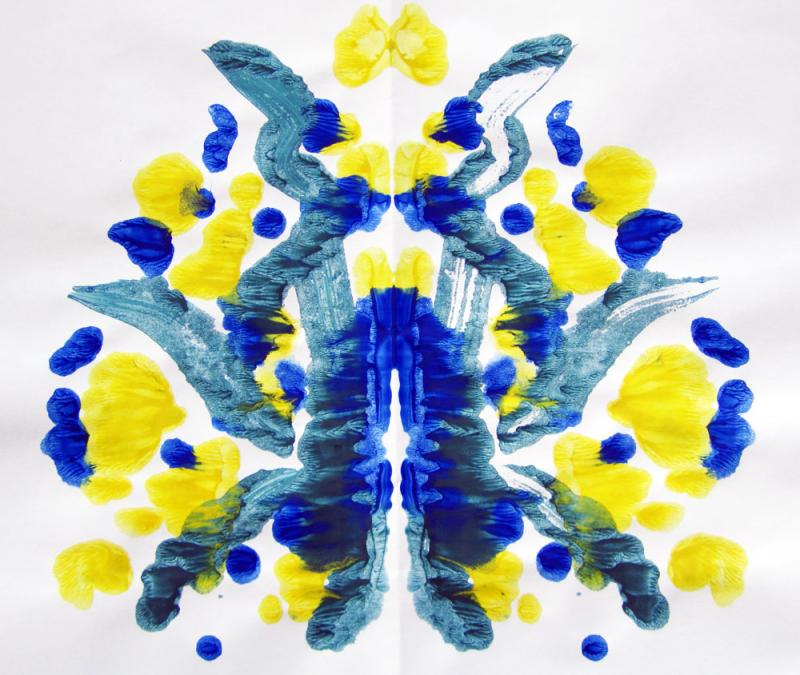
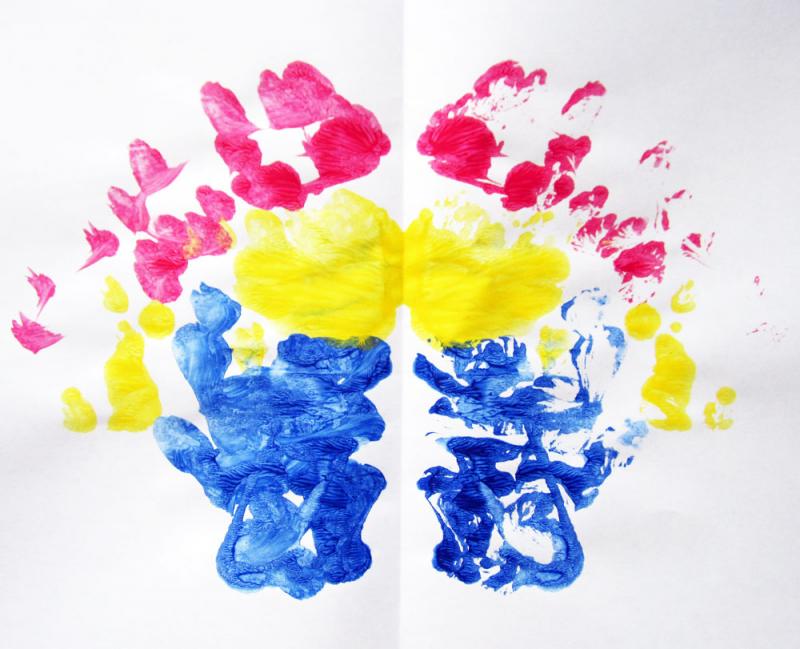
1) Fold a sheet of paper in half, unfold it and prepare to choose a colour.
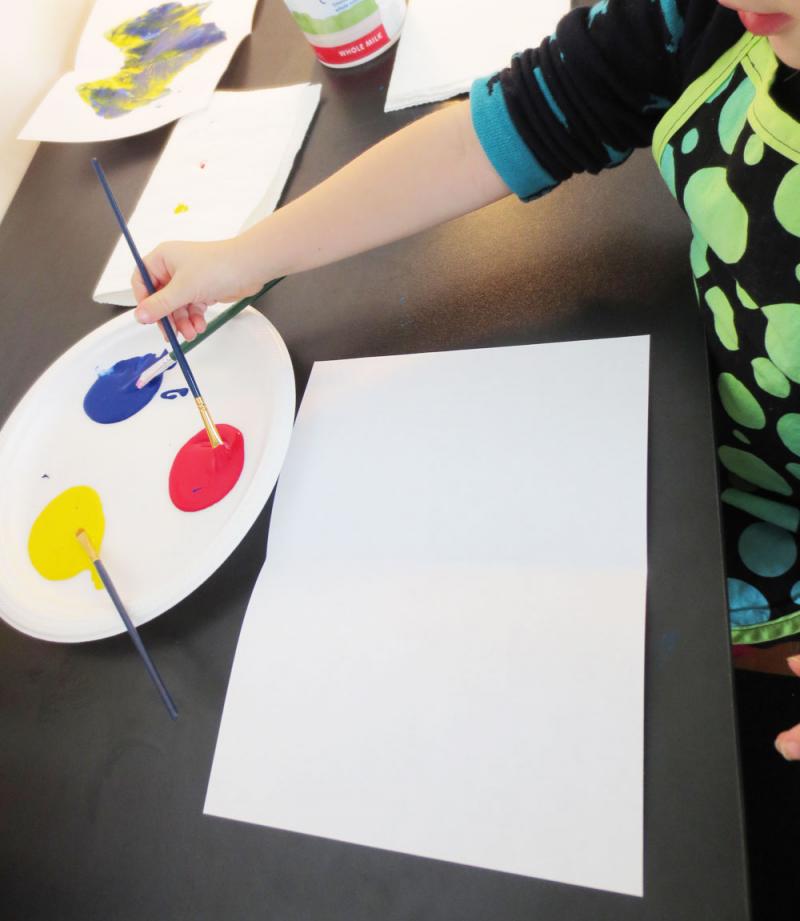
2) Place a dab of paint on one side of the paper.
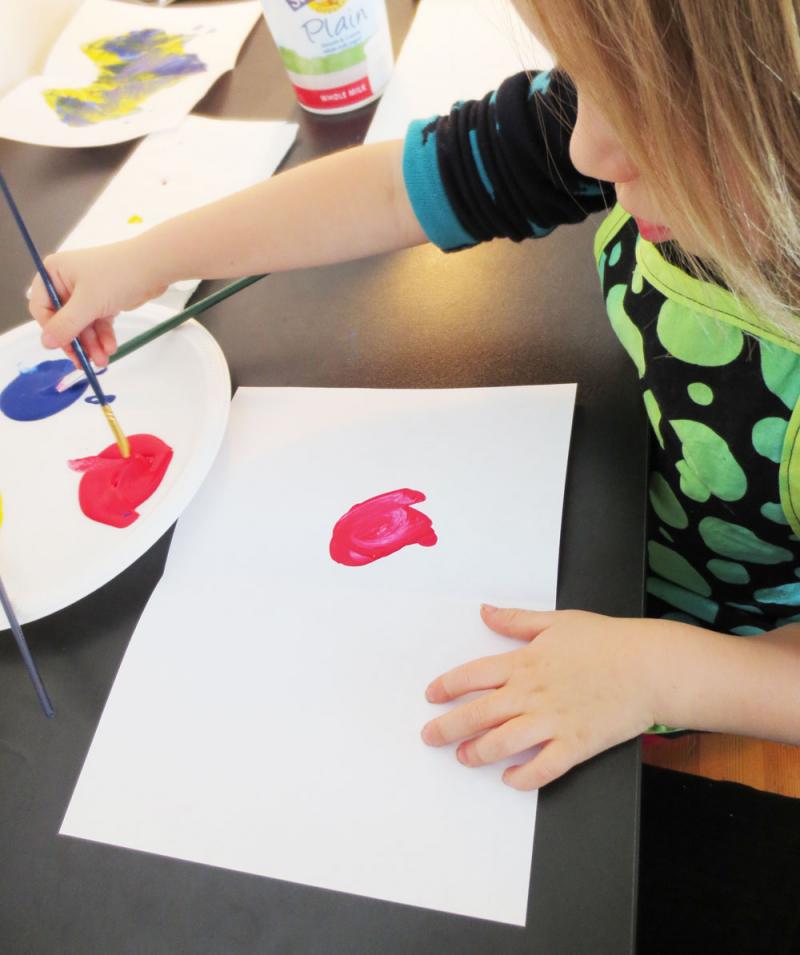
3) Then, place a dab of paint on the other side.

4) Fold the paper.
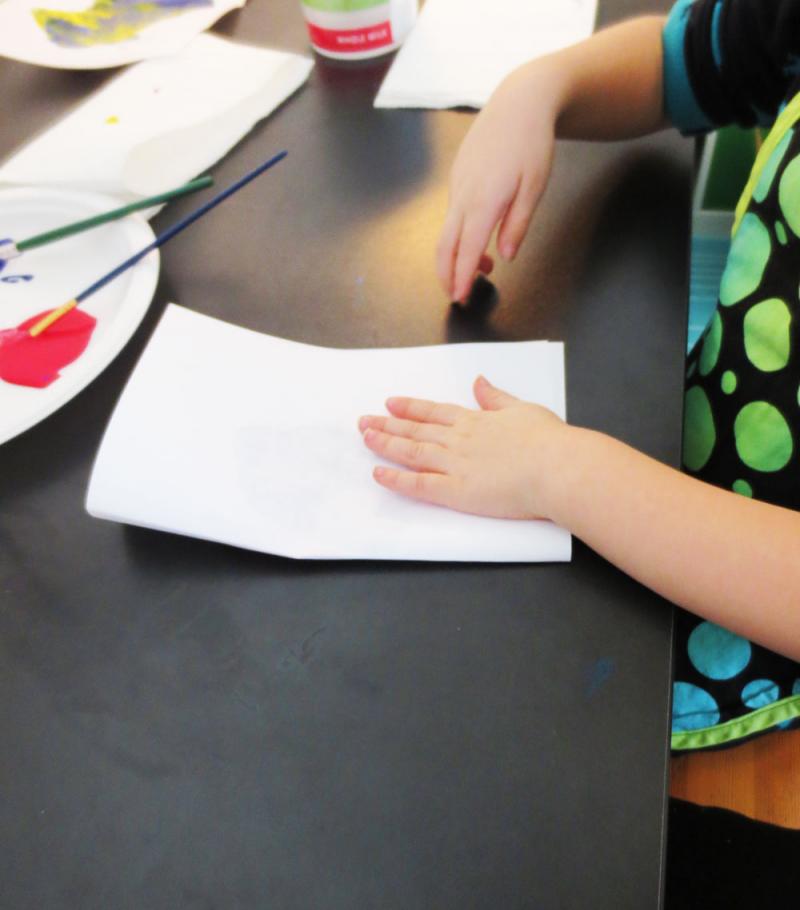
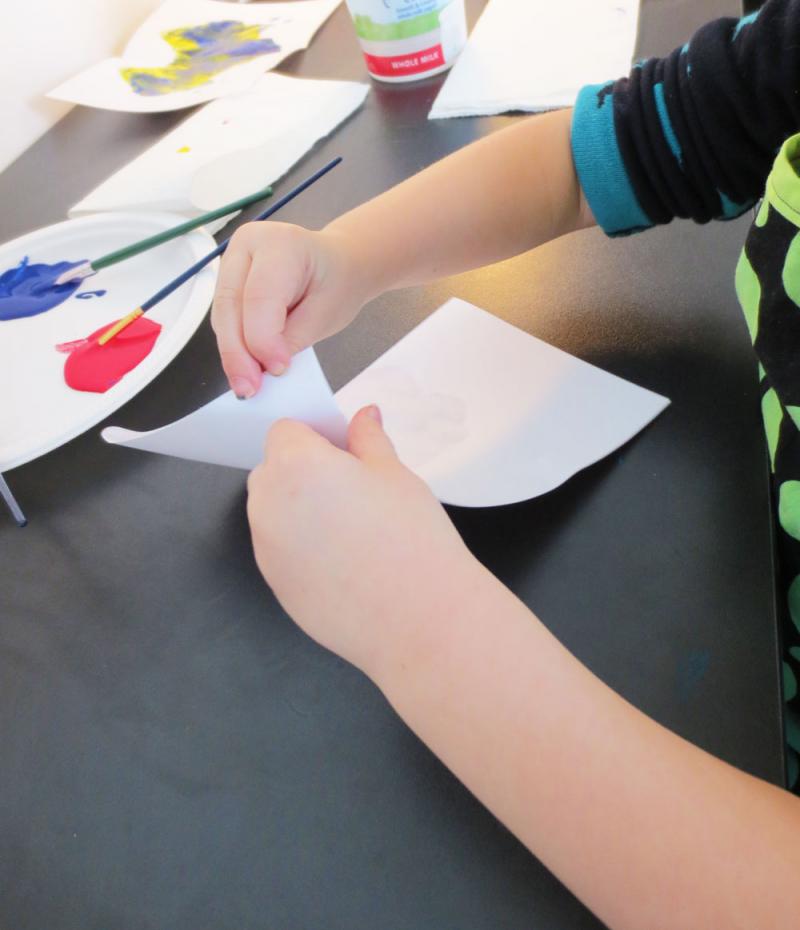
5) Rub the paper. (Tip: place another sheet of paper on top to absorb any leakage.)
6) Unfold the paper.
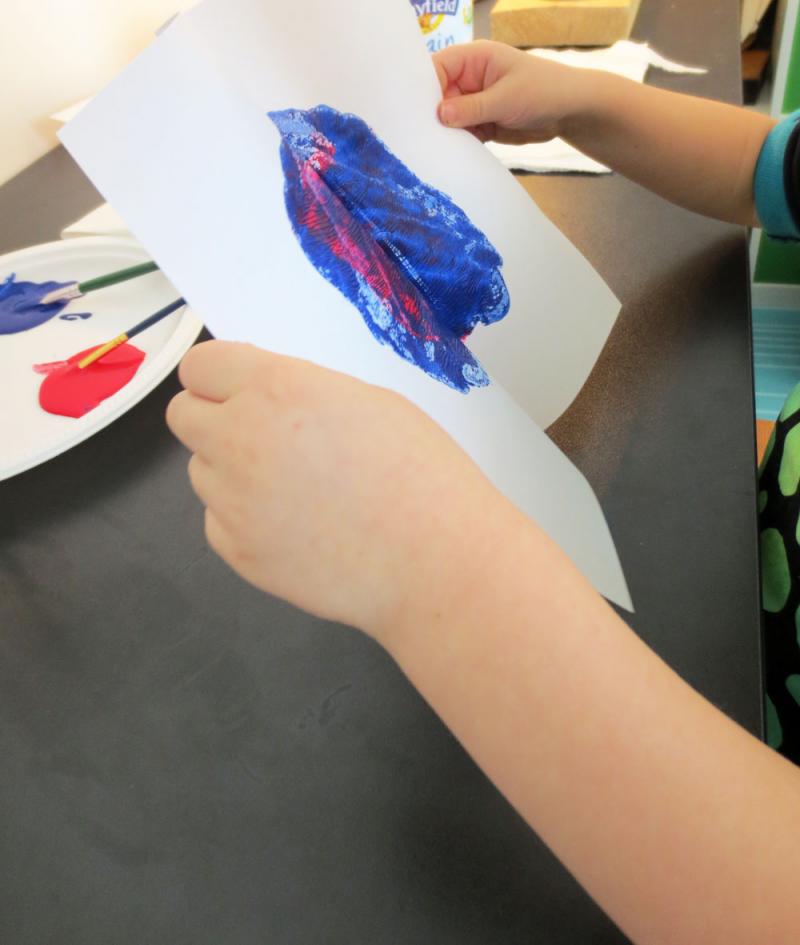
7) Marvel at the wonderful burst of colours.
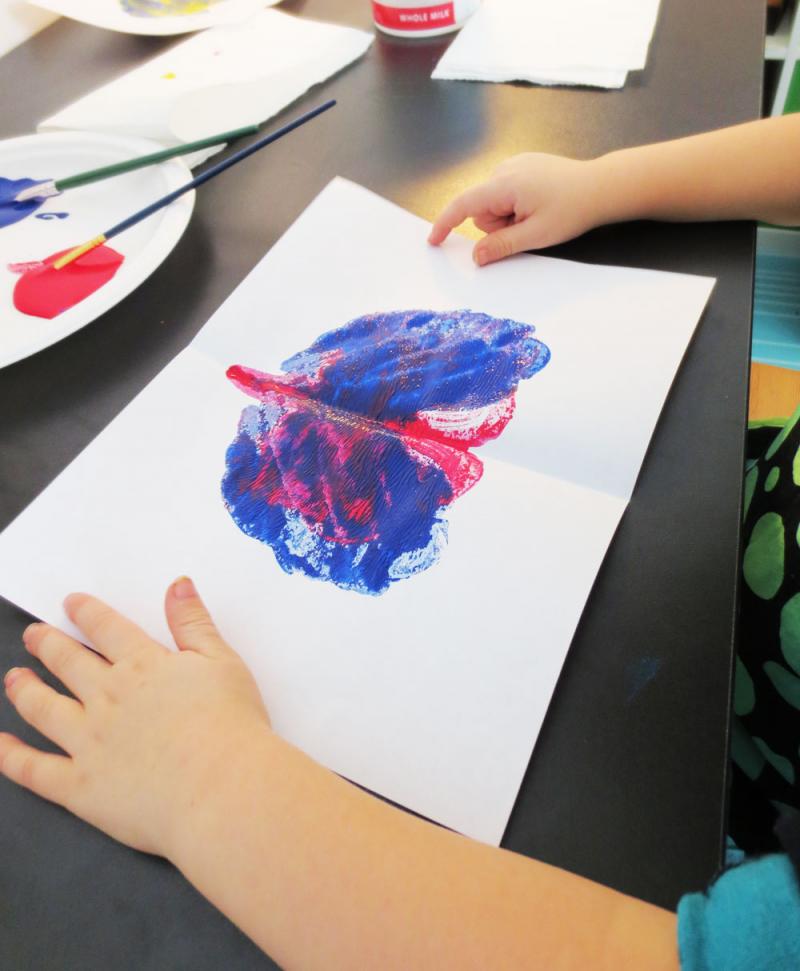
8) Repeat.
Once dry, you can leave the blots as they are, or you can get creative by cutting them out and gluing them onto colourful construction paper.
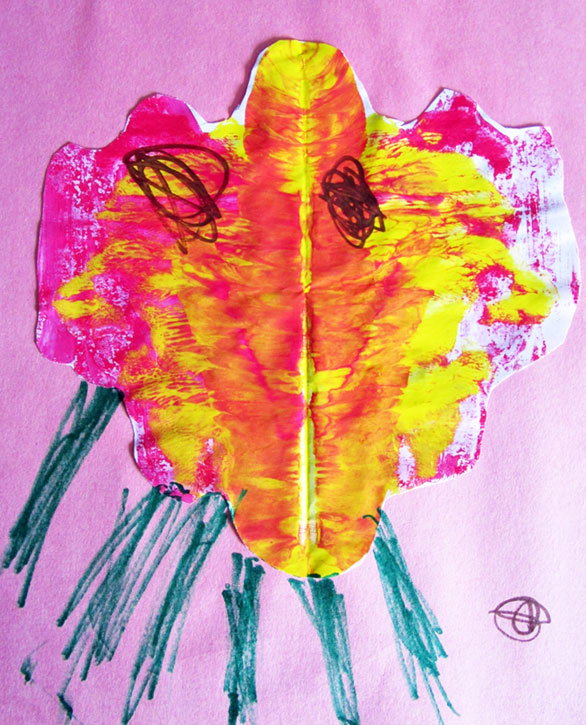

Feeling adventurous? Grab a magic marker and add some embellishments, like eyes and legs. Before you know it, the splats of colour you and your kids created together will become monsters, bugs, or alien creatures. The sky’s the limit and there is endless fun to be had while naming your creations.

The Dizzy Ladybug
Robot Wearing Mittens

Angry Hornet
Dancing Beetle
Rooster Kissing Rooster
The Fine Print: The primary colours are red, yellow, and blue and all other colours can be created by mixing them together in various combinations. Yellow + Red = Orange. Red + Blue = Violet. Blue + Yellow = Green. We call these new colours the secondary colours.
Imagine that!
Find more fun and creative art projects for you and your kids from Andrea at The Art of Childhood.

