I just had the most wonderful week of vacation in sunny Australia (it is the middle of the summer there). It was really great to get out of the cold for a week. Sydney is a beautiful city. The wharf is amazing and the gardens are gorgeous.
I spent a lot of time out of doors and yes I was fully clothed at all times (I do not do the beach).
Even with my extra vigilant sun smart approach to being so near the equator I was still reminded that even a little sun can be dangerous.
I had lunch on a patio one afternoon—long pants and long sleeves and under an umbrella—but my sleeves were pushed up to my elbows. While my face was covered in a great sunscreen (watch for a future review) and my eyes were protected by the greatest sunglasses my one forearm was exposed for about 2 hours while I ate and drank with some friends. The sun really was sneaky and I never fet the burn coming because the sea breeze kept me quite cool all afternoon. It wasn't until I was leaving the table that I noticed how red my arm had become.
"Damn, damn, damn!" I cursed (it was after all only day 2 of my holiday and being sore and irritated was not going to be fun especially since that night I had to dress up for the opera).
"Oh it is ok." said my local friend. "Just put some paw paw ointment on it and it will be fine."
Some what?
So first off paw paw is papaya. Easy enough. But I had never heard of using it to treat minor burns or irritation on the skin. Apparently no Australian medicine cabinet is complete without said ointment. Off to the pharmacy I went in search of the wonder product. And what did I discover - yep just like all cosmetics there are some great formulas, some really terrible ones and price points across the board.
The great thing is that it actually works - my very bad burn was reduced within a couple hours and gone altogether in less than 2 days. Here's why:
Papaya has an enzyme called papain. Papain, the active ingredient in the ointment, is antibacterial, antiinflammtory and also rich in Vitamin C and A which all stimulate dermal regernation. In theory, with the correct dosage and the correct formula paw paw ointment will work wonders on burns and all general irritations. Post burn treatment it also has some other amazing uses:
1. Cuticle Softener
2. Foot Cream
3. Elbow Cream
4. Lip Balm
5. Post Shave treatment (men and women and yes even intimate shaving)
6. Deep conditioning for hair
7. Diaper Rash Treatment (yep safe for kids)
8. Eye Cream
This product quite quickly became my go to tube for everything. I brought three tubes home with me just in case I couldn't find it in Canada.
Here's the downside though—lots of so called paw paw ointments are just scented petroleum jelly and not worth the bother.
What to look for and avoid:
1. High active ingredient. The best papain levels are at 5%-7% concentrations. This should be labelled on the tube. Less is ineffective and more will be too exfoliating.
2. No petrochemicals (petrolatum). Might as well just by petroleum jelly and apply it. Plus it is sticky with the petro chemicals.
3. The packaking should be opaque to protect the stability of the paw paw fermentation (active ingredient)
4. Don't pay more than $6 or $7 dollars!
Apply as generously as needed and while it will heal burns qickly it has so many more uses you will want this product around all the time.
My favourite is Pure Nutraceuticals Paw Paw Ointment ($7 for 25mL).


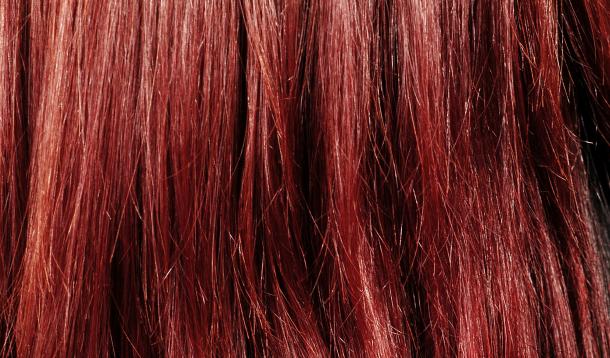
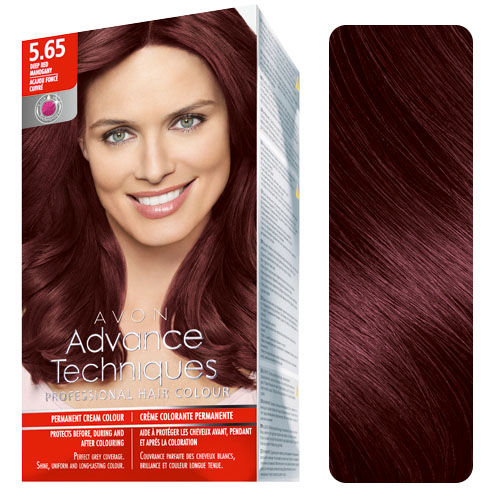
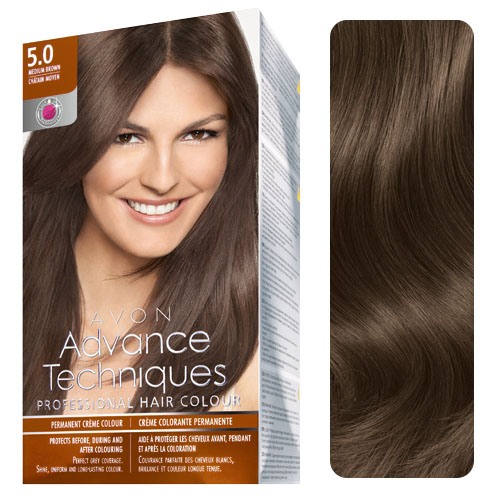
Let me preface by saying I am not a hair stylist. Yes I have managed and operated hair salons, in my career, but I am neither a colourist nor am I qualified to cut hair. I understand the language of hair stylists and I am always looking for quality hair products, so when I was sent a full set of the new Avon Advanced Techniques Professional Hair Colour I was very intrigued.
First, Avon has really been turning their old fashioned image around these last few years. With new formulas, cutting edge ingredients, and a sleeker design to their packaging this company has managed to appeal to a new generation without sacrificing their affordability.
Not everything produced by Avon is high quality but, like all cosmetics companies, they have some really outstanding items.
Second, Avon is branching out from traditional categories that have been their bread and butter for decades. This is good and bad because it will certainly give them a higher profile with consumers but it can mean cutting corners to get to the market quickly with new products.
When I saw the new hair colour I knew I had to bring in another expert to help me evaluate the formula. So I went to my colourist and asked him to look at the ingredient list and claims made. What I didn't do was tell him the brand. I wanted a strictly professional opinion based on his knowledge of formulations and ingredients.
Here is what I learned about hair colour:
![]() Always consider both lift and deposit. Deposit refers to the amount of grey coverage or pigment saturation. Lift refers to the level of peroxide used to develop the colour. The higher the lift the more permanent the colour. Generally speaking the lighter the hair the highter the lift.
Always consider both lift and deposit. Deposit refers to the amount of grey coverage or pigment saturation. Lift refers to the level of peroxide used to develop the colour. The higher the lift the more permanent the colour. Generally speaking the lighter the hair the highter the lift.
![]() Colours never translate as seen in a colour swatch because different hair can have different porosity meaning it will take the pigment differently. There is always a variance in shade based on individual hair.
Colours never translate as seen in a colour swatch because different hair can have different porosity meaning it will take the pigment differently. There is always a variance in shade based on individual hair.
![]() Colour build up can make the hair fragile and also effect the pigment application. Simply put the more pigment coating the hair shaft the more artifical the colour can look. Also as this build up increases the colour can actually start to damage the hair.
Colour build up can make the hair fragile and also effect the pigment application. Simply put the more pigment coating the hair shaft the more artifical the colour can look. Also as this build up increases the colour can actually start to damage the hair.
My colourist was very clear about in-salon colour versus home colour. He actually said a great many home colours are ok to use, the problem is that often the developer (peroxide) provided with them has too high a lift factor often causing breakage and some of the home colours contain metallic salts which cause intense build up of pigment which damages the hair. Most consumers would not know (until it is too late) if their home colour will do this. Often he has to correct these issues in-salon.
After looking at the ingredient list I provided him this was his feedback about the new Avon products:
![]() It certainly was a professional quality formula. The colour itself does not contain metallic salts and when he checked it against his colours in the salon the formula was almost identical. He said every formula works slightly different but this would be a formula he would experiement with as a professional.
It certainly was a professional quality formula. The colour itself does not contain metallic salts and when he checked it against his colours in the salon the formula was almost identical. He said every formula works slightly different but this would be a formula he would experiement with as a professional.
![]() The developer was the highest volume peroxide available. His concern was that it was not ideal for all types of colouring. For example he told me for the type of work he does on my hair it would be too strong and the result would be very intense. It certainly would ensure grey coverage, almost 100%, but grey coverage is not the only reason to colour hair.
The developer was the highest volume peroxide available. His concern was that it was not ideal for all types of colouring. For example he told me for the type of work he does on my hair it would be too strong and the result would be very intense. It certainly would ensure grey coverage, almost 100%, but grey coverage is not the only reason to colour hair.
![]() The after treatment "seal" was not up to his standards. It simply will coat the hair with a silicone that will create shine but won't last. He prefers a post treatment that will penetrate the hair and last for several weeks.
The after treatment "seal" was not up to his standards. It simply will coat the hair with a silicone that will create shine but won't last. He prefers a post treatment that will penetrate the hair and last for several weeks.
![]() Overall he said the formula would live up to its claims but reinforced that the biggest difference between a home colour an in-salon is the technician. He pointed out that even with my colour he custom blends it to suit me based on how much grey is being covered, how often I am able to recolour my hair, the mixture of pigment (he always custom-creates the right level of brown and red). None of this can be done at home with one tube of colour and a high-level peroxide.
Overall he said the formula would live up to its claims but reinforced that the biggest difference between a home colour an in-salon is the technician. He pointed out that even with my colour he custom blends it to suit me based on how much grey is being covered, how often I am able to recolour my hair, the mixture of pigment (he always custom-creates the right level of brown and red). None of this can be done at home with one tube of colour and a high-level peroxide.
Final verdict:
Avon Advanced Techniques Professional Hair Colour ($7.99 for full kit)
Meets the standards of "professional" product but can be limiting for custom work. With 23 colours in the range there is certainly something for everyone's taste. The developer (peroxide) is a high level, which is great for grey coverage, but will prove less than desirable for fashion colouring. While cerainly less expensive than going to the salon, it is important to note the cost of in-salon colour is not just the dye. The higher fee is also for the expert application. Something a home dye can never provide.


Sometimes I wonder why I wait so long to do something.
I have been considering facial fillers for some time and I have found oh so many excuses as to not get it done. Now all I can say is "why did I wait?"
Last week I blogged about Fortélis. I have to say that, while the experinence is not quite what is advertised, the results certainly are.
My most pressing concerns, about having filler done, were:
![]() Ensuring a natural look
Ensuring a natural look
![]() Avoiding the "frozen" look
Avoiding the "frozen" look
![]() Ease of recovery
Ease of recovery
Well the procedure was a great success.
I had my work done at Paramedical Skin Health in Toronto (2120 Queen Street East 416 916 7395) and in a strange little side story—the LME who did my work kept saying how she recognized me. I was flattered but really didn't think too much of it. Then, during my second visit, she said, "I know who you are! You trained me years ago." Well I have to say I immediately felt a lot safer (lol).
What to expect:
1. The procedure is not without pain. I did have a topical freezing agent and it helped but there is discomfort. Be prepared if you have a low pain threshold. The more volume needed the more painful the injection. As the filler is built up the pain reduces.
2. It takes more than one appointment. The brochure says it only takes 30 minutes but this is not true. There will be swelling from the injections and it needs to subside to evaluate the work. I was very pleased when I was told I needed to come back in 48 hours for an evaluation and touch ups. The touch-ups were completely painless.
3. Patience is key—my entire prodcedure took 3 hours in total over 2 visits.
4. The results were instant. And any adjustments needed (on the second visit) were instant as well. Yes I had a few lumps for a couple days but it was ok.
5. Bruising—I flinched and tightened up and it caused bruising. I was warned. It is important to relax as much as possible.
6. Bleeding—there may be bleeding. Especilly if you drink alcohol before the proedure (avoid drinking 24 hours before). I did have wine with dinner the night before and I did bleed. On my second visit I did not drink the day before and there was no bleeding.
7. The filler feels like my face—not weird implants. I washed my face, slept on it, had a facial everything. Totally normal sensation.
8. The filler spreads over 8 hours—it may fill pockets in the skin and it settles over an 8 hour period. Let the product relax before evaluating and remember a touch may be needed.
9. Not as expensive as I thought—yes it did have a cost but the results last for 1 year and when I did the math it is about the same price as a monthly massage or facial in a high end spa. Total price $2100—or $175 per month. Not cheap but not exactly out of the world expensive either. I weighed it against having Botox (which is what evryone pushes). Botox for me would have been $675 for a treatment (and would not have actually given me all the results I wanted) and would need to be redone every 3 months. Total cost per year $2700. So for me I actually spent less money and got better results.
10. Healing. I was back at work the next day. Yes I bruised but it healed in a couple days. Yes I saw some injection marks whch also healed in a couple days.
Overall—I am extrememly pleased. I look refreshed without looking plastic. I look energized without looking frozen. Most of all I really like the look staring back fom the mirror. Like I said "why did I wait so long?!"
Before treatment:
Two days after the second treatment:
Notice the fullness of the cheek area, the darkness under my eyes is gone, the lines and wrinkles around my eyes are gine and the ridge inbetween my eyebrow is gone. Well at least for the next 12 months.