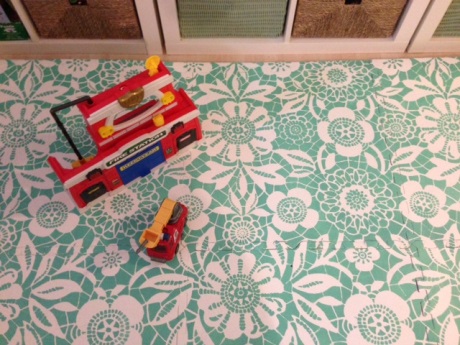
Foam mats create a safe spot for small children to play. They are comfortable and cushioned, but they are also very in-your-face bright. I thought I would come up with a way to make them blend in with any decor.
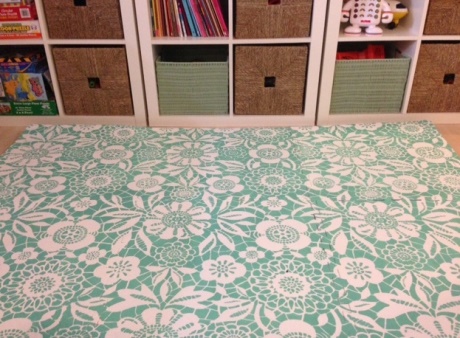
If you live in a smaller home, like we do, you may need to use the mats in your family room. In this case, you can disguise them to look like a rug. I stenciled this one using the
Skylar's Lace stencil. from Royal Design Studios. I think they would look amazing in a chevron or wide stripe as well.
Materials:
several foam mats
primer
varathane
high-density foam rollers and paint trays
stencil
Instructions:
1. Turn the mats {
which I found at Canadian Tire} upside down so the smooth side is on top. Arrange the mats to create the size and shape you want. Keep them together for the entire process.
2. Use a roller to add two coats of primer.
3. Paint the base coat using a roller. Do two coats.
4. Place stencil in the top corner and roll the paint over it. Be careful not to use too much paint. Hold or tape the stencil in place.
5. Repeat using the stencil until the entire mat is covered. Touch up any ‘mistake’ spots with a small brush.
6. Allow to dry and then add two coats of water based varathane. Make sure you use a non-toxic surface coat since it is for little people.
When you are done, you have this, which I think looks waaaay better then the bright colours they started with.
If you are using the mats in a child's room or playroom, you can make them less grown up and more interactive. To create this road map version, follow steps 1 and 2 then sketch your design on the mats in pencil. You may want to draw the design on paper first. Paint each section and then the smaller details. Use artists’ brushes for the fine work. Add two coats of varathane when done.