Years ago when I was a young twenty something, a friend brought a luscious pavlova for my birthday dessert when we were out at a restaurant. Pillowy white, slathered in whipping cream and fruit, it was quite possibly one of my favorite birthday desserts ever. I had never attempted to make pavlova since, always believing that meringue was difficult to make.
Twenty years later, I find that being a food blogger pushes me to try things I may not have otherwise. After seeing so many great looking meringue cookie recipes, I finally pulled out some eggs and my Kitchen Aid mixer to make my own. Meringue cookies are different from pavlova, but the method is much the same.
As I researched how to make meringue cookies, I discovered there seems to be some debate regarding how to bake them so I pulled advice from no less than four different sources to come up with this recipe, which I think works very well. Making meringue is all about whipping up egg whites with sugar, and then drying them out at low heat in an oven. The weather may affect how long it takes your meringues to dry-on a rainy day, up to even 30 minutes longer. If you live somewhere dry like southern Utah, it may take a shorter time. The point is not to be afraid to follow your instinct here-they aren’t hard, but they do take a little bit of ‘baker’s instinct’ to get them right. If you are like me and are not even sure what the difference really is between soft peaks and stiff peaks, go here for a great visual.
This recipe contains cocoa nibs, which add a dark chocolaty crunch that is fantastic against the sweetness of the meringue. They are a specialty ingredient, and if you can’t find them (or find them too costly), you can leave them out or substitute good quality, finely chopped, bittersweet chocolate. Milk chocolate has too much moisture and won't work as well.
Ingredients:
3 large egg whites, room temperature*
Pinch of salt
1/4 tsp cream of tartar
1 vanilla bean, split and scraped (or 1 tsp pure vanilla extract)
3/4 cup sugar (superfine is best, but if you don’t have that process regular sugar in a food processor for about 3 minutes)
3 tbsp cocoa nibs*
Pre-heat oven to 200 F and line your cookie sheets with parchment paper. Parchment is a must here, as you need to be able remove the meringues from the baking sheet easily.
 Thoroughly wash and dry both your mixer and the whisk attachment. There can’t be even a speck of grease on it or your meringue won’t work.
Measure the sugar into a bowl and stir in the scrapings from the vanilla bean. The seeds tend to stick together in clumps so you want to mash the vanilla bean seeds into the sides of the bowl and sugar so that
In the bowl of your electric mixer, mix the egg whites at medium speed until frothy. Add the salt and cream of tartar, and continue to mix until the egg whites hold soft peaks. At that point, begin adding the sugar gradually. You do this because you want the sugar to dissolve into the egg whites and not be gritty. Continue to beat until the egg whites become glossy and hold stiff peaks. To be sure that it’s finished, rub a small amount of meringue between two fingers and it should be smooth. If it’s still gritty, beat a bit more until it is smooth (which means the sugar is dissolved). Gently fold in the cocoa nibs.
Spoon the meringue onto the prepared cookie sheets, using about 2 tbsp meringue per cookie. Since there are cocoa nibs in this one, it won’t pipe well so use a spoon and don’t worry about dolloping it right on there. You should get about 12 cookies.
Bake the meringues in the center rack of your oven or an hour, rotating the pan after 30 minutes. The point is to dry out the meringues. Some people like theirs to be completely dry in the middle, others love a marshmallowy-like center. These come out softer and more marshmallow-like after 1 hour. If you would prefer them to be drier, bake up to 30 minutes longer. The meringues are finished when they feel dry to the touch, you can remove them easily from the parchment, and they sound hollow when you tap on the bottom. Turn off the oven and let the pan sit in the oven with the door cracked open another inch for about another hour, as they dry further.
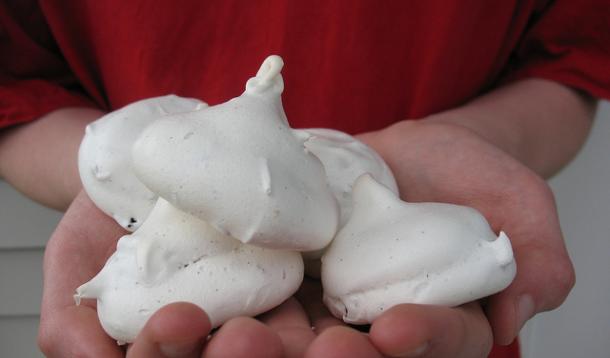
The meringues should not be browned-this means that your oven is too hot, and that the sugar is starting to caramelize. Rather, they should still be a snowy white, but dry to the touch.
Store your meringues in an airtight container on the counter. You want to keep them away from any moisture, or they will become soggy. They are best consumed right away, but should last a few days as well. You can also dip the bottoms of these in melted chocolate, but only do so if you plan to eat them fairly soon or the moisture of the chocolate will begin to break down the meringue.
Makes 12 cookies

![]() Notes:
Notes:
* Cocoa nibs are a specialty ingredient found at many kitchen shops or good grocery stores. If you cannot find them or would prefer not to spend the money they can be omitted, or you can substitute finely chopped bittersweet chocolate.
* Egg whites are more easily separated when cold. To bring to room temperature, cover and let them sit on the counter for 30 minutes.
* Cream of Tartar helps to stabilize the egg whites and is essential.
* Read up more on how to make meringue cookies at The Joy of Baking, which has lots of tips and tricks.


