When I was a kid, biscuits were a Sunday evening light supper. Mom would bake up a batch and set out a spread of lunch meats, cheeses, veggies, pickles, and we could make up a little plate of warm, fresh biscuits and fixings.
These cheesy, light bits of heaven are one of my teenager's favourites. He gobbled them down with soup and chilli, and then pleaded with me to make more so that he could take them in his lunch. These would be delicious with a salad, ham dinner, soups, and stews and are easy enough that you could get your older children to make them. Now, if you don't have buttermilk, you could use the trick of adding a little lemon juice or vinegar to regular milk to sour it, but I find that real buttermilk adds a lot more flavour. The buttermilk that I buy is so thick and delicious, I can't replicate the flavour with the substitution but in a pinch, I suppose it would work. (See below for the directions on how to substitute milk for buttermilk)
Ingredients:
2 1/4 cups flour
2 1/2 tsp baking powder
2 tsp sugar
1/2 tsp baking soda
1/2 tsp salt
1/2 cup cold salted butter, cubed (if you use unsalted butter, increase salt by 1/4 tsp)
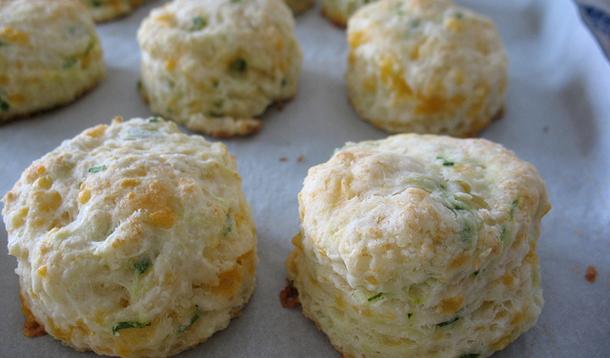
1 cup shredded extra old Cheddar
3 tbsp finely chopped chives (I used green onions)
1 cup buttermilk
Note: To sour milk to substitute for buttermilk, measure 1 Tbsp white vinegar or lemon juice into a 1 cup measure, and then fill with milk and let stand for 5-10 minutes. (source: Joy of Baking.com)
 Pre-heat your oven to 425 F
In a medium sized bowl, whisk together the flour, baking powder, sugar, baking soda, and salt. Toss in the cubes of butter and using a pastry blender or two knives, cut in the butter until the mixture resembles coarse crumbs. Stir in the cheese and chives with a fork.
Dump in the buttermilk and stir until the mixture forms a raggy-like dough, then turn out the dough onto a lightly floured counter. Knead gently-only enough to make the dough come together, really. You want there to be little pockets of butter in there to make them light and fluffy. Pat the dough out to about 3/4 inch thickness, then cut rounds out using a 2 1/2 inch biscuit cutter. (I have no idea what diameter mine was. In fact, it broke. I have to buy a new one this week)
Place on a parchment paper lined cookie sheet and bake for about 10-12 minutes, until the bottoms are browned and they are golden. Remove from the oven and cool on a rack, then store in an airtight container for about 24 hours. I usually freeze mine to use later in the week.
Makes about 12
Adapted from Canadian Living


