
You've decided to invest in a family photo shoot with a professional photographer. Congratulations! I know it may seem as if it is a big step and a lot of money, but even if you are a great photographer in your own right, you won't regret stepping back to let someone else take the reins this time.
![]() How to Make Your Blog Photos POP!
How to Make Your Blog Photos POP!
I try to budget for family photos every year, although sometimes life gets in the way. We've been fortunate to have at least four sets done in the past six years and I'm itching for the next one. I love seeing how our family changes - particularly the kids - from year to year, and it's so much easier to do that with someone else behind the lens.
Our experience with multiple photo shoots over the years has led me to come up with a few tips and tricks to help make the session go more smoothly:
1. Pick a location close to home. This one applies to those with small children. Work with your photographer to come up with a location that doesn't involve driving for an hour. Long drives = cranky kids = uncooperative kids = crummy pictures.
2. Find a time that works best for everyone. Your photographer will want to shoot when the light is best. Unfortunately, this may not work best for your family, particularly if it lands at nap/bed/dinner time. Talk to your photographer in advance to come up with a time that balances natural light and your family's schedule.
3. Wear comfortable clothing. I believe that people who feel comfortable in their clothes are more likely to look comfortable in their pictures. Pick out clothes (not too matchy-matchy, no big graphic prints) that complement each other but that everyone is happy to put on. Everyone's smile will be a little more genuine if they are wearing something that's more in their comfort zone.
![]() Don't End Up With An Awkward Family Photo: Fashion Tips for Your Family Pics
Don't End Up With An Awkward Family Photo: Fashion Tips for Your Family Pics
4. Come prepared. Think about the people-combinations that you want to have captured in photos, particularly if your family is larger or if you're including extended family. Make a list of these combinations and give it to the photographer at the start of the session.
5. Trust your photographer and look at the camera. This one is tough for most parents. Instead of focusing on your kids, make sure YOU are looking at the camera. All the time. Let your photographer worry about the kids. When she or he clicks that shutter at the moment that your child finally smiles or looks right in the lens, you don't want to be the one looking in the other direction! Your photographer is a professional - trust him or her to do the job well and to let you know if you need to help.
6. Let your kids be themselves. This is also known as "manage your own expectations." While I'm all for the posed shot with everyone looking the same way, leave some room for what else may come naturally. Often the "outtake" pictures that reflect reality (like the photo of my daughter pouting with her hands crossed at the beginning of this post) will become your favourites.
7. Don't let anyone get hungry. Pack a bag of snacks. No matter when you feed them, kids will get hungry as soon as a session starts. Also, don't be above a little bribery - a small pack of Smarties can go a long way. :)
8. Relax and have fun. Enjoy the hour or two with your family. Get silly. Have fun. Be happy. All of this will shine through in your pictures!
Have you had a great family photo shoot? Feel free to share your favourite shots with us in the comments below.
Image by Heidi Ram Photography
I'm going to confess something: in the past seven years, I've probably taken over 30,000 photographs. (It's really more like 40,000, but I'm getting better at culling my pictures.) Almost none of those photos are printed.
Our memories live in a digital box.
![]() 3 Rules For Your Best Looking Family Photos Ever
3 Rules For Your Best Looking Family Photos Ever
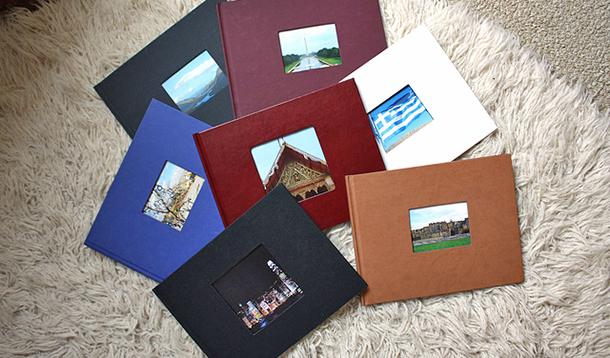
We recently took a weekend trip and one of the perks that came with the room was a coupon for a free photo book. I actually used it once we got back and quickly made an 8 x 8 photo book of our time at the resort. The day it arrived, I was surprised by how much my kids loved the book. They loved seeing themselves in print (even though the photos were not that great) and read it repeatedly over the first few days. I'm embarrassed to say that other than the photo books of their (respective) first years, I have no photo albums that they can look through or that we can tell our family stories from.
So, my goal for 2015 is to document our family memories with a book for each year. I'm going to compile the 2015 book on a monthly basis, and I'd like to also create books for previous years, working my way backwards.
I'm still wavering on how to do this, but these are the options I'm considering:
1. Old school photo albums. Print out the photos and slide them into a pocket. I'm paranoid about backing up your stuff, so this makes me nervous for some reason. If anything happened to the photo album, I'd have to start the printing and sorting all over again.
2. Paper Scrapbooks. I used to be an avid scrapbooker. Then I had my second child and I realized I didn't have the time to painstakingly cut out letter titles and glue down photos and embellishments anymore. My time commitments have only become worse, so this option isn't going to work for me, either.
![]() Moms Are Disappearing From Their Family's Story and It Needs To Stop
Moms Are Disappearing From Their Family's Story and It Needs To Stop
3. Digital Scrapbooking. This has potential; you begin by designing the pages in Photoshop/Photoshop Elements and then printing them out to slide into 12 x 12 pocket protectors in a binder/album. The other option is to save the layered template pages until the end of the year, and have them printed into a photobook at the end of each year (which is what I did with the books for my kids' first year). Want to get into digital scrapbooking? Check out JessicaSprague.com. It's so easy to learn.
4. Project Life App. If you're familiar with the Project Life way of scrapbooking (which, in paper form, combines 1 and 2 above, or, in the digital realm, falls into number 3), it's meant to make your storytelling simple. Becky Higgins, creator of the Project Life system, has created an app for Apple devices. THIS IS SCRAPBOOKING FROM YOUR PHONE, PEOPLE! It's really easy to use. You could print the pages as you go, or save them all for the end of the year and have them printed into a photobook. Think of this as an easier version of number 3.
5. Photobooks. I know I mentioned photo books in 3 and 4 above, but that's in the context of using another program first, and then printing those pages I create as a single-image page in a photobook from a source like Blurb or Shutterfly. As a standalone, though, each of the photobook services have their own easy-to-use templates and software that you can just drag photos into. Add a bit of text and have the book printed! (This is what I did with our wedding book, and our recent travel book.)
Each of 3, 4 and 5 meet my backup criteria - there's always a digital version of the complete book or each page that can easily be reprinted.
I suspect I'll probably use the Project Life App for my 2015 photos, since I can do it on the go and my current photos are already on my phone or in Dropbox. For previous years, I'm leaning towards using the photobook software from whichever printer I choose to use. While I'd like to spend more time on design, I think the drag-and-drop method is what is going to get these books completed. Done is better than perfect!
Are you hoarding pictures on your computer? What's your solution for getting them onto paper?
Photo by Flicker CC by Iris

Do you have a new camera and you're not sure where to start? Has your camera been collecting dust on a shelf (like mine), and you want to shake the rust off your skills? Have you been shooting like crazy and now you're ready to take your photography to the next level?
Sure, you could always turn to Google and search for YouTube videos on topic (which may be fantastic...or not), or you could look no further than these established resources for online learning:
![]() Check out our Photography 101 posts
Check out our Photography 101 posts
1. The Actual Camera Manufacturers. Most camera manufacturers now include a learning section on their website. Check out Canon's Digital Learning Center and Nikon's Learn & Explore. All the content here is free for your consumption!
2. CreativeLive. The concept at CreativeLive.com is brilliant: unbelievable courses that are FREE if you watch them live. Missed it? You can always buy the course and watch at your leisure. Prices vary, depending on the length of the course. Check out their calendar so that you don't miss a live broadcast of a topic you're interested in!
3. Lynda.com. You may be familiar with Lynda.com as an online learning resource for many different topics, but they have hundreds of photography courses as well. There are over 200 for beginners alone!
4. KelbyOne. I'm a fan of Scott Kelby and what he's created over at KelbyOne. Beautiful videos, top notch content. You can buy an annual subscription and watch as much as you want (pay attention for holiday sales - they often take $50 off the price), or you can rent a course for three days. (The rental option is fantastic and, in my opinion, one of the many things setting them apart from Lynda.com.) His blog and LightroomKillerTips website are also great resources, as well as his weekly webTV show, The Grid. He's written many books on digital photography and his entire business is based on teaching people how to improve their photography.
5. ClickinMoms. Check out the ClickinMoms University for a wide variety of courses you can take on a full participation or audit basis. In addition, they also offer some self-paced courses to do at your leisure. They have great content offered, but the pricing can be on the higher side. If you're looking for feedback and an interactive course, this is for you. The interactive courses are forum-based, and some involve video, while others are just handouts.
These are a few of my favourite online spots for learning and improving my photography. What sources do you turn to?
Photo from Flickr CC: Cubmundo

