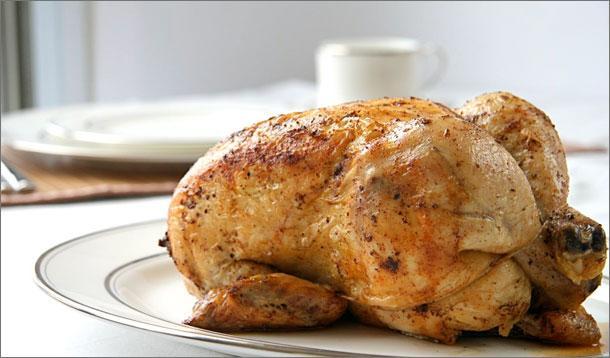
 Season the cavity of both chickens with salt and pepper. Place 1 sprig of thyme, rosemary and a bay leaf in each chicken. Rub the skin of both chickens with oil and tie legs of each chicken together with butcher's twine. Place chickens breast side up on a rack in a roasting pan. Roast at 400 F for 40 minutes, basting every 10 to 15 minutes. Scatter the carrots, onions and celery around the chicken and continue to roast for another 30 to 40 minutes until a thermometer inserted into the thigh reads 180 F. Remove the chickens from the pan and allow to rest. Place the roasting pan on the stovetop and cook over Medium-High heat until the vegetables are browned. Pour off the liquid until all but 2 tablespoons are left. Add the flour and cook for 4 to 5 minutes, stirring regularly. Whisk in the chicken stock until smooth. Simmer for 20 minutes and add salt and pepper to taste. Strain gravy through a sieve and discard vegetables. Cut chickens and serve with gravy. Enjoy!

 Choose food that can stack on top of one another. For example: instead of taking bag of chips take chips that are in cannisters to save space. Don't leave cups full of water on counter tops when you start to drive. We may have learned this the hard way. Twice. Look for dual-purpose kitchen items. For example, plastic milk cartons can also be used as a juice container. Pack what’s needed for each meal only. Use multi-functional kitchen tools that can be used for multiple meals. Plan ahead. You can make sauces, stews, and other side dishes ahead and have them ready to go in the fridge or freezer. Only do what you need to do in the RV and do the time consuming stuff ahead of time! This means more time for fun! Transport meat and vegetables in freezer bags with their marinades. When you're ready to cook, they're already marinated, which saves you another step along the way. Minimize your cooking apparatus (pots, pans, spoons etc.) and base your meals around what is convenient to cook with those items.

Chop potatoes and boil until soft. Chop green onions and set aside. Crack eggs and cook over low heat until you have soft, scrambled eggs. Saute yellow onions and garlic in 2 T olive oil until fragrant. Add sausage to onion mixture and cook all the way through. In large bowl combine sausage mixture, scrambled eggs, potatoes, cheese, green onions, parsley, salt, and pepper. Divide ingredients into 8 or 9 tortilla shells. Roll and wrap in tin foil until ready to eat! Serve with salsa and hot sauce. 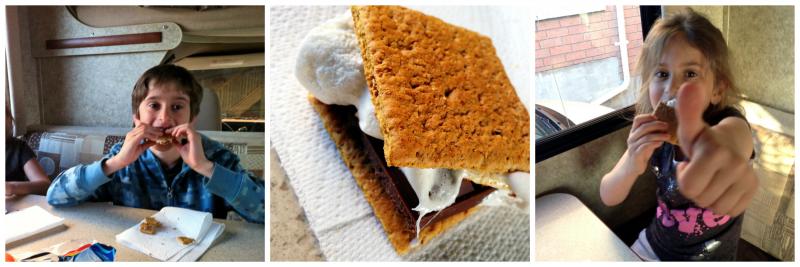
Place 1/2 of a HERSHEY’S® 45g Milk Chocolate Bar on graham cracker half. Carefully toast marshmallow over RV cooktop (supervise the kids if they’re doing this). Place over chocolate. Top with second graham cracker and gently press together.
 Enter the world of freedom by taking an RV vacation. With an RV you can go where you want, when you want, and escape the harried life of schedules without giving up the conveniences of home.
This is proudly sponsored by our friends at Go RVing Canada.
www.gorving.ca

This biscuit recipe makes for an island of tranquility in the stormy chaos that is a weekday morning in our house. I have one child who gets up at the crack of dawn wanting to colour, skip, get dressed, and celebrate the day; I have another who clings to his pillow and every last moment of sleep he can possibly squeeze out; and finally one who is so busy making herself look just right that she couldn't possibly have time to sit down and eat breakfast in the morning ("I'm very busy Daddy don't you know?").
So any recipe that my kids love and is ready to throw in the toaster oven is a winner in my books.
This recipe is also super easy to play around with based on your children's likes and dislikes. I'll generally whip up a batch on a Sunday night, and then cover and put in the fridge for easy to make breakfasts for the next number of days. When I get downstairs in the morning I toss a few in the toaster oven and then get busy making lunches. 20 minutes later these delicious and savoury biscuits are ready to grab and go. Perfect for kids bustling out the door to school or camp. Give them a try and see what your crew thinks.


Cook bacon according to instructions then chop coarsely.
Combine flour, baking powder, baking soda, and salt in processor, blend for 5 seconds.
Add butter cubes and blend until coarse meal forms, about 30 seconds.
Transfer flour mixture to a large bowl. Add cheddar cheese, fresh chives, and chopped bacon; toss to blend.
Gradually add buttermilk, stirring to moisten evenly (batter should be sticky).
Cover and store in refrigerator until ready to use.

To bake:
Preheat toaster oven to 425 degrees F. Line toaster oven tray with parchment paper.
Using lightly floured hands, drop generous ½ cup batter for each biscuit onto prepared baking tray, spacing batter about 2 inches apart.
Bake biscuits until golden and toothpick comes out clean, about 18 to 20 minutes. Serve warm or at room temperature.

