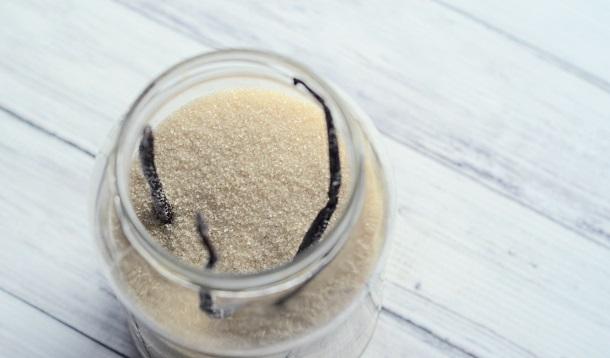
Have you ever looked at the price of vanilla sugar? It's priced somewhere between "Gold per Ounce" and "Firstborn Child." And if you've ever had the pleasure of smelling vanilla sugar, it's not hard to see why they feel like they can charge prices like this.
But if you're savvy, you know better. DIY vanilla sugar is something everybody can do. All you need is a big ol' jar like a pickle jar, except with all the pickle smell long, long washed out; some sugar, and some vanilla beans.
Oh, and time. Like making your own awesome Vanilla Extract, time is of the essence.
Ingredients
1 large and very clean sealable jar
Sugar (lots)
2-3 vanilla beans, roe in or out* (see below)
Directions
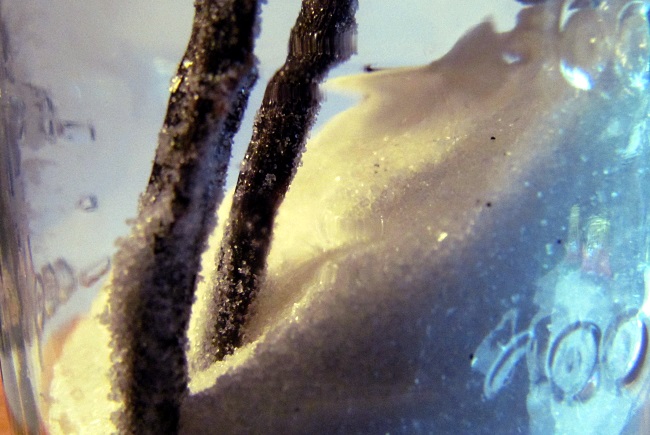
 Put your beans in the jar.
Fill jar with sugar. (Almost all the way full, not this half-full I did to show you the beans)
Wait 5-7 days before using, shaking hard once a day to prevent clumping.
Use as you would wherever you would use vanilla sugar, or even regular sugar!
Replace whatever sugar you use from your jar and shake it up for your next baking session.
Gloat as you enjoy a virtually limitless supply of vanilla sugar for a year, because the longer it sits, the better it gets.
* Now you have some flexibility. Do you like the idea of black flecks in your white sugar? Slice open the pods, extract the vanilla roe, and grind it together with a smaller amount of sugar before adding it to your jar so they don't clump together so much. Don't want the roe? Leave em whole. Have another recipe that needs vanilla beans? Even better. Let your sliced open, roe-extracted beans dry after simmering them in milk, and drop them in your jar.
![]() RELATED: Two Ingredient Gift - Make Your Own Vanilla Extract
RELATED: Two Ingredient Gift - Make Your Own Vanilla Extract
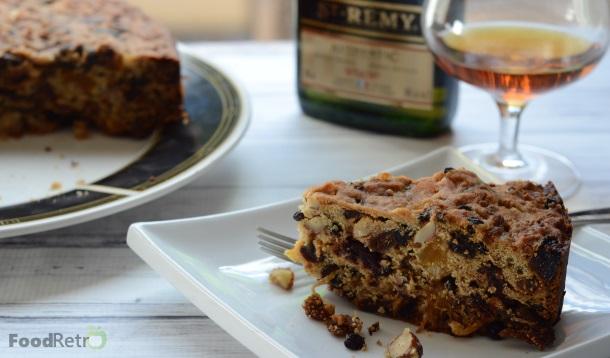
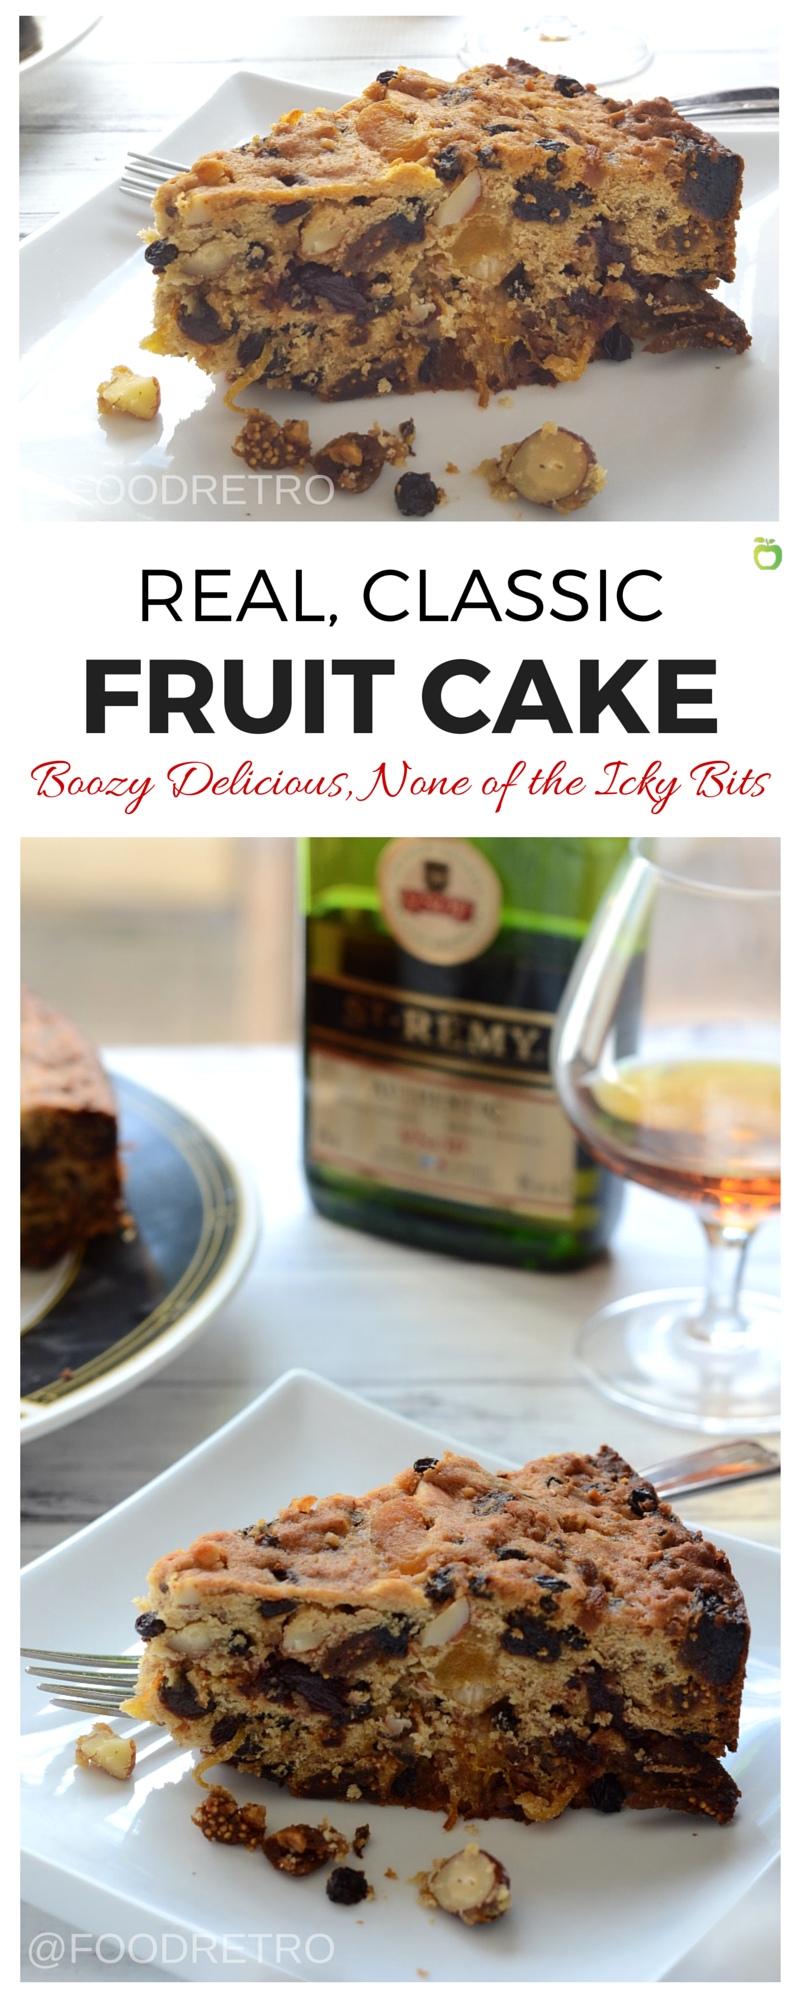
I must confess, I must be a sucker for challenges, cause when the YMC editor threw down the gauntlet asking if anybody would be willing to make a real honest to goodness fruitcake (like the kind you marinate with alcohol for weeks), I actually volunteered. In my defense, I had never made a fruitcake before. I was thinking it couldn't possibly be a big deal. Also, I heard that real, authentic, honest-to goodness fruitcake is amazeballs and totally worth it.
Well, it is. Both a big deal and totally worth it. But you'll have to have a lot of patience and a little faith.
Ingredients
$40 worth of dried fruit and nut stuff at Bulk Barn
Some flour, butter, salt and other typical baking things
1 bottle Brandy
1 Bottle of Wine
Directions
Step 1: Pour glass of wine before telling husband how much you spent buying stuff to make a cake that is usually considered the laughingstock of the holiday season (to which he says, "Ew, fruitcake.")
Step 2: Spend an hour chopping and measuring everything out in advance.
Step 3: Pour another glass of wine before spending another 30 minutes blending everything together, mostly to silence the inner voices that are having a lively inner commentation on whether this here will be the most expensive baking disaster of your career and the bet-takers laying odds whether the contents of this bowl are actually going to fit in this springform pan.
Step 4: Pour another glass of wine for husband as bribe because because you are having trouble stirring 2 cups of flour into a bowl of 3 pounds of stuff with a flimsy spatula. (Note to public, never use a spatula to mix fruitcake. Go straight for the biggest, stoutest wooden spoon you got.)
Step 5: Be impressed that it indeed fit in springform pan.
Step 6: Set it to baking in the first stage. Pour another glass of wine because after all that, you deserve it.
Step 7: Run out of wine. Chug some brandy when you realize you probably shouldn't have ignored that step about cutting the piece of parchment paper for the sides. Make a face and wonder if you should have dropped $50 on the large bottle of Calvados instead of the $14 flask of something the LCBO clerk said was the smallest / cheapest.
Step 8: Go looking for another bottle of wine and decide that if the cake fails, you'll write it up as a great story anyway, complete with fail pictures.
Step 9: After the cake indeed comes out without a fuss, and after weeks of patient basting with brandy, realize that holy heck. You made fruitcake. And it's good.
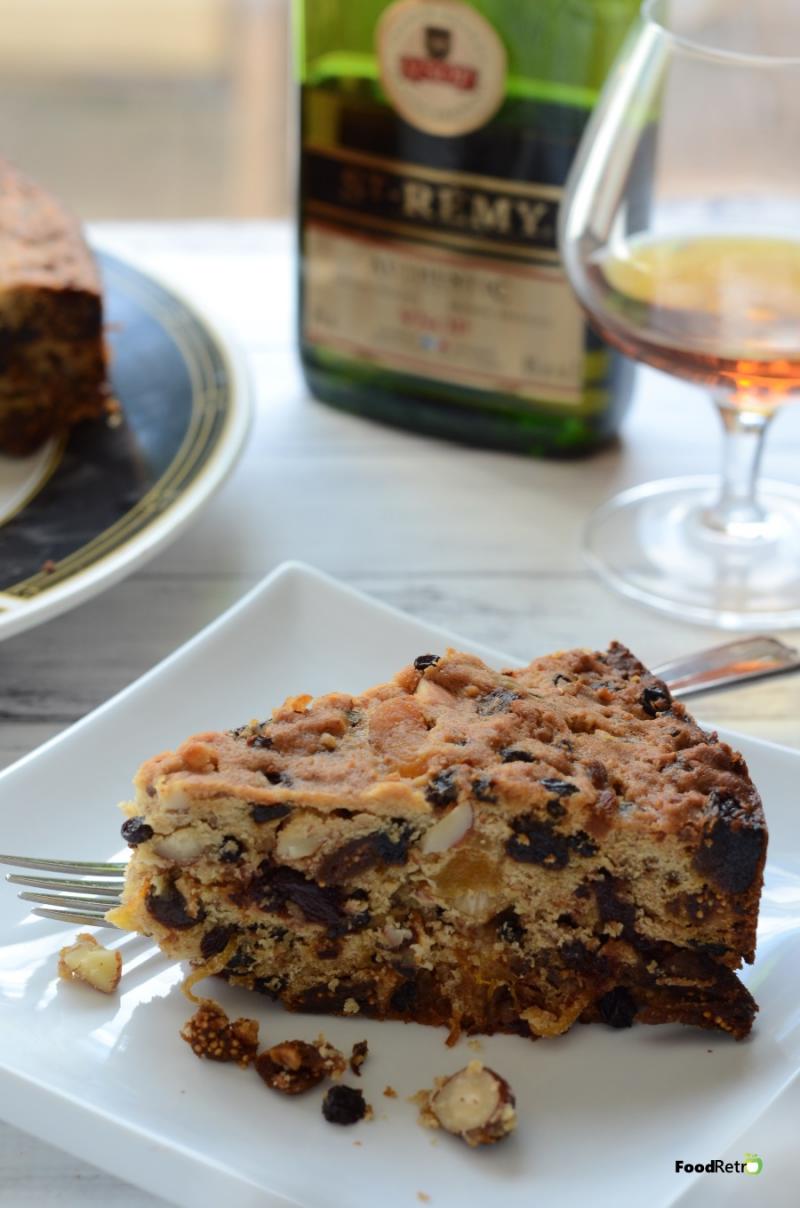
I'll level. Being as I didn't have my own (well tested) recipe nor the months required to perfect one, I created an amalgamation of other people's recipes and tips, notably the fruitcake recipe from Joy of Baking (which claimed to be tested) and Alton Brown's Free Range Fruitcake. Somewhere along the way I picked up the genius tip that fruitcake is thought gross cause people put the gross things nobody likes in it, things like slimy neon red glace cherries (and after looking at them at Bulk Bar, I agree. I can't even) and slimy candied citrus peel which was supposedly a mix but was sort of a uniform green.
I think this is an excellent approach to making fruitcake. If you look at things and think, "ew, gross," then exclude those things. I stuck with things that mostly people like to eat, which raised the price, but also raised the edibility factor and people's willingness to try the fruitcake I made, because nothing is glowing red and green in it.
I used a 10" springform (didn't have an 8") and this changed Joy of Baking's bake time considerably, so make sure you know what size your pan is.
Ingredients
1 cup unsalted butter
1 cup brown sugar *
1 1/2 tsp unsulfered molasses *
3 large eggs
1 orange, zested and juiced
Zest of one lemon
3/4 cup ground almonds
1 cup chopped nuts of your choice (I used hazelnuts only)
1 1/2 lbs (680g) of large dried fruit of your choice (eg. I used dried apricots, figs, & prunes) chopped up
3/4 lb (240g) of small dried fruit of your choice (eg. I used raisins, sultanas, currants, craisins, cherries)
3 TBSP brandy plus extra for basting
2 cups all-purpose flour
1 tsp baking powder
1/4 tsp salt
* If you happen to have both light and dark brown sugar in your pantry, you can use 1/2 cup of each instead of 1 cup of brown sugar plus 1 1/2 tsp molasses
Directions
I highly recommend prepping everything in advance; note the divisions in the ingredient list. Set your butter to soften in the mixing bowl with the sugar; zest fruit and set aside the juice and zest; chop your large dried fruit and set it in a LARGE (really big) bowl with the ground almonds and chopped nuts; mix flour, baking powder and salt in a small bowl; and in a microwaveable bowl, pour the 3 tbsp of brandy over the smaller dried fruit and microwave for about 90 seconds to soften the fruit and speed marinate it.
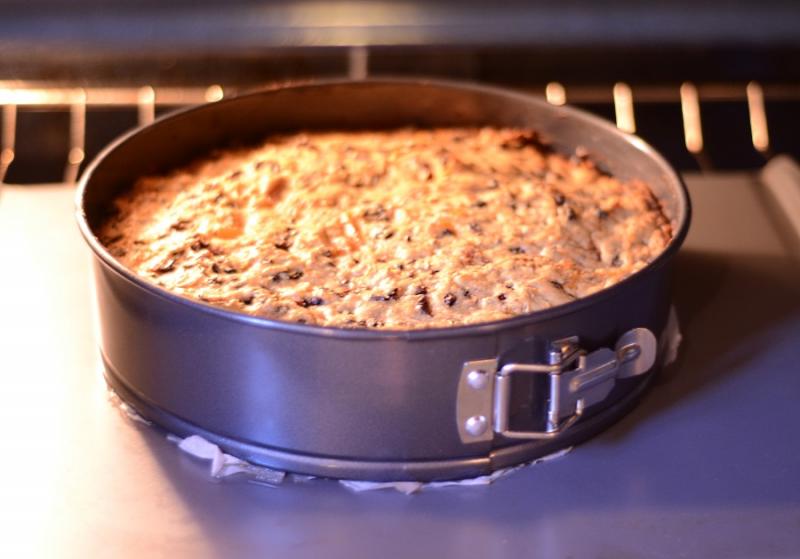
Preheat the oven to 325F (160C), line the removable bottom of a 10" springform pan with parchment paper (to help hold everything in), and then grease the paper and sides.
Cream butter, sugar, and molasses until fluffy with a mixer. On a lower speed, add the eggs one at a time, then the juice and zest, scraping down the sides of the bowl.
Pour the contents into the large bowl containing the chopped large dried fruit and nuts. Add the brandy and smaller dried fruit. Fold till combined.
Finally, fold the flour mixture into the cake batter, stirring well.
Scrape the batter into the springform pan and press the mixture evenly into the corners. Place the springform on a larger baking sheet, and bake in preheated oven for 1 hour.
Reduce the temperature of the oven to 300F (150C) and bake for another 30 minutes, or until a skewer inserted into the center comes out with only moist crumbs.
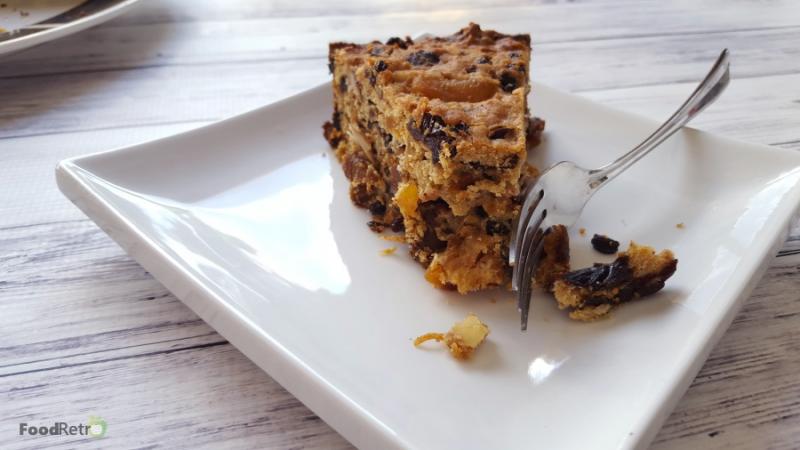
Remove cake from oven and cool completely. After cooling the fruitcake, prick the top of the cake with the skewer and baste with brandy.
Store the cake in a large Tupperware container, or wrap thoroughly in plastic wrap with an outer layer of aluminum foil, and seal in a large bag. Baste the cake again with brandy twice per week for two weeks, and then once a week until Christmas. Or freeze the cake after a few bastings until Christmas if Christmas is more than a month away.
Ensure that you do not baste the cake with brandy less than 24 hours before serving to avoid a strong alcoholic bite (unless you like that sort of thing).
And to those of you on the receiving end of the fruitcake, you should know that a real fruitcake is nothing short of a labour of love. Someone actually thought you were worth money AND weeks of effort. So the least you can do is take a bite without making a face. Capice?
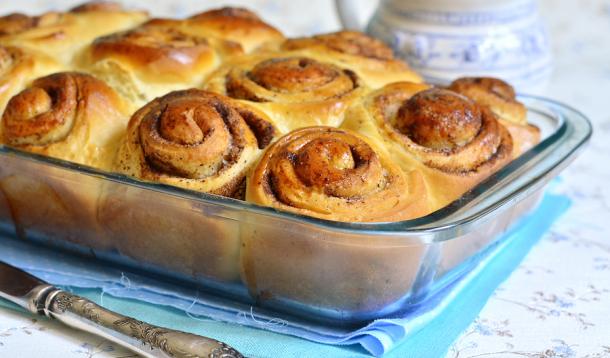
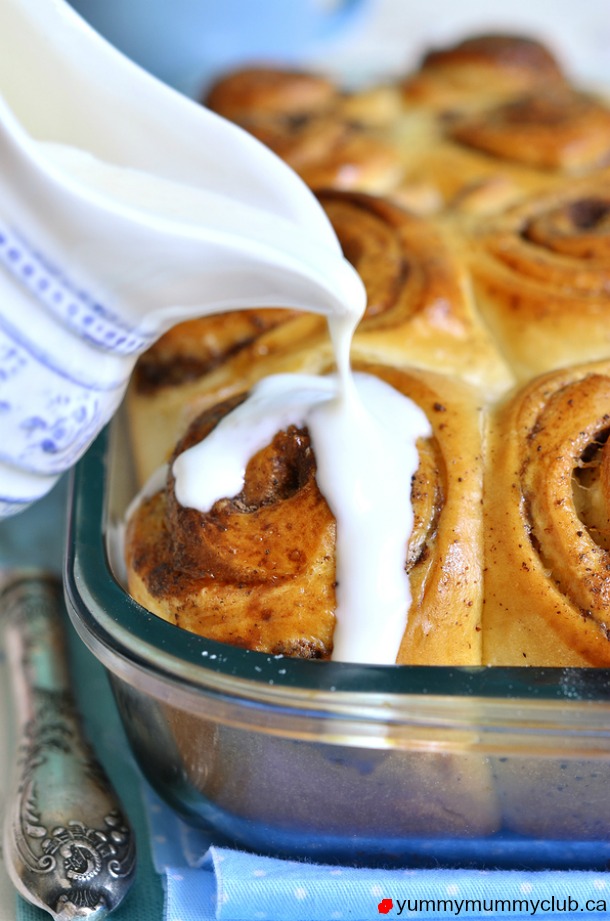
As is often the case, some of the best recipes seem to come out of everything going pear-shaped. Case in point: coconut breakfast buns.
Cinnamon buns had been on brain for a while, and I had a recipe sketched out. I happened to have some time on my hands and I thought I would bake. But I was well overdue for a grocery run. In my poor, nearly-empty fridge, next to expired milk (which I tossed), was non-expired table cream I had for guests for coffee. I had only salted butter. And when I went to my pantry, my coconut oil was sitting there looking me right in the eye.
Well, I like coconut. In fact, I'd say it'd be a good candidate for long-term dating material. And I had coconut for garnish.
As I was making the sugar mix, I opted for my somewhat-ignored palm sugar instead of brown. And when I opened up the cinnamon, suddenly I didn’t want that spice anywhere near my sweet, rich, coconutty goodness. So I reached for the vanilla instead, and these lovely buns were born.
If this sounds like death by coconut to you, then rest assured: it's one of the sweetest ways to go.
Ingredients
1/4 cup warm water (~125F)
1/4 cup granulated sugar
2.5 tsp instant yeast (1 package)
3/4 cup 18% cream
1/4 cup cold-pressed coconut oil + 2 tablespoons
3 1/4 cup all purpose flour, divided
1/2 tsp salt
1 large egg, beaten, room temperature
1/2 stick salted butter (4 tbsp)
3/4 cup Madhava coconut (palm) sugar (you can substitute brown)
1/2 tsp pure 100% vanilla extract
Icing sugar, approximately 1/2 – 3/4 cup
Coconut flakes for garnish, optional
Directions
Warm your cream and coconut oil, either briefly via the microwave or in a pot on low heat. You want to warm the two to a temperature safe for your yeast (125-130F max!), so mind the heat and use a thermometer.
In a large bowl, mix the warm water and the sugar. Add your yeast and stir it to hydrate it, activate it, and keep it from being lumpy in dough. Add the oil, cream, salt, and one cup of the flour.
Stir the flour in to mix the ingredients well, and add the egg. Add the remaining flour gradually until the dough becomes a ball. Turn out the ball and knead for a few minutes, adding more flour in sprinkles as necessary to keep from sticking. When the ball stops feeling so sticky, and when a pinch of dough stretches and can be made into a translucent “windowpane” instead of tearing, you’re done!
Cover the dough and allow to rest for 10 minutes. While the dough is resting, using a mixer, cream the palm sugar, butter, and vanilla together for a couple of minutes, or until fluffy.
Using a rolling pin, roll the dough out into a rectangle approximately 12″ x 9″. Use your fingers to push the rounded edges dough back towards the center as you roll to aid you in making the rectangular shape.
Spread the butter/sugar mixture over the dough and roll the dough by the edge into a log, attempting to keep the edges as square as you can.
Pinch the seam closed, and cut the log into 8-12 evenly spaced pieces depending on the size of roll you want by cutting from the middle (each piece in half till you get 8 pieces, or half, then half, then by thirds to get 12).
Place the rolls into 1 or 2 (depending on quantity) greased pans, cover, and let rise for 30 minutes. Rolls should approximately double.
Bake for 20 minutes at 375F.
While the rolls are cooling, melt the two extra tablespoons of coconut oil. Using a spatula, add the icing sugar a couple of tablespoons at a time, mixing till smooth, until you get a sweet, slightly runny icing. Drizzle the icing with the spatula over the tops of the rolls, and garnish with extra shredded coconut if you prefer.
Enjoy!