This month, I had the pleasure of being invited out east, to Oshawa, where I haven’t had to drive near for ages. Durham College has campuses in Oshawa and Whitby, and they’ve opened up an exciting program for students with their boutique culinary school, the Center for Food (CFF), about a year ago.
For students looking for something a little bit different, this rather small and intimate setting boasts a uniquely integrated series of programs. You see, the CFF isn’t just a culinary school at all—it’s also a working green-certified teaching bistro open the public, and there’s also a small retail shop inside called Pantry, where anyone can buy an amazing selection fresh and preserved goods made by the students of the CFF (I came home with venison stew, and some pickled beets and loved them).
![]() Preserves 101: Have the Best Tomatoes All Year-Round
Preserves 101: Have the Best Tomatoes All Year-Round
I had the pleasure of speaking to one of the students who prepared our food, Justin Hurley. This young man never dreamed he would end up in culinary studies when he was in high school, but he has fallen in love with the program during his previous year, and he is intending to continue in culinary management.
The icing on the cake, however, is that the CFF is also a philosophy of sustainability. Their credo is “Field to Fork,” and to prove it, we were shown some of the freshly-dug up three acres facing the large bay windows of the bistro that will eventually become a large herb garden and orchard in the spring, supplying some of the Bistro’s demand for fresh produce. There’s also another 10 acres at the Windreach Farm (a partner of the CFF), being tended to by farming students, who will supply much (if not most) of the rest of the CFF’s needs.

(Christian Pritchard, chef; Brittany Lombard, second-year Durham College (DC) Culinary Management student; Dave Hawey, DC professor and program co-ordinator; Robert Grieve, DC professor and program co-ordinator; Jamie Kennedy, chef; Ron Chatterton, chair, DC Board of Governors; Roger Anderson, chair, Region of Durham; Pat Perkins, mayor, Town of Whitby; and Don Lovisa, DC president. - Photo property of Durham College.)
Supporting the Center for Food’s vision of improved rural economy is Chef Jamie Kennedy, who is an ambassador of the CFF’s programs. Chef Kennedy makes regular visits to the campus and works with the students, sharing with them his love of food as an expression of art and instilling within them the professional pride in using locally produced food.
For parents living in the GTA with high-school aged children interested in hospitality, horticulture or culinary studies, you may do well to check out Durham College’s offerings. And if you’re in the area--with kids looking for a college or no—check out the Bistro ’67 and Pantry for some delicious, local foods.
Have you ever had real eggnog? If your answer is "yes*" (*it came in a box), then the answer is no. No, you have not.

Some people believe in fate. Some people believe we were put on Earth for a specific purpose. Myself, I feel like I must embark on a personal spirit quest every Christmas to educate people about the commercial Nog Formerly Known as Egg, which is a whole lot of (????) filled with artificial flavourings, carcinogens, seaweed thickeners, and additives. Eggnog no longer contains any egg, and is allowed to label itself as eggnog with less than 1% dairy in it.
 Here's Why You Need To Read Food Labels
If you don't believe me, take your own spiritual quest to the grocery store aisle and have a look at the ingredient label. Just make sure you fast beforehand.

I steadfastly maintain that this is why there is decline in the drink's popularity, because real eggnog is FRICKIN' DELICIOUS, man.
REAL. EGGNOG. IS. AMAZEBALLS. PERIOD.
I have a how-to on making enough (real) eggnog for a Christmas party (like a boss). But maybe you don't want that much. Maybe you only want a little. Maybe you want only just enough eggnog to bake cookies with, or to make Majia's make-ahead Eggnog French Toast (made 139% more awesome with the power of eggnog that has eggs in it).
Maybe you love eggnog (even the fake stuff) everyone else is like "Eeewuh, I don't like eggnog!"
Or worse, maybe they're like "Omigaw, no way! I won't drink! Raw eggs cause salmonella!" (Even though odds of a contaminated egg be approximately 1:20,000.)
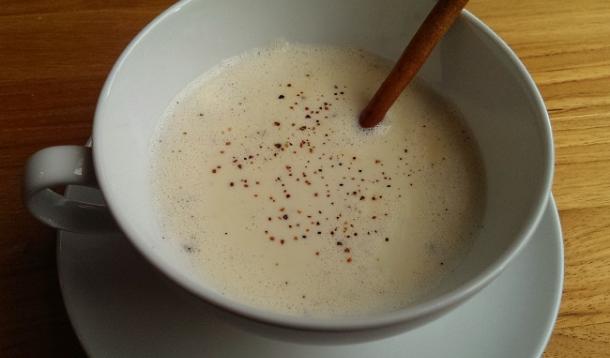
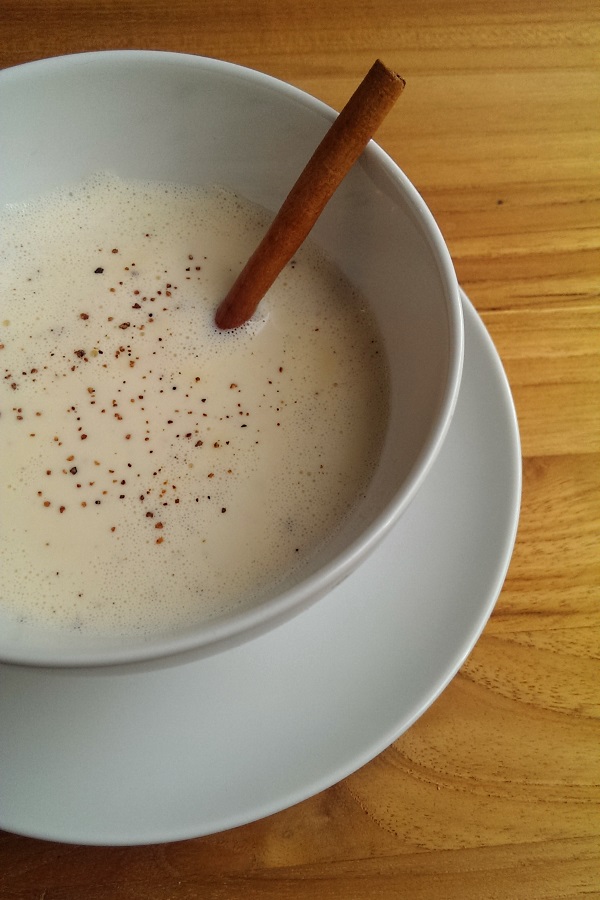
So what if I told you I could teach you how to make one cup of eggnog... in under 10 minutes?
What if I told you it could be made safely, with pasteurized egg in it?
And yes, this is entirely possible. Egg yolks begin to coagulate (turn thick and rubbery) somewhere roughly between 149-158°F (I actually get a different answer every place I try to get a definitive number)... but on two things all the various sites agree: 1) at 140°F, salmonella bacteria begins to die, and 2) in commercial settings, egg is considered pasteurized after being held at this temperature for about 3.5 minutes.
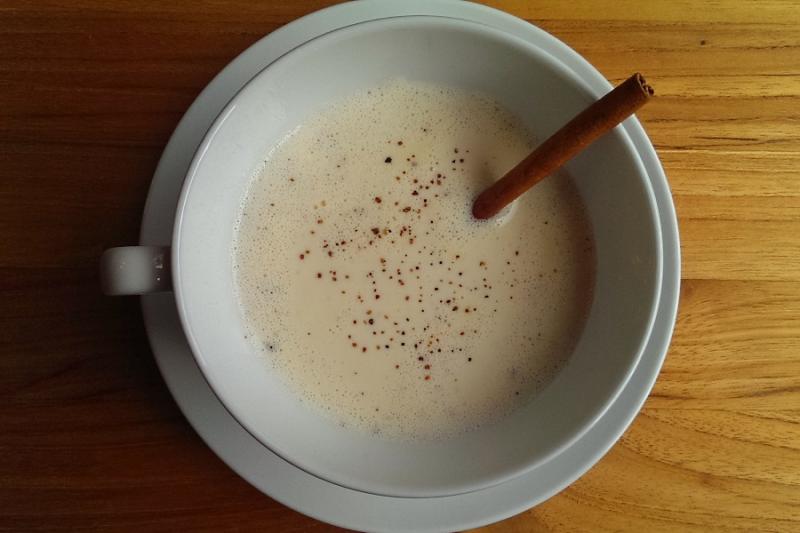
It's difficult (if not impossible) for an individual to be sure that they've held a whole egg, still in shell, at the correct internal temperature for 3.5 minutes. But we don't have to hold the whole egg to 140F. We only need a single yolk, scrambled, and brought slowly up to the point that it begins to thicken, which is considerably hotter than the temperature required to kill bacteria. With hot milk, slow heating, and continuous whisking, the egg cooks through like a custard, without forming large clumps of scrambled egg.
Oh, and if for some reason you like the taste of rum, but you don't want all the fun side effects that come along with it? Use a couple of drops of rum extract.
 Heat the cream in a cup in the microwave for 90-120 seconds, until steamy and frothy. In a small saucepan, whisk the egg yolk and the sugar till the yolk turns a light shade of yellow.
Temper the egg yolk by adding the very hot cream in a slow drizzle to the saucepan and the egg, whisking continuously. Turn the heat on to medium low under the saucepan, and continue whisking for another 3-5 minutes, until the cream mixture thickens slightly, but before it begins to simmer.
Remove the saucepan from heat immediately and set on a hot pad. Whisk the vanilla and alcohol in with a dash each of cinnamon and nutmeg. Pour eggnog through a small sieve (if small curds have formed near the edge of the pan) into a large mug.
Cover and refrigerate eggnog until chilled, or up to a day. Serve garnished with more nutmeg, if desired.
For reasons I won't probe too deeply, I find that December tends to be the time of year when I decide to go multi-ethnic on the dinner plate. This might stem from a fear of conformity (turkey? BAH. EVERYONE is making turkey, man!), but it could just be that when I'm being flooded in holiday offerings, I don't want to eat holiday stuff all month long.
Besides, it reminds me of the fact that I haven't hung up a single holiday decoration yet.
OK, so we're probably still dealing with fear of conformity.
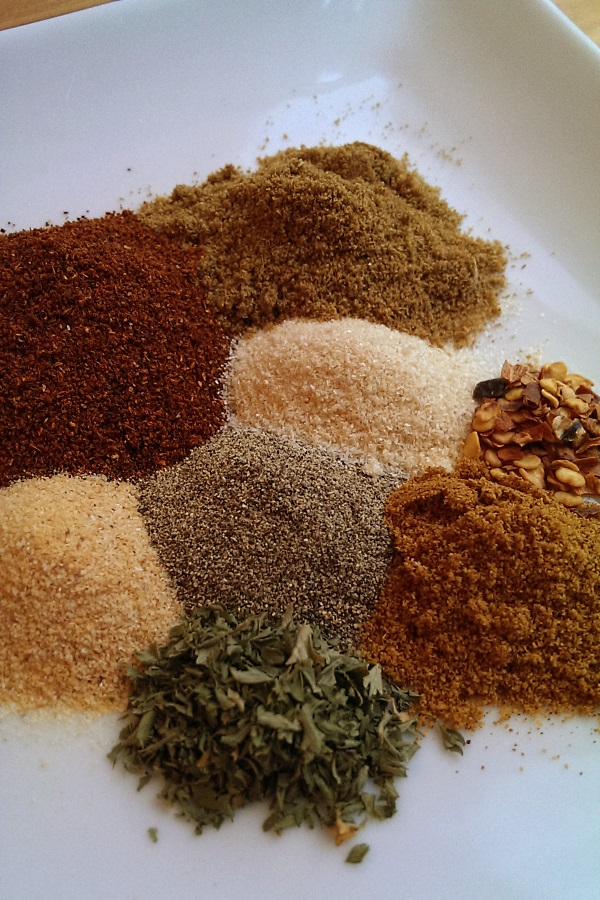
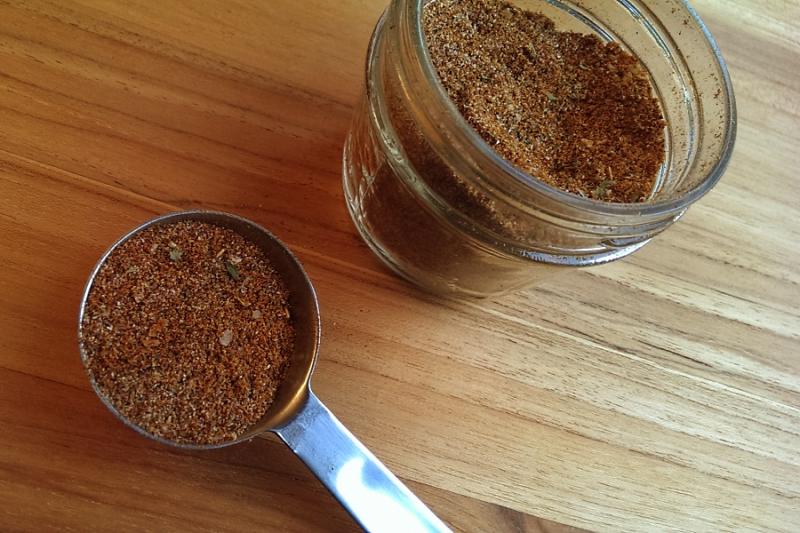
So you're probably wondering why you would want to make the taco seasoning when you could just use a box. I've got little beef with the box mix (did you see what I did there?) but it's got limitations. So this is why you might want to make your own:
![]() The Five O'Clock Scramble: 5 Steps To Dinnertime Bliss
The Five O'Clock Scramble: 5 Steps To Dinnertime Bliss
A) I like making my own tortillas. I do! It's really easy (and really cheap, actually) and you can make them out of whole wheat, white or spelt flour. If you decide you like to make tortillas too, you don't really need the big box. B) You can season it up however you please. I'm not the biggest fan of cumin. You might think no taco is complete unless it's Melt-Your-Face spicy (I will show you how to make spicy mods below). C) MAYBE YOU DON'T EVEN WANT TO MAKE TACOS! Oh Em Gee. The seasoning base is great for taco dip or fajitas or an enchilada bake I've been making recently that my husband likes to call Mexican Lasagna.
#4 - this stuff is also awesome to give away as a gift. You can make a double plus batch and put it in this cute little mason jar and give a gift that makes people yell olé!
Or maybe you're making enough tacos to feed your entire extended family. We won't judge.
Ingredients:
Directions:
 Mix everything together and store it in a container for when you want to use it. Whew, that was hard! Right?
But wait: How do I use it to make tacos!?
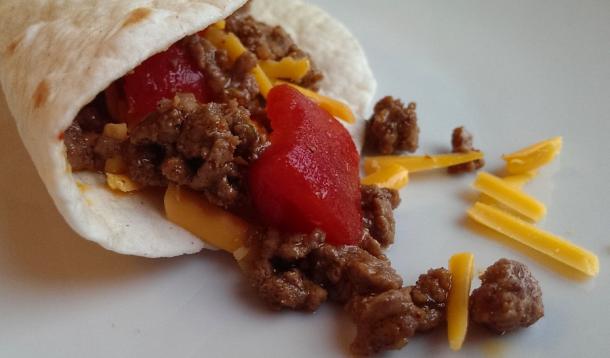
Brown and drain approximately 1 LB (450g) of hamburger (or alternative). Return it to the skillet over medium heat, and mix in 1tsp of cornstarch OR about 2tsp flour with the ground beef. Add 2tsp of seasoning mix to start and about 2/3 of a cup of water to make the sauce. Let simmer for 3-5 minutes, until the sauce begins to thicken.
Taste and add more seasoning mix to your taste preferences, and serve it up with the toppings and warmed shells.
Buen provecho!