
Looking for my simple step-by-step guide to making a perfect turkey dinner? Then scroll down now!
As you know, Frigidaire gave me the amazing opportunity to review their new Gallery Double Oven and I have to tell you I’m in love. When I, of course, took to Twitter to tell you just how in love I really am and how excited I am to be able to make turkey, stuffing, and sides all at the same time this thanksgiving so many of you replied with some form of “Turkey? I’m too scared to make turkey.”
According to your replies, some of you don’t like to touch it (but seriously people ground beef and whole chickens would have the same gross factor!) and others were worried about over or undercooking their birds. In the end, so many of you—despite the exact hang-up—were down-right nervous and even scared at the mere thought of making a turkey.
I took that as a personal challenge and armed with my brand-new Frigidaire double oven and just in time for you to build up some confidence before Thanksgiving I am here to prove that if I can make a complete turkey dinner than anyone can. Yes, that includes you too!
I made my first turkey the Thanksgiving of my third year of University in my rental kitchen equipped with an apartment-sized oven. I was clearly a girl full of spunk and that I-can-do-anything attitude but I also had my dad on one phone line and my grandmother on the other.
What I’ve learned, now about six turkeys into my holiday hostessing career is a) it’s better to have my dad or my grandmother actually in my kitchen than many hours (or provinces) away and b) the best turkeys are brined and UN-STUFFED.
That’s right people—stuffing or dressing or whatever you call it needs to be cooked separately from the bird. Who knew?
As for the brine, that’s a fancy word for pre-soak. So don’t let it scare you.
Are you ready? Not yet? How about I tempt you with this picture of a full turkey dinner that you too can create with the simple step-by-step guide and pictures below.

So here we go—step-by-step cooking instructions for turkey brining, basting, roasting and, of course, gravy-ing.
As a bonus I’ve also included my fool-proof totally traditional (nothing fancy here folks!) stuffing recipe, which I was so excited to cook at the EXACT same time as the turkey at TWO completely different temperatures thanks to my Frigidaire double oven.

Ingredients:

10-13 lb turkey (fresh or completely defrosted)
1/2 cup packed brown sugar
8 cups apple juice or apple cider
Package of fresh poultry mix seasoning
6 cloves of garlic (peeled but not crushed)
1 large onion sliced into strips
¼ cup butter, softened
Salt and Pepper to taste
 24 hours before baking your turkey, unwrap, rinse and discard all the giblet stuff, but save the neck for basting!

In pot big enough to hold your turkey (or the roasting pan which is what I use) stir 1 cup of hot water from the tap with sugar until dissolved.

Add the apple juice and mix well.

Place turkey into pot breast side down.

Add herbs, garlic and onion to pot then add enough cold water from the tap to cover the turkey (or the best you can—I’ve never had a pot big enough to submerge the turkey).

Cover and refrigerate for 24 hours.

The next day, just before roasting, remove turkey from brine and pat dry (do not rinse!). Discard brine.

Place turkey breast-side-up in roasting pan (I use a rack so the turkey won’t stick), if the turkey legs are not pre-tied, tie them together with kitchen string and tuck wings under back.

Massage softened butter all over turkey (this is my Dad’s trick and he calls it the turkey massage).

Sprinkle with salt and pepper.

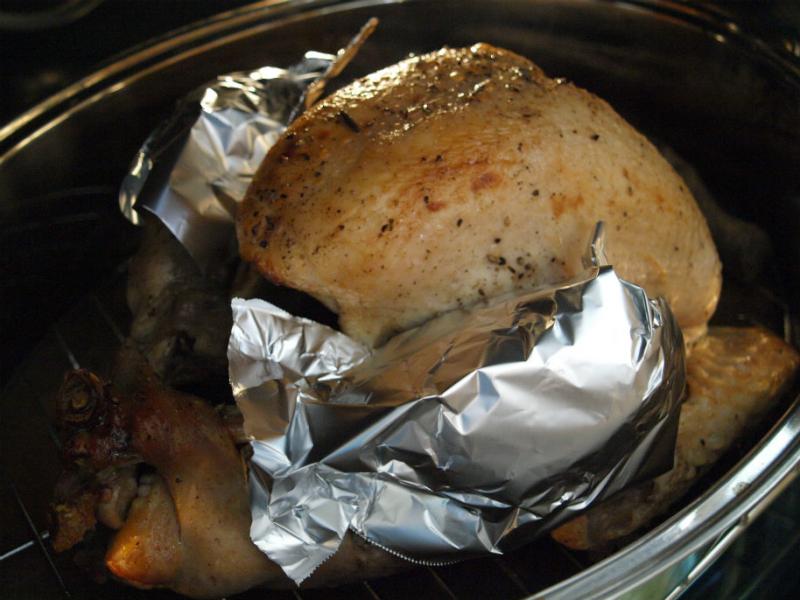
Roast turkey in pre-heated 325F oven for approximately 3 ½ to 4 hours using roasting instructions below and basting every 30-45 minutes (with basting liquid—see recipe below). When meat thermometer inserted into thickest part of thigh reads 185F, remove from oven, transfer to serving platter, tent with foil and let stand for 15-20 minutes prior to carving (just enough time to make the perfect gravy recipe below).

PERFECT ROASTING INSTRUCTIONS: I roast for the first hour without the lid, then cover the turkey for the next 2 to 2 ½ hours and finally uncover for the last ½ hour of roasting. When uncovering the turkey for the last ½ hour you may need to cover the drumsticks with tin foil (shiny side down) to prevent browning/drying out (at least that’s what my Grandma tells me).
Ingredients:
Neck from Turkey
1 cup chicken stock
½ cup white wine
1 rib celery, sliced
½ tsp. dried poultry seasoning
Add all ingredients to sauce pan, bring to a boil, reduce heat to low and simmer.

Use to baste turkey until finished (usually 3 bastings) then add neck to roasting pan and use juices from in pan for remaining basting.
Ingredients:
Juices/fat from roasting pan
¼ all purpose flour
1 ½ cups chicken broth
After removing turkey from pan and tenting, place roasting pan vertically over two burners on stove-top.

Skim off majority of fat from surface of the liquid (leave approx 2-3 Tbsp).
Turn both burners on to medium heat and cook for 1 minute scarping brown bits from bottom of pan.
Sprinkle with flour and continue to cook stirring constantly for approximately 2 minutes.

Whisk in broth and bring to a boil continuing to stir.
Reduce heat and simmer until thickened (approximately 3 minutes).

Strain if desired (I don’t—by this point there are already enough dishes) and serve with turkey.
Ingredients:

12 cups/2 loaves of bread (I use my Four-Ingredient No Knead Bread—one white and one whole wheat)
½ cup butter
1 Spanish or white onion, diced
2 cloves garlic, minced
1 cup diced celery
1 tsp. dried poultry seasoning
1 cup chicken stock
½ cup white wine
Slice bread and toast on baking sheet in 350F oven approximately 10 minutes (turning half way).

Allow to cool, slice into cubes and place in large bowl.

In sauté pan over medium heat, melt butter then add onion, celery, garlic and poultry seasoning and cook until vegetables are softened (approx. 15 minutes).

Add vegetables to bread and toss to combine. Pour chicken stock and wine over bread and vegetables.

Transfer to greased 13 x 9 baking dish, cover with foil and bake at 400F for 30 minutes, uncover and continue baking an additional 10-15 minutes until top is browned.

PS: Remember how excited I was to be able to bake desserts and turkey at the same time and not have to worry about the dreaded taste transfer? Well while the turkey, stuffing and everything else was happening I also baked chocolate cupcakes and mixed up some party popcorn to top the cupcakes for my daughter's birthday class treat and guess what—STILL no taste transfer!

Turkey brine and gravy have been adapted and Canned-Soup-Mom-ified from Canadian Living, October 2011.

One look at my Pinterest boards and you will know I easily get dreamy about wood floors and stone countertops and premium appliances that will one day grace my dream kitchen. While the cabinet colours in my day dreams easily change from light to dark, the one thing that never (EVER) changes is the need for my dream kitchen to include a double oven.
When Frigidaire offered to deliver their new double oven right to my front door for me to review I didn’t hesitate for one single second before I asked how soon it could be here. Thankfully I didn’t have to wait long and the brand new Frigidaire Gallery 30" Freestanding Electric Double Oven Range (aka my new LOVE!) arrived the other day!
When I was told this oven could handle two turkeys at the same time I was immediately impressed, but—honestly—what I really wanted it to do is cook a turkey and a dessert at the same time without me worrying that my apple pie is going to taste like the stuffing in my turkey (something I’ve always worried about with double ovens).
Within an hour of having this oven installed I was pre-heating both the top and the bottom ovens (one to 350F and one to 425F—let’s really test it out why don’t we!) and pulling random ingredients out of my fridge and pantry. On the menu were Chicken Taquitos (for the man of my house—my son—who likes a whole meal he can fit in one hand) and Cake Batter Cookies.
Before I even had all of the ingredients organized on the counter both ovens were pre-heated and ready to go (I definitely needed to catch up!). In no time after throwing the Chicken Taquitos in the top oven and the Cake Batter Cookies in the bottom oven I was breathing in the sweet cookie and the cheesy salsa smells.
I will admit I worried about the cookies tasting like salsa.
Twenty minutes later I had dinner and dessert cooling on the counter. I was in love but was reserving head-over-heels until I had a chance to taste test.
After some cooling time on the counter while I tried to figure out why my toddler was having a complete meltdown, I finally had a chance to taste and swoon. The taquitos tasted just the way they should and those yummy Cake Batter Cookies tasted just the way they should too. I think the experts call this “zero taste transfer” and let’s just say I was impressed.
I may be years away from having my Pinterest-worthy dream kitchen but I am so very lucky to have my dream appliance (far more important than wood floors and granite anyway). Thank you Frigidaire!
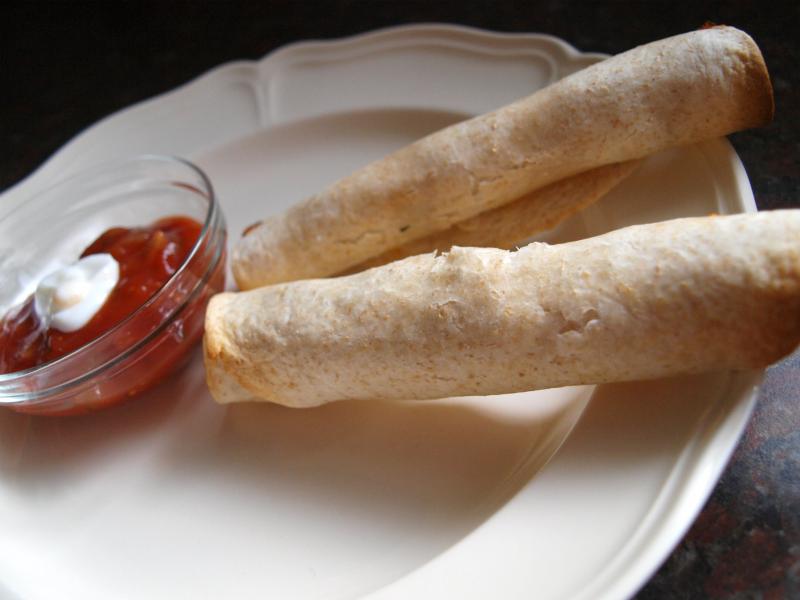
And now for the good stuff: Chicken Taquitos (a whole meal you can eat with one hand!)
Ingredients:

3oz. cream cheese
¼ cup salsa (I use mild for the kids)
1 Tbsp. lime juice
1 Tbsp. taco seasoning (Hint: then use the rest to make Crockpot Chicken Tacos)
1-2 cloves garlic, crushed
3 Tbsp. chopped fresh cilantro
2 cups cooked chicken (I use the pre-cooked rotisserie chicken from the grocery store)
1 cup shredded cheese (cheddar for the kids, Mexican for adults)
12 small flour tortillas (I like the pre-packaged ones because they are easy to work with and roll without tearing)
1 Tbsp. melted butter
Coarse salt to taste
Mix cream cheese, salsa, lime juice, taco seasoning and garlic until combined.

Add cheese, cilantro and chicken and mix well.

Add approx. 3 Tbsp. of the mixture to the bottom third of a tortilla.

Roll tightly and place seam side down on a parchment-lined cookie sheet. Repeat with remaining tortillas.

Brush with melted butter, sprinkle with coarse salt and bake in pre-heated 425F Frigidaire double oven (like my new one!) for 15-20 minutes.

TIP: These taquitos freeze perfectly prior to baking. Simply roll and place seam side down on cookie sheet and flash freeze for approximately 15-20 minutes in the freezer. When taquitos are firm, put into freezer bag and place back in the freezer. When you are ready to bake them, simply place on parchment lined baking sheet, brush with butter and sprinkle with salt then bake in a pre-heated 425F oven for the full 20 minutes. No need to defrost first!
BONUS: These taquitos make a great appetizer too!
BONUS # 2: Make extras because these leftovers are definitely lunchbox worthy the next day!
PS: If you missed the Cake Batter Cookie recipe you can find it here.

Recipe adapted and Canned-Soup-Mom-ified from Chef in Training.
Check out our Dream Kitchen section full of tips, tricks and advice to turn your kitchen from drab to fab—whether you want to transform it from top to bottom or simply update it and get organized.
Would you love to have a brand new oven? Click here to find out how you could win a Frigidaire Double Oven!
This is proudly sponsored by our friends at Frigidaire.
www.frigidaire.ca

My kids and my husband love apple pie but usually the last thing I want to do is spend what feels like hours in the kitchen peeling and slicing apples. That's why I love this recipe. It has all the taste of an apple pie with less than an 1/8th of the work!
Simply mix sugar and cinnamon.

Roll out each pastry until flat and even (so easy my 3-year-old can do it without dropping her "binky").

Brush with melted butter.

Top with cinnamon and sugar.

Cut pastry into eight strips, place slice of apple at end of each.

Roll.

Brush with butter, top with more cinnamon sugar and bake.

Let cool on rack and try not to eat them all!

Glaze (if you like).

Ingredients:

1/2 cup sugar
2 Tsp. cinnamon
1 package refrigerated or frozen pie crust (the kind with 2 crusts in box), brought to room temperature
3 Tbsp. melted butter, divided
2 apples peeled (if desired) and cut into eight slices each
Glaze (Optional):
1/2 cup icing sugar
2 Tbsp. lemon juice or water
In small bowl, mix cinnamon and sugar together reserving 1 Tbsp. for the topping.
On lightly floured surface roll out each pie crust until flat and even.
Brush each crust with melted butter and top with cinnamon sugar.
Cut each pie crust into eight strips, top each one with an apple slice and roll (sugar side in).
Place on parchment paper lined baking sheet, brush with remaining melted butter and top with remaining cinnamon sugar.
Bake in pre-heated 425F oven for 13 to 15 minutes.
Let cool on baking rack.
If using glaze, put sheet of wax paper or paper towel under the baking rack (for easy clean-up), mix glaze and using fork drizzle glaze on top while apple pie bites are cooling.
PS: Looking for other super easy, child-friendly apple pie recipes? Try my son's favourite Mini Apple Pies.
PPS: Want to try your hand at making your own pie crusts? Try Karen's recipe for the perfect pastry.
Adapted from Cookin Up North.


